















57731H5WW General Electric Washer - Instructions
Keep searches simple. Use keywords, e.g. "leaking", "pump", "broken" or "fit".
Dampening straps were broken
Originally my water level sensor was broken. When I was repairing that, I noticed that the dampening straps were broken. Replacing them was easy. The hardest part was remembering how to open the top. I just searched the internet until I found the answer. I can't remember it all right now, but the key was to slide a putty knife in between the top and the front to pop open the body.
Parts Used:
-
Marc from Cambridge, MA
-
Difficulty Level:Easy
-
Total Repair Time:Less than 15 mins
-
Tools:Screw drivers, Socket set
7 of 9 people
found this instruction helpful.
Was this instruction helpful to you?
Thank you for voting!
washer had heavy wet clothes left after spin cycle
The trick is to pull the front cover off by using a putty knife .slide it under the cover at both front corners.it will click on each corner.then pull front cover off .lift off the bottom catch hooks.look for the pump on the bottom right side.unplug the wite connector .take 2-5/16 bolts out holding the bracket.then grab a pliers .squeeze the hose clamps and pull the 2 hoses off.assemble new pump.
Parts Used:

-
Richard from Garden City, NY
-
Difficulty Level:Easy
-
Total Repair Time:Less than 15 mins
-
Tools:Pliers, Socket set
8 of 12 people
found this instruction helpful.
Was this instruction helpful to you?
Thank you for voting!
The setting knob was broken and wouldn't engage
There is nothing to tell really. Took the setting knob off, put the new knob on. That was it, took all of five minutes.
Parts Used:

-
Joy from Pipe Creek, TX
-
Difficulty Level:Really Easy
-
Total Repair Time:Less than 15 mins
-
Tools:Pliers
6 of 7 people
found this instruction helpful.
Was this instruction helpful to you?
Thank you for voting!
Agitator kept coming off
Removed the bolt holding the agitator coupler on, replaced it and the bolt then slid the agitator on the coupler and the fabric softener dispenser on top of that.... so easy!!
Parts Used:

-
Jay from Wickliffe, KY
-
Difficulty Level:Really Easy
-
Total Repair Time:Less than 15 mins
-
Tools:Socket set
9 of 16 people
found this instruction helpful.
Was this instruction helpful to you?
Thank you for voting!
Washer kept filling with water after it started agitating
There is a metal plate on back of the top of the washer held on by 3 screws. Removed them and that gave you access to the water valve. Water valve was fastened with 2 screws. Removed them and the hose that was connected with a clamp. Reversed the order on the installation and done. Whole job took 20 min. Now I know where to get parts. This site was awesome. Ordered the part on Tuesday, UPS delivered Thursday.
Parts Used:
-
PETER from READING, PA
-
Difficulty Level:Really Easy
-
Total Repair Time:15 - 30 mins
-
Tools:Nutdriver, Pliers, Screw drivers
6 of 7 people
found this instruction helpful.
Was this instruction helpful to you?
Thank you for voting!
Washer overflowing water wouldn't stop even when turned off or unplugged.
Turns out that water valve was bad but that's not the only thing I find out after I replaced that part my washer could not register what load size is on so there is bad pressure hose and pressure switch also. Easy unplug washer turn off water remove water supply hoses then unscrew the 3 screws that are holding control panel. Disconnect old valve from the cable plug unscrew the screw that is holding water valve. Install new valve by placing it in the same place where the old one was screw the screw that holds the valve connect it to the cable plug connect water supply hoses plug plug in the washer back and turn on the water. Check for possible leaks and test your washer by choosing the smallest load.
Parts Used:
-
Alisa from LAWRENCEVILLE, GA
-
Difficulty Level:Really Easy
-
Total Repair Time:30 - 60 mins
-
Tools:Nutdriver, Pliers
6 of 7 people
found this instruction helpful.
Was this instruction helpful to you?
Thank you for voting!
Leaking hose
Unscrew the 2 screws holding the drain hose clip to the machine - use bucket to get an excess water - remove bad drain line - I installed a new drain hose clip as well - make sure you put the clip on at the same position as the previous hose - push house firmly into opening and screw into machine - pretty easy repair - and I'm a novice
Parts Used:

-
Craig from Peabody, MA
-
Difficulty Level:Really Easy
-
Total Repair Time:15 - 30 mins
-
Tools:Screw drivers
6 of 7 people
found this instruction helpful.
Was this instruction helpful to you?
Thank you for voting!
Washer did not drain completely with water on floor, drain pump frozen.
After unplugging the washer, I drained remaining water from washer tub using my Wet/Dry vac. Ordered new pump Sunday night from PartSelect, 'Standard delivery', part arrived Tuesday morning. Removal & installation took less than 20 minutes.
Parts Used:
-
Ray from Ventura, CA
-
Difficulty Level:Easy
-
Total Repair Time:15 - 30 mins
-
Tools:Pliers, Socket set
6 of 7 people
found this instruction helpful.
Was this instruction helpful to you?
Thank you for voting!
tub fell down on one side
after ordering part and getting the wrong part sent to me i was able to finally get right part to my house 2 weeks later, i pulled front cover off with a screwdriver took out broke rod and inserted new part closed cover and hooked power back on and was in business
Parts Used:
-
douglas from Stockton, CA
-
Difficulty Level:Really Easy
-
Total Repair Time:15 - 30 mins
-
Tools:Pliers, Screw drivers
9 of 17 people
found this instruction helpful.
Was this instruction helpful to you?
Thank you for voting!
Tub straps broken caused excessive wabbling
Popped off the front panel and removed two screws that help top down. Then pulled the top of the washer up and leaned back out of way.Then each strap had a screw on each end and a clip that holds straps just remove the old and replace with new and put back together.
Parts Used:
-
Drew from Apopka, FL
-
Difficulty Level:Easy
-
Total Repair Time:30 - 60 mins
-
Tools:Nutdriver, Screw drivers
6 of 8 people
found this instruction helpful.
Was this instruction helpful to you?
Thank you for voting!
Water leaking in the floor occasionally with no obvious leaks anywhere
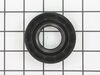
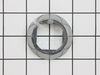
ORDER Spanner wrench for GE tub nut. Impossible to remove hub nut on a washer with age without it. Purchase 1 11/16 in spanner wrench, tub seal, hub nut , split nut
and washer under
agitator all at one time or you will struggle with this repair. The few cents you save is not worth it, the video they provide does a good job but theirs washer
is new hope this helps
and washer under
agitator all at one time or you will struggle with this repair. The few cents you save is not worth it, the video they provide does a good job but theirs washer
is new hope this helps
Parts Used:

-
Greg from Shannon, GA
-
Difficulty Level:Difficult
-
Total Repair Time:1- 2 hours
-
Tools:Nutdriver, Pliers, Screw drivers, Wrench (Adjustable)
5 of 5 people
found this instruction helpful.
Was this instruction helpful to you?
Thank you for voting!
Noisy while spinning
I dissasembled the machine and it took about 30 minutes. Orderd the parts recommended for noisy spinning. Reinstalled the new parts / changed all drum straps. Cleaned the drain drum and spin drum and after complete reassembly the washer is still noisy in agitation and spin cycle. The motor,transmission,counter weight,and drum look ok but there is still a reason why the machine is still noisy. Spent 120.00 dollars on parts so far but the drum and motor,transmission and counterweight are very expensive to replace. I am just going to keep using the machine until the washer fails to work anymore. I'm not going to put any more money in the washer. I will just buy a new one. It's not hard to dissasembled and reassemble the washer. I purchased the parts that was recommended to fix the washer but they were not the ones.The new parts did help like the tub seal but the bottom line is that the washer is still noisy. I watched your videos to work on the washer and there were no special instructions on disassembly and reassembly. Like always there must be more than i know to repair this washer. Thanks
Parts Used:

-
Thomas from SELAH, WA
-
Difficulty Level:A Bit Difficult
-
Total Repair Time:More than 2 hours
-
Tools:Nutdriver, Pliers, Screw drivers, Socket set, Wrench (Adjustable), Wrench set
6 of 8 people
found this instruction helpful.
Was this instruction helpful to you?
Thank you for voting!
No Agitation Spins OK
Followed your video instructions and removed agitator.Used 7/16 3/8 in socket wrench to remove bolt in the agitator coupling and replaced coupling. Put new bolt in and tightened. Installed Agitator.Works Great.
Parts Used:
-
Raymond from TRAVELERS RST, SC
-
Difficulty Level:Very Easy
-
Total Repair Time:Less than 15 mins
-
Tools:Socket set
6 of 8 people
found this instruction helpful.
Was this instruction helpful to you?
Thank you for voting!
Wash basin wobbled excessively
Use paint scraper to release spring tabs holding front cover on.
Removed 2 screws holding lid down, and lifted up but did not remove top cover and control panel.
R/R 2 hex screws holding strap in place. If you are lucky and the broken strap is up front this is a super fast repair. Those of you with a rear strap will want to disconnect the wiring harness to the lid switch and likely remove the top panel (+ <5 mins).
Super easy and super cheap!
Removed 2 screws holding lid down, and lifted up but did not remove top cover and control panel.
R/R 2 hex screws holding strap in place. If you are lucky and the broken strap is up front this is a super fast repair. Those of you with a rear strap will want to disconnect the wiring harness to the lid switch and likely remove the top panel (+ <5 mins).
Super easy and super cheap!
Parts Used:
-
David from Rochester Hills, MI
-
Difficulty Level:Really Easy
-
Total Repair Time:Less than 15 mins
-
Tools:Nutdriver
6 of 8 people
found this instruction helpful.
Was this instruction helpful to you?
Thank you for voting!
My washer would not drain the water out.
IT was so easy to replace the pump. I think the hardest part was trying to get the pliers to work right. All I had to do was unscrew two bolts, take off two pipes, get the new pump and replace the pipes and bolts. It was that easy.
Parts Used:
-
jayme from drummonds, TN
-
Difficulty Level:Really Easy
-
Total Repair Time:Less than 15 mins
-
Tools:Pliers, Socket set
6 of 8 people
found this instruction helpful.
Was this instruction helpful to you?
Thank you for voting!