Hotpoint Parts
- Search your model number to find:
- Genuine OEM parts guaranteed to fit
- Free manuals and guides
- Repair instructions and videos
Popular Hotpoint Parts
Hotpoint Lower Spray Arm
There is a ring on the part that tightens clockwise to the nipple that sprays out the water that it rests on. Twist clockwise and you are done!
It is a mystery how it was unattached to begin with but not a problem in the end, it was easy to fix!
Thanks for sending genuine GE parts! Read more...
PartSelect Number PS17137081
Manufacturer Part Number WD22X33499
This lower spray arm assembly in your dishwasher distributes water and detergent during the washing cycle by spinning around and spraying water in different directions. You can usually find it attached to a support or hub at the bottom of the dishwasher. If this part is broken, you might notice some signs. You might hear a knocking or banging sound coming from the dishwasher. The spray arm may not rotate properly or might seem wobbly. It is important to replace a damaged arm assembly as your dishes will not get cleaned properly, and they will still have dirt on them even after a wash cycle. It can also cause the dishwasher to have a bad smell because of leftover food residue. To remove your existing arm assembly, you will need to release its locking mechanism before lifting it out of your appliance. Please be informed that this OEM-verified part is sold individually.
Fixes these symptoms
- Leaking
- Noisy
- Not cleaning dishes properly
- See more...
Installation Instructions
Mark De from BRONX, NY
Spray arm had become unattached and burned by the heat element
It was a simple as: attach and done! There is a ring on the part that tightens clockwise to the nipple that sprays out the water that it rests on. Twist clockwise and you are done!
It is a mystery how it was unattached to begin with but not a problem in the end, it was easy to fix!
Thanks for sending genuine GE parts! Read more...
Your Price
$49.95
In Stock
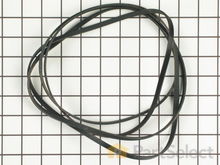
Hotpoint Drive Belt
Removed the top cover and front assembly w/door and front drum support, right where the unit was located. Had to gain rear access to loosen drum drive belt so undid the dryer vent hose to floor connection through a front acess hole. Moved the unit out to the breakfast nook as well as disconnecting the power cable from the wall socket. Removed the rear access panel covers and unhooked the drive belt. At the front removed the top screws off the lower cross member to allow spreading of the side covers to allow the removal of the drum. Removed drum and found the bearing bushing gone, reduced to powder.
Using the supplied instuction sheet, replaced the rear bearing assembly, replaced the drum after vacumming the whole interior and started the reassembly of the unit using the new belt and moved the unit back into place. Reconnected the power cable and dryer vent then lastly replaced the lint filter and selector knob. Closed the breaker and turned on the machine, no noise!!!
Incidently I am 78 years old. Thanks PartSelect. Read more...
PartSelect Number PS16542496
Manufacturer Part Number WE03X29897
This Drive Belt is 89.5" long and comes in black, featuring four ribs on the inside for a better grip. This is a long belt that wraps all the way around the dryer drum, around a tension pulley, and then around the drive motor pulley, allowing all the parts to work together, spinning the drum as the motor rotates. If the drum will not turn when the dryer is turned on the belt is likely broken. It is common for belts to stretch or become brittle over time, which is what leads to the breakage. If broken, it should be replaced; the drum simply cannot spin without this belt. Refer to your model number and user manual to check if this part is right for you. Ensure you use work gloves to protect your hands from sharp internal parts during this repair. Please note: When comparing the length of your old belt to the length of the belt as stated here, remember that a small amount of stretching and contortion may occur with belts over time for a range of different reasons. Unless your belt is drastically different in length, this belt is what you are looking for despite any small inaccuracies. You will need to remove power to your appliance, remove the main panel, and access the motor drive to slip your new belt back into place.
Fixes these symptoms
- Drum Not Spinning
- Heat stays on after drum has stopped
- Noisy
- See more...
Installation Instructions
Edwin from Seattle, WA
Dryer making grinding noises
We live in a Condominium, space is tight especially in the Utility room where the washer/dryer are located. Turned dryer breaker off at the electical panel. Removed the top cover and front assembly w/door and front drum support, right where the unit was located. Had to gain rear access to loosen drum drive belt so undid the dryer vent hose to floor connection through a front acess hole. Moved the unit out to the breakfast nook as well as disconnecting the power cable from the wall socket. Removed the rear access panel covers and unhooked the drive belt. At the front removed the top screws off the lower cross member to allow spreading of the side covers to allow the removal of the drum. Removed drum and found the bearing bushing gone, reduced to powder.
Using the supplied instuction sheet, replaced the rear bearing assembly, replaced the drum after vacumming the whole interior and started the reassembly of the unit using the new belt and moved the unit back into place. Reconnected the power cable and dryer vent then lastly replaced the lint filter and selector knob. Closed the breaker and turned on the machine, no noise!!!
Incidently I am 78 years old. Thanks PartSelect. Read more...
Hotpoint Dryer Front Bearing White 2pk
PartSelect Number PS17137205
Manufacturer Part Number WE03X37318
Fixes these symptoms
- Drum Not Spinning
- Marks left on clothes
- Noisy
- See more...
Installation Instructions
Matthew from Plainfield, IL
Due to over loading of the dryer the drum ruined the slides and was making a bad noise due to plastic rubbing plastic
It was pretty easy. After already taking apart the dryer to install a new belt I knew exactly my plan of action. I removed the two screws that hold the top panel of the dryer to the front panel. I then removed the top panel and removed the screws that hold the front to each side panel. I than pulled the front away from the cabinet and drum. I put the new slides in place and installed a new felt strip. I put it back together and that was that. Very easy.
Read more...
Hotpoint Lint Filter
PartSelect Number PS11763056
Manufacturer Part Number WE03X23881
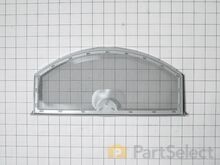
This is a genuine OEM part that works for some models of GE, and Hotpoint models. This Lint Filter is used for Dryer.
Fixes these symptoms
- Door won’t close
- See more...
Installation Instructions
Lisha|Lamb from SHELDON, MO
Your Price
$12.95
In Stock
Hotpoint Dishwasher Lower Rack Roller
PartSelect Number PS16217024
Manufacturer Part Number WD12X26146
The lower rack roller supports the smooth sliding of your dishwasher’s bottom rack. Measuring 1.5 inches in diameter and charcoal-colored, this OEM replacement part is sold individually. Replace all four rollers at once for consistent performance. Wear gloves during installation.
Installation Instructions
Dennis from CICERO, IN
Hotpoint Dryer Bearing Slide Green 2pk
PartSelect Number PS17137203
Manufacturer Part Number WE03X37317
Fixes these symptoms
- Drum Not Spinning
- Marks left on clothes
- Noisy
- See more...
Installation Instructions
Matthew from Plainfield, IL
Due to over loading of the dryer the drum ruined the slides and was making a bad noise due to plastic rubbing plastic
It was pretty easy. After already taking apart the dryer to install a new belt I knew exactly my plan of action. I removed the two screws that hold the top panel of the dryer to the front panel. I then removed the top panel and removed the screws that hold the front to each side panel. I than pulled the front away from the cabinet and drum. I put the new slides in place and installed a new felt strip. I put it back together and that was that. Very easy.
Read more...
Hotpoint Gasket
PartSelect Number PS11700870
Manufacturer Part Number WD08X21894
This part is a replacement gasket for your dishwasher. The gasket creates a seal at the bottom of the dishwasher tub, so water does not leak out while the dishwasher is running. If you notice water leaking out onto the floor, you should inspect the gasket for damages and replace as necessary. The gasket is gray in color and is approximately 22 inches long. It is made of plastic and is sold individually. This is a genuine OEM part sourced directly from the manufacturer.
Fixes these symptoms
- Leaking
- See more...
Installation Instructions
D from LE CENTER, MN
Gasket at the bottom of the door disintegrated.
Took off the kickplate, diconnected the wires and removed the whole door by lifting straight up, removing spring wires from hinges. Once door is disconnected from the machine, removed one hinge by removing bolt. Slid gasket into place, secured hinge back in place, then reconnected wires at bottom, replaced hinge spring wires and slid door back down onto hinges. Now that we know how to do it, could do it in 15 min to half hour.
Read more...
Your Price
$15.95
In Stock
Hotpoint Dryer Bearing Slide (2 Pack)
Reviewed YouTube videos.
Patience is required, take your time, take photos of the wires and also make a written wiring chart. This was the flaw in my planning. Reference the schematics from PartsSelect to number the controls. Do NOT use masking tape to identify the wires as they will have all stuck together by the time you go to reinstall them.
Most difficult process was removing and identifying the numerous wires to the back panel. They have push connectors, but some were very difficult to remove. The people doing the "how to" videos no doubt had them partially released and that made it look easy. Examine the connectors before removing to identify how they are captured by the connector. A paper clip "tool" I made enabled me to release some of the capture lugs, but some were so tight, I had to use small needle-nose pliers to open up the lug to release the wire on the connector.
When reinstalling, re-tighten those connectors.
Replacing the parts was much easier than the wiring disconnect/reconnect process. I'm happy to report that replacing the rear bearing and the front 2 green and 2 white shim/bearings immediately and completely solved my problem. For about $150, I restored my dryer to "like-new" functionality and got a lot of satisfaction from doing it. The project took about 4 hours, which could have been reduced to 2 hours had I know about the clip release and wiring identification process. Also, make sure you thoroughly vacuum out your unit while it is disassembled. Good luck!!! Read more...
PartSelect Number PS17137207
Manufacturer Part Number WE03X37319
This drum glide bearing is an authentic OEM replacement part that is compatible with dryers. It is white in color and made of highly durable plastic. The bearing allows the drum to rotate smoothly and dry your clothes thoroughly and evenly. It keeps the drum stable and protects it from excessive friction damage. Over time, the bearing may wear down or break due to normal aging or wear from repeated use. If the bearing is no longer able to support the drum, you will likely notice unusually loud grinding or squeaking noises from the dryer. You may also notice increased drying times due to poor drum rotation. Inspect all the bearings on your dryer, as they tend to wear down at the same time. Each drum glide bearing is sold individually.
Fixes these symptoms
- Drum Not Spinning
- Marks left on clothes
- Noisy
- See more...
Installation Instructions
mike from SUMMERVILLE, SC
Dryer was making increasingly loud "thumping" sound.
Parts were shipped quickly, packaged correctly, and were in original GM packages - very reassuring. BTW, your customer service is excellent.Reviewed YouTube videos.
Patience is required, take your time, take photos of the wires and also make a written wiring chart. This was the flaw in my planning. Reference the schematics from PartsSelect to number the controls. Do NOT use masking tape to identify the wires as they will have all stuck together by the time you go to reinstall them.
Most difficult process was removing and identifying the numerous wires to the back panel. They have push connectors, but some were very difficult to remove. The people doing the "how to" videos no doubt had them partially released and that made it look easy. Examine the connectors before removing to identify how they are captured by the connector. A paper clip "tool" I made enabled me to release some of the capture lugs, but some were so tight, I had to use small needle-nose pliers to open up the lug to release the wire on the connector.
When reinstalling, re-tighten those connectors.
Replacing the parts was much easier than the wiring disconnect/reconnect process. I'm happy to report that replacing the rear bearing and the front 2 green and 2 white shim/bearings immediately and completely solved my problem. For about $150, I restored my dryer to "like-new" functionality and got a lot of satisfaction from doing it. The project took about 4 hours, which could have been reduced to 2 hours had I know about the clip release and wiring identification process. Also, make sure you thoroughly vacuum out your unit while it is disassembled. Good luck!!! Read more...
Your Price
$71.49
On Order
Hotpoint Upper Rack Assembly
PartSelect Number PS16618975
Manufacturer Part Number WD28X30219
This dishrack is for dishwashers. The dishrack holds the dishes in place during the dishwashing cycle. Follow the instructions in the manual when installing this part.
Fixes these symptoms
- Not cleaning dishes properly
- See more...
Installation Instructions
Cooke, from STAMFORD, CT
Racks were rusted
Terrible! Bottom rack was wrong... original was discontinued. Fork and knife holder did not fit in original location. Parts company new this and still processed the order! Disaster!
Read more...
Your Price
$72.47
In Stock
Hotpoint Bucket Auger
It is not that hard to do the repair it just takes some patience and paying attention to details. Read more...
PartSelect Number PS17626595
Manufacturer Part Number WR29X43990
The ice bucket auger is located within the ice bucket assembly in your freezer. It stirs and dispenses the ice in the bucket. You may need to replace the auger if your ice maker is noisy, or not dispensing ice. Disassembly of the ice bucket assembly is necessary to replace this part. Turn off power to the appliance before removing the ice bucket assembly to do this repair.
Fixes these symptoms
- Engine revs but auger will not turn
- Engine runs but cutters do not turn
- Ice maker dispenses too little ice
- See more...
Installation Instructions
Tim from Newport News, VA
Plastic Auger blades broke in ice tray
I used a digital camera and photographed the assembled unit and the metal blades before I started the repair. Then, I removed the top screw on the clear shield. Flip over ice tray and removed two Phillips screws on bottom. Exterior plastic white cover comes off next. The cover sides have hard push-in white plastic tabs. Push them in; pry up top cover with small flathead screwdriver. Slide white top cover up and you will now see the metal blades and assembly. Auger is held in place with a metal c-clip and washer on the end. Use flat head screwdriver to pry off c-clip. Then you will see a nylon round slotted nut. The threads are reverse, use pliers and loosen nut. It is not that tight but pliers are needed. Then it all is loose and ready for removal. I slid all the blades off at one time and kept them stacked together. Slide out auger and clear flat shield cover. Install new auger, clear shield, and metal blade stack. When you put it all back together take a look at the long metal J-hook on the bottom make sure it is in the slot before you make everything tight. Failing to do this will prevent cubed ice from dispensing. It is not that hard to do the repair it just takes some patience and paying attention to details. Read more...
Hotpoint Appliance Types
- Hotpoint Oven Parts
- Hotpoint Stove Parts
- Hotpoint Air Conditioner Parts
- Hotpoint Ice Maker Parts
- Hotpoint Cooktop Parts
- Hotpoint Dishwasher Parts
- Hotpoint Dryer Parts
- Hotpoint Food Waste Disposer Parts
- Hotpoint Freezer Parts
- Hotpoint Ice Maker Parts
- Hotpoint Microwave Oven Combo Parts
- Hotpoint Microwave Parts
- Hotpoint Range Parts
- Hotpoint Refrigerator Parts
- Hotpoint Thermostat Parts Parts
- Hotpoint Trash Compactor Parts
- Hotpoint Range Hood Parts
- Hotpoint Washer Parts
- Hotpoint Fridge Parts
Popular Hotpoint Models
Below are the most popular Hotpoint models we have. Enter your model number in the search box to find your model.
- HTDX100EM8WW ELECTRIC DRYER
- HTS18GBSARWW Top Freezer S Series
- HSM25GFTASA Side-by-side T Series
- HSS25GFPJWW Side-by-side P Series
- HSWP1000M4WW WASHER
- HSS25GFTAWW Side-by-side T Series
- HTS17GBSERWW Top Freezer S Series
- HTX24EASK0WS ELECTRIC DRYER
- HSM25GFRFSA Side-by-side R Series
- HSS25GFPAWW Side-by-side P Series
- HSS25IFMDWW Side-by-side M Series
- HTDX100ED6WW ELECTRIC DRYER
- HTDP120ED0WW
- HSM25GFRESA Side-by-side R Series
- HSS25GFPHWW Side-by-side P Series
- HSS25GFTABB Side-by-side T Series
- HTWP1400F1WW
- HTS17GBSARWW Top Freezer S Series
- HTDX100ED0WW
- HSM25GFRASA Side-by-side R Series