Admiral Parts
- Search your model number to find:
- Genuine OEM parts guaranteed to fit
- Free manuals and guides
- Repair instructions and videos
Popular Admiral Parts
Your Price
$49.86
In Stock
Admiral Upper Rack Adjuster Kit
PartSelect Number PS10065979
Manufacturer Part Number W10712395
This authentic Dishwasher Upper Rack Adjuster Kit with white wheels is a kit made up of primarily plastic and metal components, which will require a screwdriver to install. This kit comes with all the necessary parts for a dishwasher rack adjuster. It fits onto the dishwasher rack and connects it to the track allowing it to slide in and out. If broken then the rack will no longer slide properly, and the part must be replaced. In many cases, our customers have reported the top rack of their dishwasher hanging down or sagging due to the adjuster kit, particularly if the wheels, have broken or failed. If you are having problems in this area, this kit will help get your dishwasher back up and running. Check your model number and user manual to see if this part is right for you. The parts for this kit come as a package and are not generally sold individually.
Fixes these symptoms
- Door latch failure
- Door won’t close
- Leaking
- See more...
Installation Instructions
Richard from OAKLAND, CA
Instruction from Whirlpool Not Good (No problem with Part Select)
Trial and error. The instructions from Whirlpool included with the part had minuscule pictures so it was hard to follow. The written instructions were good. But "a picture is worth a thousand words." Eventually it worked. The metal replacement part is much better the the plastic original. Not a good reflection on Whirlpool.
Read more...
Your Price
$37.44
In Stock
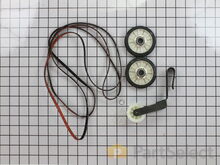
Admiral Dryer Maintenance Kit
PartSelect Number PS373087
Manufacturer Part Number 4392065
The drum support roller kit (Dryer Repair Kit) allows the dryer to tumble properly by supporting the drum cylinder. The idler pulley provides the tension required for a multi-ribbed belt. The belt attaches to the drum, idler pulley, and motor pulley. If your dryer is damaged, it may be making loud, squeaking, and/or squealing noises while the drum is turning. This is from normal wear and tear. The drum may eventually stop turning all together. This is a sign the part should be replaced. This is one complete maintenance kit. The kit includes the drum belt, drum support rollers, one idler pulley, four tri-rings, and one clip. The parts are constructed of plastic, metal, and rubber, and come in black/white/silver.
Fixes these symptoms
- Drum Not Spinning
- Heat stays on after drum has stopped
- Marks left on clothes
- See more...
Installation Instructions
DENNIS from ALTOONA, FL
Broken drive belt
Grow a second set of hands. Always unplug any appliance. Remove lint screen. remove two screws (philips Head). I took a wooden shim lightly tapped w/hammer to pop front of dryer top free. Mine worked on hinges and just flipped back til it rested against the wall. Removed two 5/16 screws inside holding face on carefully raise face section off the support clips at either side on the bottom. Pull drum out (I have the large style drum commercial size [approx.). Clean the inside free of all lint (known to be fire hazard). Sling new belt around drum. Get newly grown set of hands to hold drum in place. Pinch belt to fit between tensioner, lift tensioner and place belt around motor pulley. Spin drum couple times to make certain belt isn't twisted. Reverse dismantle proccess to put back together. Replace all parts that come with kit, you'll feel better knowing you got a new dryer, almost.
Read more...
Your Price
$64.84
In Stock
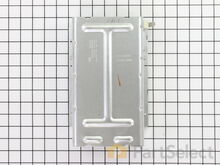
Admiral Dryer Heating Element
To remove the heating element there are two small nut-head screws. Remove the two electric wires. Then you can pull the heating element away.
You can check the heating element with an ohm-meter or visually inspect it to see if the heating element spiral wire is broken.
Don't hurry to dispose the old element. My model includes a small electric safety part. You'll need to transfer it to the new heating element (that comes without it)..
Good luck. Read more...
PartSelect Number PS334313
Manufacturer Part Number 279838
The heating element (Flat Can Heating Element 5400W, Heating Element, Whirlpool Dryer Heating Element, Dryer Heating Element) provides heat to the dryer. It is metal and measures 10.5 inches long, 7.5 inches wide, 2 inches deep. The element attaches to the heater housing. This part can break as a result of wear and tear. This can be material fatigue or prolonged high temperature exposure. If broken your clothes may not dry because of a lack of heat. It must be replaced when there is no longer continuity between the terminals. First check the thermal fuse on the blower housing before deciding to replace the heating element.
Fixes these symptoms
- Heat stays on after drum has stopped
- Noisy
- Not Heating
- See more...
Installation Instructions
Gadi from Irvine, CA
Dryer motor runs, but no heat
To reach the heating element you only need to open the back cover of the dryer (about 8 nut-head screws). Remember to disconnect the power.To remove the heating element there are two small nut-head screws. Remove the two electric wires. Then you can pull the heating element away.
You can check the heating element with an ohm-meter or visually inspect it to see if the heating element spiral wire is broken.
Don't hurry to dispose the old element. My model includes a small electric safety part. You'll need to transfer it to the new heating element (that comes without it)..
Good luck. Read more...
Admiral Dryer Drive Belt
PartSelect Number PS346995
Manufacturer Part Number 341241
This dryer drum belt (Whirlpool Dryer Belt, Drive Belt) has four ridges, three grooves and is 1/4" wide, and 92 1/4 inches in length. It comes in black and is made of rubber. The belt transfers the rotation of the motor to turn the drum. The belt attaches to the drum, idler pulley, and motor pulley.
Fixes these symptoms
- Drum Not Spinning
- Heat stays on after drum has stopped
- Noisy
- See more...
Installation Instructions
Ray from Denton, TX
Dryer tub belt broke
Removed the two screws that attatch the lent channel to the top of the dryer, then lifted the top of the dryer by pushing in on the two locking tabs located at the front , left and right , corners of the dryer top with a small flat head screw driver. The top of the dryer will fold back out of the way. At this point I removed the two 1/4 inch screws that are located on the inside of the dryer front left and right corners that hold the front panel/door to the two side panels. Now I was able to lift the front panel up and set it to the side. The bottom of the front panel that contains the dryer door that I just removed was held on the bottom by two clips that slide into slots on the front panel and did not require any removal to disconnect the bottom of the front panel, just pull up on the front panel. Since the tub was held in place by floating on a seal at the back of the dryer and a seal on the front panel , which I just removed the tub is now free floating except for the two alignment roller wheels at the bottom of the tub. It is easier if you lay the dryer on its back at this point with front of the tub pointing up. I pulled the tub out and cleaned the years of built up lent and removed all the pieces of the old , destroyed, belt. Note, the belt tentioner is located at the front of the motor which on the bottom right hand side. If your belt is broke like mine the tensioner may/will fall to the back of the dryer when you tilt it back, but do not worry. Once the dryer was cleaned up I put the tub back in place , still on its back and made sure the two alignment rollers were in place and rolled freely when the tub was turned by hand. Another note, my original belt tensioner did not have a rolling wheel that the belt rode on , but was a semi-circle smooth surface that the belt remained in constant friction with when the dyer was running, so I made sure the replacement tensioner I ordered with my new belt did have a rolling wheel that the belt would ride on, which I believe will reduce wear and extend the belt life. The new belt came with a diagram of the belt and tensioner routing which was helpful. Note: do not take the tensioner wheel off/apart when trying to route the belt. Follow the instructions routing diagram. The tensioner is held in palce by inserting the bottom back half into the slot in the bottom floor of the dryer making sure it is aligned with the belt pully on the shaft of the dryer motor. The dryer is still on its back side. Now, it was easier for me to route the belt around the center of the tub, following the marks from the original belt, and hold in in place in a few spots with masking tape and then route it thru the tensioner and onto the front pully of the motor. Make sure you have the grooves of the belt against the tub and the grooves are aligned with the pully on the motor. Now you can remove the masking tape that was holding the belt around the tub and spin the tub by hand watching the belt making sure it is not in a bind and is traveling around the motor pully , tensioner and tub freely. Make sure the tub is still sealed on the back side wall. As you turn the tub by hand you can adjust the belt by hand so that is following the original marks around the tub left by the orignal belt. Also double check the two alingment rollers and make sure they are spinning and on track. Now put the front panel with the door on by sliding it onto the two clips that are one the bottom at each side and put the two screws in that hold the front panel to the two side panels. Now stand the dryer back up and spin the tub by hand again making sure it has a good seal on the back side and on the front panel. Pull the top back down and put the two screws in that hold the lent channle to the top. I am not sure when the belt started failing on my dryer, but was amazed at how quiet it runs now. Guess I was use to the extra noise made by a dryer that was about to die. This was a cheap and easy repair and glad I did it myself.
Read more...
Your Price
$9.65
In Stock
Admiral Dishwasher Rack Track Stop
PartSelect Number PS11746591
Manufacturer Part Number WP8565925
The rack track stop on your dishwasher is designed to stop the dish rack at the appropriate place when opening and closing the rack. If your dishwasher is not cleaning your dishes properly, the rack stop may need to be replaced. The replacement part may differ slightly from the broken part, depending on the model. However, the different styles are interchangeable. This product is sold individually and comes in both a white and grey plastic version. Many of our customers found this repair to be very easy and takes less than 30 minutes to complete. Simply snap the old part out and snap the new part into place. You will not require any tools to complete the job. This is an authentic part approved by the manufacturer.
Fixes these symptoms
- Door latch failure
- Door won’t close
- Noisy
- See more...
Installation Instructions
Steven from WASHINGTON, DC
Upper rack wheels had begun to break off. Shoddy design and materials.
I carefully followed the video instructions step by step. They were detailed, clear, and pointed out how to avoid installation mistakes. WIthout the video I would have been tempted to just figure it out myself - ("Hey, I'm a handy guy. How hard could it be, right?"). With the video I sailed right through with no dumb errors. The new rack adjuster wheel set is much sturdier than the Whirlpool original. It made sense to get new rack stops at the same time. Thank you, PartSelect.
Read more...
Your Price
$21.11
In Stock
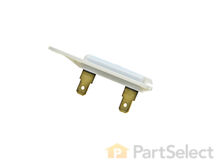
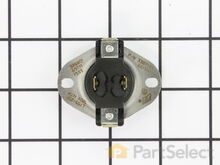
Admiral Dryer Thermal Fuse
Not knowing what the problem was I started looking at the coils and could not see any broken parts.
So then checked the thermal fuse for continuity I removed the two wires from it with a small pair of needle nose pliers, it was held in place by two screws, once they were removed the fuse came out easily, I checked continuity with a volt meter placing the meter on X1 Ohms and could not get a reading.
I replaced with a new one and put it all back together the way I took it apart.
Then I plugged it in and it worked first time, I now have warm dry clothes. Read more...
PartSelect Number PS11741460
Manufacturer Part Number WP3392519
The Dryer Thermal Fuse (Thermal Cutoff, Temperature Fuse) is a 2 by ½ inch, white, plastic safety mechanism that stops the flow of electricity to the motor circuit when a dryer overheats. If the fuse is missing or broken, your dryer will not start. A thermal fuse fails when the exhaust temperature exceeds the fuse rating, that is when the temperature rises above the temperature that the fuse is designed to handle. This can occur when a heating element is shorted, a regulating thermostat or thermister fails, or with a partially restricted exhaust vent. The fuse attaches to the blower wheel housing. It must be replaced when there is no longer continuity between the terminals. This is a one-time fuse, meaning it cannot be re-set. The replacement part features two 3/16 inch terminals.
Fixes these symptoms
- Drum Not Spinning
- Heat stays on after drum has stopped
- Not Heating
- See more...
Installation Instructions
ANTHONY from CHESHIRE, CT
Dryer was working, but no heat.
First I unplugged the dryer, then removed the back panel, this exposed most all of the wiring and I could see the heater coils.Not knowing what the problem was I started looking at the coils and could not see any broken parts.
So then checked the thermal fuse for continuity I removed the two wires from it with a small pair of needle nose pliers, it was held in place by two screws, once they were removed the fuse came out easily, I checked continuity with a volt meter placing the meter on X1 Ohms and could not get a reading.
I replaced with a new one and put it all back together the way I took it apart.
Then I plugged it in and it worked first time, I now have warm dry clothes. Read more...
Your Price
$59.84
In Stock
Admiral Dryer Repair Kit
PartSelect Number PS373088
Manufacturer Part Number 4392067
The Whirlpool Dryer Repair Kit is a universal maintenance kit for 27-inch dryers, compatible with various models from Whirlpool, Kenmore, Maytag, and others. It includes a belt, drum rollers, an idler pulley, clips, and a washer to fix common issues like noise and improper drum rotation.
Installation requires disassembling the dryer to replace parts using standard tools. Ensure the dryer is unplugged before starting. This durable OEM kit provides reliable repairs for quieter, more efficient operation.
Fixes these symptoms
- Drum Not Spinning
- Marks left on clothes
- Noisy
- See more...
Installation Instructions
jason from HOLDEN, MA
very loud squeeling sound
The issue was the idler pulley. First I began opening up the front panel based on a youtube video but soon realized the model was slightly different and required a lot more items to remove. I saw the pulley in the back with nothing in the way so I put the front panel crap back on and removed the rear panel. There it was, very simple to remove and replace. I'm not looking forward to drum rollers though. Hopefully they're aren't as difficult as they appear.
Read more...
Your Price
$55.07
In Stock
Admiral Dryer Heating Element
PartSelect Number PS11741416
Manufacturer Part Number WP3387747
When connected to electricity the dryer heating element glows red hot and generates heat. When air is blown over it, it heats the air which is used to dry the clothes. The heating element fits inside the heater housing inside the dryer. Wear and tear on the heater coil from use will eventually cause the coil to break and the element to fail. When this part fails it can cease to produce any heat. Alternately, the coil could break and short to ground allowing the dryer to continue to heat even when turned off. The latter is a fire hazard and the dryer should be disconnected from power until the element is replaced. If the element coil breaks, the element needs to be replaced. This model is 11 by 5 inches with 5/16” terminals, metal and ceramic, and comes in black. It is sold individually.
Fixes these symptoms
- Not Heating
- Too hot
- See more...
Installation Instructions
Alan from Brooksville, FL
Burned out heater element
Remove the kick plate from the bottom of the dryer by sliding a putty knife along the top edge to release the plastic clamps, one on each side about 4" in from the edges. The kick plate folds out and down. You will see the heat shield on the right, held in by one hex head screw. Remove screw and heat shield. The element is positioned in an open-front housing and is fastened to the left side of the housing by two hex head screws, located on the "rail" of the element and right near the two wires. Remove the hex-head screws that hold the element in place and disconnected the two wires by pulling them out by hand or with needle nose pliers. The only difficulty here is the cramped working area...I recommend a stubby socket driver for these two screws. Most of this I had to do by feel because I could not see the screw heads. Once the screws are out and the wires have been disconnected, slide the old element straight out toward you. You may need to disconnect a small plastic hose located to the left front of the element, but this hose just pulls right off. Vacume the dust & lint build-up out of the whole area, wipe out the element housing and clean up the whole underside of the dryer prior to installing the new element. Installation is reverse of removal. It also might be a good opportunity to clean out your exhaust duct and the vent to the outside. (Never use the aluminum foil-accordian-type duct.) If the exterior dryer vent has any kind of screen over it, remove it and get rid of it. Screens collect lint, lint builds up and burns out elements.
Read more...
Your Price
$22.67
In Stock
Admiral Dryer Drum Support Roller
2. pop off top of unit
3. remove front of dryer
4. lay unit on its back
5. remove drum and replace pulley assembly,belt,drum rollers of which it has 2 rear and 2 front
6. reverse above and then remove filter-vent housing and scrape off old seal install new seal
7. re-connect power,gas and vent use again
8. only sad part to whole job was seeing how cheaply whirlpool now makes thier products Read more...
PartSelect Number PS11752609
Manufacturer Part Number WPW10314173
This drum support roller is sold individually. Most dryers require two. The tri-rings are included. This is a drum support roller for a dryer. It is a genuine replacement part. This part is sold separately. Most dryers require two drum rollers. It is recommended to check and replace both drum support rollers at the same time to ensure proper drum rotation and because they often wear at the same rate. The drum support roller holds the drum in the proper position while it spins on the support wheels. If rollers are worn out, they will cause the dryer to be noisy.
Fixes these symptoms
- Drum Not Spinning
- Marks left on clothes
- Noisy
- See more...
Installation Instructions
Jeff from Phoenix, AZ
noisy and slow drum speed
1. disconnect power,gas and vent lines2. pop off top of unit
3. remove front of dryer
4. lay unit on its back
5. remove drum and replace pulley assembly,belt,drum rollers of which it has 2 rear and 2 front
6. reverse above and then remove filter-vent housing and scrape off old seal install new seal
7. re-connect power,gas and vent use again
8. only sad part to whole job was seeing how cheaply whirlpool now makes thier products Read more...
Your Price
$47.55
In Stock
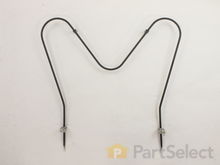
Admiral Oven Bake Element
2. Ordered the part from partselect.com
3. Disconnected element, connected the new one, and screwed it back in. Read more...
PartSelect Number PS438018
Manufacturer Part Number 316075103
The Oven Bake Element is a black, metal part which supplies heat to the oven. This element is 19-1/2" wide x 18-1/2" long and has 3-1/2" inserts. It is rated as "Easy" to install by users, and attaches to the bottom of the oven. If you notice visible damage, or that your oven is not receiving heat properly then it may be a problem with this part. Check your model number and user manual to see if this is the right part for you. It is important for you to disconnect your appliance from the power source before performing this repair. After disconnecting your appliance, remove the two screws/nuts connecting the old element, pull it out, and discard if faulty. Simply connect the new element prongs where the old element fit, and screw it back in. You may need a flashlight when making this repair.
Fixes these symptoms
- Element will not heat
- Little to no heat when baking
- Little to no heat when broiling
- See more...
Installation Instructions
David from Shawnee, KS
Oven woudn't heat
1. Removed two screws, pulled out the element, voltage tested the element and determined it was an open circuit (bad element).2. Ordered the part from partselect.com
3. Disconnected element, connected the new one, and screwed it back in. Read more...
Admiral Appliance Types
- Admiral Stove Parts
- Admiral Air Conditioner Parts
- Admiral Ice Maker Parts
- Admiral Cooktop Parts
- Admiral Dehumidifier Parts
- Admiral Dishwasher Parts
- Admiral Dryer Parts
- Admiral Freezer Parts
- Admiral Ice Maker Parts
- Admiral Microwave Oven Combo Parts
- Admiral Microwave Parts
- Admiral Range Parts
- Admiral Refrigerator Parts
- Admiral Washer Parts
- Admiral Wine and Beverage Cooler Parts
- Admiral Fridge Parts
- Admiral Oven Parts
Popular Admiral Models
Below are the most popular Admiral models we have. Enter your model number in the search box to find your model.
- LTF2112ARW Top Freezer
- ATW4675YQ1 AUTOMATIC WASHER
- ADE7005AYW Residential
- LNC7764A71 Residential
- AAV7000AWW Residential
- AED4475TQ0 Residential
- ADE7000AYW Residential
- AED4475TQ1 RESIDENTIAL DRYER
- AED4675YQ1 29" ELECTRIC DRYER
- LSD2615HEZ Side-by-side
- LSD2615HEW Side-by-side
- DDB1501AWW
- ATW4475TQ0 Residential
- DDB1501AWZ
- ATW4475VQ0 RESIDENTIAL WASHER
- ADG7005AWW Residential
- LTF2112ARB Top Freezer
- ATW4475XQ0 AUTOMATIC WASHER
- LSD2615HEB Side-by-side
- DDB1501AWB