Microwave Parts
Find your part
Enter your model number or a part number and click "Search"Popular Microwave Parts
Your Price
$8.56
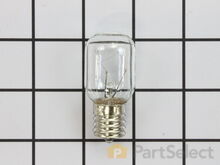
Light Bulb - 40W
The filters are very easy to replace. No tools needed.
Hope this helps. Read more...
PartSelect Number PS2376034
Manufacturer Part Number 8206232A
This 40w light bulb is a replacement bulb constructed of glass and metal. It is an easy-to-install electrical part which produces 40w of light. If the bulb won't light up then it may be broken and should be replaced. The bulb attaches directly to an appropriate light socket and has a small screw-in base. To access the exterior light bulb, you will need to remove the panel on the bottom of the microwave using a Phillips screwdriver. If your exterior light bulb has not been changed before, it is probably held in place with some silicone. You will need to cut away this silicone to remove the old bulb. If you cannot access the silicone with a utility knife, it can be removed using dental floss. Once the silicone is removed, simply unscrew the old bulb, and replace it with the new one. Be sure to disconnect the power to the microwave before you begin this repair. This light bulb measures about 1 1/8 inches. We do not recommend using a higher-wattage bulb for this appliance, and can only recommend this specific bulb. If fixing the bulb does not solve your microwave light issue, it's possibly a problem with the socket, which means the socket and/or board will need to be replaced. This can be a more dangerous repair, so consult your user manual or a technician before attempting.
Installation Instructions
Chris from Cedar Hill, TX
Burned out light under microwave and Filters needed changing
I just removed the multiple screws which held the hood cover on. I then attempted to remove the light bulbs from the socket. This proved impossible because the bulbs were so fragile from the heat and grease build up. To make this task much easier and probably safer, just replace the bulb housing and light bulb. The bulb housing unplugs very easily. Just replace it then screw your new bulb in. P.S. Be sure to unplug appliance before you start.The filters are very easy to replace. No tools needed.
Hope this helps. Read more...
Your Price
$7.44
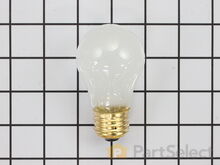
Light Bulb - 40W
PartSelect Number PS884734
Manufacturer Part Number 8009
This an authentic OEM 40-Watt replacement light bulb, used in a number of household appliances. It is specially designed to withstand extreme temperatures, which is why these replacement bulbs are most often used to light the inside of refrigerators and ranges. It features a standard socket base, which means you simply unscrew the burnt-out bulb and screw in the replacement. Depending on the appliance you may require a screwdriver or nut driver to access the light bulb. We recommend you wear work gloves while handling this replacement part. It is constructed of glass and metal and is sold individually. Depending on the appliance and location of the bulb within it, you may want to consider disconnecting power and using a flashlight for easier access to unscrewing and re-screwing in your bulb during this repair.
Installation Instructions
judie from mays landing, NJ
interior drawers were off their rollers
pulled the washer out and replaces the top roller system on both sides and the replaced the weels and brackets on the bottom drwaer. however i had trouble putting the dish washer back correctly and had to call a repairman to adjust the dishwasher and alighn it to open and close properly. but i did do good inside. i feel it was easy and a success. thank you for having the supplies for us to attempt to repair it on our own.
Read more...
Your Price
$43.79
Secondary Door Switch
PartSelect Number PS237421
Manufacturer Part Number WB24X829
The secondary door switch is a simple on/off mechanism that stops the microwave from operating when the door is open (normally opened). The switch monitors the door latch position, and communicates whether the door is open or closed to the electrical control board. This door switch is approximately 1 inch long, and has 2 metal prongs called terminals that extend out of its body. Common symptoms related to a faulty secondary door switch include: microwave will not turn/shut off, or the microwave will not heat properly.
NOTE: Before you begin this repair, first make sure your microwave is unplugged, and that your capacitor is discharged. A capacitor stores large amounts of electricity even when your microwave is unplugged.
Fixes these symptoms
- Doesn’t shut off
- No heat
- Touchpad does not respond
- See more...
Installation Instructions
Marla from Arlington, TX
light worked, timer and control pad worked, but no turntable, no heat, no noises of any sort, just didn't start up
Noted on partselect.com that someone else with this problem, found it to be secondary door switch. There are three door switches in this model, but online info noted that one of the three might feel "soft" (in my case, one switch clicked in a rather "jiggly" way, the other two were strong decisive clicks.) To access the door switches on this model was the only difficult part. First use a torx bit to remove the two torx screws below the latches inside the microwave. This frees the latching part inside, that holds the door switches, which you will remove after you take off the control panel. The top grill has to come off before you can remove the door panel. Remove the screws above the grill, on the microwave top cover, The grill on this model is covered with a panel that moves out when it vents. After removing the two top screws, the covered grill vent slides left to remove. Be careful, as the sliding tabs are plastic. Wiggle and jiggle it, to slip it off. Below the removed grill, is a small metal grill with one screw in lower center. Remove that screw, and wiggle that out. You'll then see the one screw that holds on the control panel. Remove this screw, and lift the control panel up to remove. Again, go slowly and gently, as the bottom tabs holding the control panel in, are also plastic and easily broken. Lay the control panel on something, (I used the coffee maker) and pull out the wire bundles tucked on the left, that are attached to the latching panel. Wiggle the latching panel gently to lift it up off of it's plastic tabs and pull it out towards you, so you can see the three door switches. Each switch (part number WB24X829) has a little black switch on it. Feel each switch with either your finger, or a screwdriver to see which one doesn't "click" strongly. The weak one is the one you will replace. The door switches are fitted into a tab, and plugged into their wires. Remove the defective switch, pull out the wires, and replace it with the new switch, plugging back the wires, and slipping it back into it's plastic tabs. Then put everything back together in reverse order. The entire job took me fifteen minutes EXCEPT for figuring out how to slide off the upper grill, which I have told you. A repairman would have cost $150, the part was $18. AND, there's a good chance, the other two switches will get "used up" in the next year or so as well, so I'll be ready next time. Thank you, Partselect, why work all day, to make money, only to give it to somebody else, for fifteen minutes of work. All I needed was the knowledge.
Read more...
Your Price
$15.76
FUSE
First off, UNPLUG THE MICROWAVE.
The fuse is located under the plastic grill at the top of the microwave. It's held on by two screws. Once you've removed the screws and taken off the plastic grill, you go to the right side of the microwave and remove another screw that holds a small metal grill in place. Removing the small metal grill is probably the toughest part of this repair. You kind of have to rock it back and forth a bit to get it to release. Once that's off, you can get to the fuse. I removed the burnt out one with a pair of needle nose pliers. I also put a small piece of cardboard under the fuse when I did this so I didn't accidentally drop it into the innards of the microwave. I did the same thing when I replaced the new fuse. I then plugged the appliance back in and made sure it worked. Once that was confirmed, I replaced both grills. Read more...
PartSelect Number PS1481237
Manufacturer Part Number WB27X10928
This ceramic microwave fuse is just over an inch in length. It is white in the center, and metal on both ends. This is a 20-amp fuse, and is used to power your microwave. If the touch pad on the microwave becomes unresponsive, the microwave produces little to no heat, or the appliance simply does not turn on, it could mean that your fuse is at fault and needs to be replaced. Because this part contains an electrical charge, remember to disconnect power to the microwave unit before you begin this repair.
NOTE: Before you start this repair, ensure that the microwave is unplugged, and the capacitor is discharged. A capacitor stores large amounts of electricity even after your microwave is unplugged.
Fixes these symptoms
- No heat
- Touchpad does not respond
- Won’t turn on
- See more...
Installation Instructions
Kim from Cliffside Park, NJ
Microwave completely stopped working
Turned out the issue was easily solved by replacing a single, inexpensive fuse. First off, UNPLUG THE MICROWAVE.
The fuse is located under the plastic grill at the top of the microwave. It's held on by two screws. Once you've removed the screws and taken off the plastic grill, you go to the right side of the microwave and remove another screw that holds a small metal grill in place. Removing the small metal grill is probably the toughest part of this repair. You kind of have to rock it back and forth a bit to get it to release. Once that's off, you can get to the fuse. I removed the burnt out one with a pair of needle nose pliers. I also put a small piece of cardboard under the fuse when I did this so I didn't accidentally drop it into the innards of the microwave. I did the same thing when I replaced the new fuse. I then plugged the appliance back in and made sure it worked. Once that was confirmed, I replaced both grills. Read more...
Your Price
$17.12
Charcoal Filter
PartSelect Number PS1871363
Manufacturer Part Number 8206230A
This Charcoal Filter traps grease from your oven's exhaust to help prevent it from entering the vent, which could cause damage over time. If the exhaust fan on your microwave is not working, you may need to replace your charcoal filter. This charcoal filter is located within the intake grille of your microwave, which will need to be unscrewed and opened to gain access to the filter. The manufacturer recommends that you change your charcoal filter every six months. This filter measures 5 inches by 5.375 inches by 0.375 inches. Be sure to measure your current filter to assure correct replacement. This product is sold individually. We recommend the use of gloves during installation to protect your hands from messy grease during your repair. You should also unplug your appliance at the electrical outlet or switch it off at the breaker. Using a Phillips screwdriver, unthread the screws securing the grill. Open the door and slide the grill to the left and lift it up to remove it. This will allow access to the filter so it can be either replaced or cleaned. Remember to insert the tabs of the grill into the frame and slide it to the right when you are done. To finish, shut the oven door and secure the grill with the screws.
Fixes these symptoms
- Exhaust fan not working
- Noisy
- See more...
Installation Instructions
Richard from San Antonio, TX
Mounting brackets are fragile and plastic support is easily broken
Replaced the intake grille. The grille should be removed prior to cleaning. The entire part is plastic and easily broken so that the two tabs for the mounting screws are shattered and will not hold the part in place. If one attempts to clean the grille using only a moderate amount of pressure with a cloth the fragile plastic will break. The part is poorly designed. When the vent is removed to replace the charcoal filter, one may discover that the grille has already been broken in a previous cleaning operation.
Read more...
Your Price
$34.24
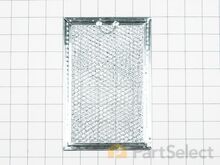
Grease Filter
PartSelect Number PS3650910
Manufacturer Part Number W10208631A
This Grease Filter is constructed of Acrylonitrile Butadiene Styrene and is used to trap grease and help eliminate odors from the exhaust air while cooking. It attaches onto the exhaust and is rated as easy to install. The part is 12 15/16" x 5 3/4", and comes in silver. Refer to your make and model number to ensure this part is right for you. If the exhaust fan of your appliance is not working, this part is the most likely cause. This part is sold individually, and it should be noted that many microwaves require two filters, so you may need to replace both at the same time by purchasing two of this part. You should consider gloves during this simple repair (which requires no tools) to save yourself from getting greasy hands.
Fixes these symptoms
- Exhaust fan not working
- See more...
Installation Instructions
Mark from SCHAUMBURG, IL
Dirty filters
Remove top grill assembly and replaced filters,parts were delivered on time and fit as expected, Job well done!
Read more...
Your Price
$21.04
Light Bulb - 40W 130V
PartSelect Number PS247209
Manufacturer Part Number WB36X10003
This light bulb is a 40 watt, 130-volt clear appliance light bulb that is manufactured to fit microwaves with small-base light bulb sockets. The light bulb illuminates the inside of the microwave while the microwave is running. You may need to replace this part if the existing one is burnt-out or broken. If the existing light bulb is broken, disconnect power to the microwave and remove the bulb base with a pair of needle nose pliers. This is a common wear item, so it is recommended to order a spare. These light bulbs are sold individually.
Installation Instructions
Gene from Urbana, IL
Light bulb out, tried to remove, lamp socket broke
Above the stove mounted microwave. I dropped the lens cover from under the bulb and tried to remove the bulb. The bulb separated from the base. I tried to remove the base with a pliers and the lamp socket broke. I ordered the parts and dropped the bottom cover of the unit down (5 screws). Removed 1 screww from the lamp socket, unplugged the wires and took it out. Simply replaced socket, fastened bottom cover of microwave, installed new bulb and closed lens cover.
Read more...
Your Price
$12.88
Fuse
PartSelect Number PS1960938
Manufacturer Part Number W10138793
If your microwave is not turning on it could be due to your fuse needing to be replaced. This part protects the microwave by shutting it off if there is an electrical surge. This fuse is just over an inch long, is metallic on both ends and ceramic in the middle. Before beginning this repair, unplug the appliance and wait a few minutes before starting. Remove the outer cabinet which is held in place with two screws. You will then locate the power cord which will lead you to the fuse holder. Determine if the fuse has blown. Using an ohmmeter, you should be able to figure out if it has blown. A proper reading is zero ohms, if it reads as anything else then your fuse has in fact blown. Simply snap the old fuse out of place and place the new one in.
Fixes these symptoms
- No heat
- Won’t turn on
- See more...
Installation Instructions
Daniel from DECATUR, GA
Microwave wouldn't turn on and found breaker been tripped and then microwave wouldn't turn on at all.
Read some instructions and easily found the fuse. Replaced it. Still didn't work. Took control panel off to check door switches. Nothing I read mentioned a second fuse. Tested and it to had blown. Ordered another one. Popped them in. Done.
Read more...
Your Price
$16.95
Halogen Light Bulb
Remove the screw holding the cover to the lights.
Remove the burned out bulb(s) (they may give a little resistance).
Carefully line up the holes for the prongs on the bulbs.
Insert the prongs firmly but gently using the styrofoam holders the bulb(s) was/were shipped in so as not to touch the bulb(s) with your fingers.
Replace the screw to the light cover.
Turn on the lights and give yourself a pat on the back. Read more...
PartSelect Number PS651484
Manufacturer Part Number WB36X10213
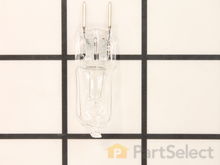
This halogen light bulb is an inch and a half long. Carrying 120 volts and 20 watts, it is used with some microwave ovens.
Installation Instructions
Eddy from LAKELAND, FL
The Halogen surface bulbs burned out on my over-the-stove microwave..
Extremely easy. Less then 10 minutes tops.Remove the screw holding the cover to the lights.
Remove the burned out bulb(s) (they may give a little resistance).
Carefully line up the holes for the prongs on the bulbs.
Insert the prongs firmly but gently using the styrofoam holders the bulb(s) was/were shipped in so as not to touch the bulb(s) with your fingers.
Replace the screw to the light cover.
Turn on the lights and give yourself a pat on the back. Read more...
Your Price
$33.35
Microwave Door Interlock Switch
PartSelect Number PS2361111
Manufacturer Part Number W10269458
This door interlock switch is for microwaves.
Door interlock switch prevents the microwave from starting when the door is open.
Because the microwave shielding and interlock switches must be properly tested following the door interlock switch replacement, a service technician should install this part.
Fixes these symptoms
- Doesn’t shut off
- Door not closing properly
- No heat
- See more...
Installation Instructions
Mark from HOMER GLEN, IL
Door switch inconsistent operation for Open/Close sensing.
Ordered top & bottom micro-switches and mounting plate parts. Internet reviews could not find specifics if the issue was due to a top/bottom or combination of micro-switch or mounting plate failure. Pulled the plug. Removed the top vent assembly cover held in by 2 Phillips screws inside the vent. Removed the control panel held in by 1 Phillip screw at the top vent assembly area. Lifted control panel upward to release the catch and moved it off to the side - didn't disconnect any leads. Used a Torx bit to remove the door switch mounting plates at the front and pulled the plates through the opening from the control panel. Documented the wire color code connections, the top plate uses 2 micro's with one using both the closed & open contact. Installed the respective micros on the mounting plates and worked backwards with the wiring and removal steps. Once completed, the open/close sensing has worked every time.
Read more...
Brands
- Admiral Microwave Parts
- Amana Microwave Parts
- Caloric Microwave Parts
- Electrolux Microwave Parts
- Frigidaire Microwave Parts
- GE Microwave Parts
- Hotpoint Microwave Parts
- Jenn-Air Microwave Parts
- Kenmore Microwave Parts
- KitchenAid Microwave Parts
- LG Microwave Parts
- Magic Chef Microwave Parts
- Maytag Microwave Parts
- Roper Microwave Parts
- Tappan Microwave Parts
- Whirlpool Microwave Parts
- White-Westinghouse Microwave Parts
- Samsung Microwave Parts
- Haier Microwave Parts
- Dacor Microwave Parts
Related Parts
- Microwave Brackets and Flanges
- Microwave Caps and Lids
- Microwave Circuit Boards and Touch Pads
- Microwave Doors
- Microwave Ducts and Vents
- Microwave Electronics
- Microwave Elements and Burners
- Microwave Fans and Blowers
- Microwave Filters
- Microwave Fuses
- Microwave Glass Trays and Supports
- Microwave Grates
- Microwave Grilles and Kickplates
- Microwave Handles
- Microwave Hardware
- Microwave Hinges
- Microwave Insulation
- Microwave Knobs
- Microwave Latches
- Microwave Legs and Feet
- Microwave Lights and Bulbs
- Microwave Manuals and Literature
- Microwave Motors
- Microwave Panels
- Microwave Power Cords
- Microwave Pulleys
- Microwave Racks
- Microwave Seals and Gaskets
- Microwave Sensors
- Microwave Springs and Shock Absorbers
- Microwave Switches
- Microwave Thermostats
- Microwave Transformers
- Microwave Trays and Shelves
- Microwave Trim
- Microwave Wheels and Rollers
- Microwave Wire Plugs and Connectors
Popular Microwave Models
Below are the most popular Microwave models we have. Enter your model number in the search box to find your model.
- PVM1870SM3SS
- JVM1790SK01 Counter Top
- PVM1790SR1SS
- FMV156DCC Hood Combo
- KHMS155LSS4
- KHMS1850SSS0
- KHMS155LSS1
- GH5184XPS4 Hood Combo
- FMV157GCA Hood Combo
- SCA1001KSS02
- FFMV164LSA
- FFMV162LBA
- JVM1870SF02 Counter Top
- FFMV162LSA
- JVM1540DM5WW
- JE2160SF03 Counter Top
- FGMV174KFB
- JVM1860SF001 Counter Top
- KHMS2050SSS0
- LMV1683ST