GE Microwave Parts

General Electric Appliance Parts
Shop By Appliance Type Shop By Part Type

Popular GE Microwave Parts

Your Price
$43.79
  In Stock
Secondary Door Switch
★★★★★
★★★★★
44 Reviews
PartSelect Number PS237421
Manufacturer Part Number WB24X829
The secondary door switch is a simple on/off mechanism that stops the microwave from operating when the door is open (normally opened). The switch monitors the door latch position, and communicates whether the door is open or closed to the electrical control board. This door switch is approximately 1 inch long, and has 2 metal prongs called terminals that extend out of its body. Common symptoms related to a faulty secondary door switch include: microwave will not turn/shut off, or the microwave will not heat properly. NOTE: Before you begin this repair, first make sure your microwave is unplugged, and that your capacitor is discharged. A capacitor stores large amounts of electricity even when your microwave is unplugged.
Fixes these symptoms
  • Doesn’t shut off
  • No heat
  • Touchpad does not respond
  • See more...
Installation Instructions
Marla from Arlington, TX
light worked, timer and control pad worked, but no turntable, no heat, no noises of any sort, just didn't start up
Noted on partselect.com that someone else with this problem, found it to be secondary door switch. There are three door switches in this model, but online info noted that one of the three might feel "soft" (in my case, one switch clicked in a rather "jiggly" way, the other two were strong decisive clicks.) To access the door switches on this model was the only difficult part. First use a torx bit to remove the two torx screws below the latches inside the microwave. This frees the latching part inside, that holds the door switches, which you will remove after you take off the control panel. The top grill has to come off before you can remove the door panel. Remove the screws above the grill, on the microwave top cover, The grill on this model is covered with a panel that moves out when it vents. After removing the two top screws, the covered grill vent slides left to remove. Be careful, as the sliding tabs are plastic. Wiggle and jiggle it, to slip it off. Below the removed grill, is a small metal grill with one screw in lower center. Remove that screw, and wiggle that out. You'll then see the one screw that holds on the control panel. Remove this screw, and lift the control panel up to remove. Again, go slowly and gently, as the bottom tabs holding the control panel in, are also plastic and easily broken. Lay the control panel on something, (I used the coffee maker) and pull out the wire bundles tucked on the left, that are attached to the latching panel. Wiggle the latching panel gently to lift it up off of it's plastic tabs and pull it out towards you, so you can see the three door switches. Each switch (part number WB24X829) has a little black switch on it. Feel each switch with either your finger, or a screwdriver to see which one doesn't "click" strongly. The weak one is the one you will replace. The door switches are fitted into a tab, and plugged into their wires. Remove the defective switch, pull out the wires, and replace it with the new switch, plugging back the wires, and slipping it back into it's plastic tabs. Then put everything back together in reverse order. The entire job took me fifteen minutes EXCEPT for figuring out how to slide off the upper grill, which I have told you. A repairman would have cost $150, the part was $18. AND, there's a good chance, the other two switches will get "used up" in the next year or so as well, so I'll be ready next time. Thank you, Partselect, why work all day, to make money, only to give it to somebody else, for fifteen minutes of work. All I needed was the knowledge. Read more...
Your Price
$15.76
  In Stock
FUSE
★★★★★
★★★★★
19 Reviews
PartSelect Number PS1481237
Manufacturer Part Number WB27X10928
This ceramic microwave fuse is just over an inch in length. It is white in the center, and metal on both ends. This is a 20-amp fuse, and is used to power your microwave. If the touch pad on the microwave becomes unresponsive, the microwave produces little to no heat, or the appliance simply does not turn on, it could mean that your fuse is at fault and needs to be replaced. Because this part contains an electrical charge, remember to disconnect power to the microwave unit before you begin this repair. NOTE: Before you start this repair, ensure that the microwave is unplugged, and the capacitor is discharged. A capacitor stores large amounts of electricity even after your microwave is unplugged.
Fixes these symptoms
  • No heat
  • Touchpad does not respond
  • Won’t turn on
  • See more...
Installation Instructions
Kim from Cliffside Park, NJ
Microwave completely stopped working
Turned out the issue was easily solved by replacing a single, inexpensive fuse.

First off, UNPLUG THE MICROWAVE.

The fuse is located under the plastic grill at the top of the microwave. It's held on by two screws. Once you've removed the screws and taken off the plastic grill, you go to the right side of the microwave and remove another screw that holds a small metal grill in place. Removing the small metal grill is probably the toughest part of this repair. You kind of have to rock it back and forth a bit to get it to release. Once that's off, you can get to the fuse. I removed the burnt out one with a pair of needle nose pliers. I also put a small piece of cardboard under the fuse when I did this so I didn't accidentally drop it into the innards of the microwave. I did the same thing when I replaced the new fuse. I then plugged the appliance back in and made sure it worked. Once that was confirmed, I replaced both grills.
Read more...
Your Price
$21.04
  In Stock
Light Bulb - 40W 130V
★★★★★
★★★★★
24 Reviews
PartSelect Number PS247209
Manufacturer Part Number WB36X10003
This light bulb is a 40 watt, 130-volt clear appliance light bulb that is manufactured to fit microwaves with small-base light bulb sockets. The light bulb illuminates the inside of the microwave while the microwave is running. You may need to replace this part if the existing one is burnt-out or broken. If the existing light bulb is broken, disconnect power to the microwave and remove the bulb base with a pair of needle nose pliers. This is a common wear item, so it is recommended to order a spare. These light bulbs are sold individually.
Installation Instructions
Gene from Urbana, IL
Light bulb out, tried to remove, lamp socket broke
Above the stove mounted microwave. I dropped the lens cover from under the bulb and tried to remove the bulb. The bulb separated from the base. I tried to remove the base with a pliers and the lamp socket broke. I ordered the parts and dropped the bottom cover of the unit down (5 screws). Removed 1 screww from the lamp socket, unplugged the wires and took it out. Simply replaced socket, fastened bottom cover of microwave, installed new bulb and closed lens cover. Read more...
Your Price
$16.95
  In Stock
Halogen Light Bulb
★★★★★
★★★★★
35 Reviews
PartSelect Number PS651484
Manufacturer Part Number WB36X10213
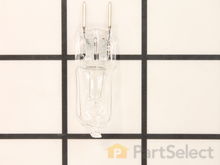
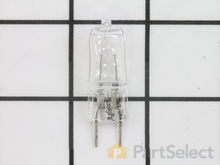
This halogen light bulb is an inch and a half long. Carrying 120 volts and 20 watts, it is used with some microwave ovens.
Installation Instructions
Eddy from LAKELAND, FL
The Halogen surface bulbs burned out on my over-the-stove microwave..
Extremely easy. Less then 10 minutes tops.
Remove the screw holding the cover to the lights.
Remove the burned out bulb(s) (they may give a little resistance).
Carefully line up the holes for the prongs on the bulbs.
Insert the prongs firmly but gently using the styrofoam holders the bulb(s) was/were shipped in so as not to touch the bulb(s) with your fingers.
Replace the screw to the light cover.
Turn on the lights and give yourself a pat on the back.
Read more...
Your Price
$30.88
  In Stock
Primary Door Interlock Switch
★★★★★
★★★★★
18 Reviews
PartSelect Number PS237015
Manufacturer Part Number WB24X10047
This interlock switch is located in the door latch.
Fixes these symptoms
  • Doesn’t shut off
  • No heat
  • Tray won’t turn
  • See more...
Installation Instructions
Steven from Manassas, VA
Microwave not heating
Rmovd top vent screen. Removed control panel. Removed fuse cover panel. Replaced fuse. Removed housing of door switches. Removd wiring from door switches and and removed door switches from housing. Replaced with new switches and re-connectd wiring. Re-attached panels. Read more...
Your Price
$35.69
  In Stock
Monitor Door Switch
★★★★★
★★★★★
13 Reviews
PartSelect Number PS237422
Manufacturer Part Number WB24X830
Unplug your microwave before attempting this repair. You will need to remove the grill, which is held into place by two screws at the top of the grill (open your microwave door before doing this). Remove the grill. Remove the screw on the left holding the control panel in place. Loosen the screw behind the panel. You should now be able to lift the panel up and pull forward to detach. You will find the door switch by removing the screws to detach the switch assembly. Press on the release tab to remove the middle switch. Disconnect the wire connector to release the old switch. The door switch is normally closed.
Fixes these symptoms
  • Doesn’t shut off
  • No heat
  • Won’t turn on
  • See more...
Installation Instructions
George from Sugar Land, TX
GE Microwave turns on when door is opened
I saw a similar problem description at partselect.com and was confident to take the challenge to repair it myself. (Thanks to partselect.com). When I opened the microwave cover I found 3 similar switches. 2 of them works the same way and the other in reverse direction. Image diagram provided to buy parts is helpful to identify the switch.
Steps:
Remove the built-in microwave from the wall and keep it in an open space.
Remove the microwave screws and take the cover out.
Remove the 2 screws(inside) from the plastic panel where switches are snapped in
Gently remove the faulty switch and replace with the new one.
(In my case the topmost secondary door switch was broken)
Read more...
Your Price
$18.44
  In Stock
Glass Light Lens
★★★★★
★★★★★
23 Reviews
PartSelect Number PS247275
Manufacturer Part Number WB36X10071
The microwave glass light lens protects the light bulb inside the appliance. It is clear in color and measures approximately 6-1/2 inches long, and 2-1/2 inches wide. You may notice that this part is cracked or broken and will need to be replaced. You will need to remove the screw holding the cover in place. Unhook the cover from the bottom panel. Bend the tabs up that are securing the old lens in place. The textured side should be facing up. Place the new lens into place and secure back into place.
Installation Instructions
Mark from GRAND BLANC, MI
Lens cracked and bulbs burned out
First I removed the single screw holding the lens assembly in place. Then I lowered the assembly and tilted it until it came out. To remove the existing cracked glass lens there were four tabs bent down on it. By hand I lifted each tab just enough to remove the broken lens. I then replaced the broken lens with the new one and re-bent the tabs down by hand to secure them to the new lens.

The lens assembly, now removed, revealed the cavity that contained the two halogen bulbs. Since they were both burned out for days, they weren't hot so I could pull each one out by hand. The bulbs are secured by two straight heavy gauge wire leads and provided a little resistance but come out fairly easily. Make a mental note of the angle they came out so it will be easier to replace them with new ones.

You're not supposed to touch halogen bulbs with your bare hands, so I used the bubble wrap they came in as a means to hold the bulb while installing it.

Be sure to insert the bulbs at the same angle they came out so the pins do not get bent.

Once both bulbs are in place, replace the lens cover assembly by putting the end opposite where the screw hole goes in first on the right, then swing it up until flush and screw it down.
Read more...
Your Price
$26.04
  In Stock
Light Socket - 250V 75W
★★★★★
★★★★★
17 Reviews
PartSelect Number PS230544
Manufacturer Part Number WB08X10016
This light bulb socket that is used in microwaves. The socket is meant to fit small-base light bulbs. * Please note: The light bulb is not included with this part and is sold separately. If the following symptoms occur, you may need to replace this part: existing socket is broken or cracked, light bulb is not turning on, or new light bulb does not work. Remember to unplug microwave before installing this part and refer to the manual provided by the manufacturer for installation instructions and a detailed diagram.
Fixes these symptoms
Installation Instructions
Gene from Urbana, IL
Light bulb out, tried to remove, lamp socket broke
Above the stove mounted microwave. I dropped the lens cover from under the bulb and tried to remove the bulb. The bulb separated from the base. I tried to remove the base with a pliers and the lamp socket broke. I ordered the parts and dropped the bottom cover of the unit down (5 screws). Removed 1 screww from the lamp socket, unplugged the wires and took it out. Simply replaced socket, fastened bottom cover of microwave, installed new bulb and closed lens cover. Read more...
Your Price
$23.37
  In Stock
SWITCH MONITOR INTERLOCK
★★★★★
★★★★★
4 Reviews
PartSelect Number PS11766871
Manufacturer Part Number WB24X25397
This is the replacement monitor switch for your microwave. It is black in color and measures approximately 1 inch by ¾ of an inch. This switch monitors the door latch position of your microwave and communicates to the electronic control board whether the latch is open or closed. If the switch is damaged, your microwave may not start, even though the door latch is closed. You can check the continuity of the switch by using a multimeter. Be sure to disconnect the microwave from power before you begin this repair.
Fixes these symptoms
  • Doesn’t shut off
  • No heat
  • Won’t turn on
  • See more...
Installation Instructions
William from KINGMAN, AZ
The power was on but the Microwave would not start.
This is an above the range microwave, use 2 people to remove it. I set it on a table and removed the outer cabinet. I then used jumper leads to discharge the capacitor. I removed the control panel (taking a picture to ensure proper wiring on assembly), then I removed the latch board. Once I had the latch board out I removed the monitor switch (which is the middle switch) and tested it for continuity. This is a normally closed switch. I tested the other two switches as well and found these (normally open) switches for continuity to be good and the monitor switch to have a short. This switch should show continuity when the door is open and should show no resistance when the door is closed. (Take care removing the switches) After I received the parts I installed them in the new Locker Holder and installed the latch board (ensure to follow the latch board adjustment steps located in the control board). I then attached the wiring to the control board and then plugged in the unit. I tested the unit to ensure it functioned correctly. I then installed the outer cabinet, and then installed the unit above the range (Use 2 people for this process). Overall an easy fix you just need to ensure you follow safety procedures (especially when dealing with capacitors.
Take a lot of pictures of the wiring and of the components and take care with the latch board or you'll have to buy a new one when all you really needed is a monitor switch.
Read more...
Your Price
$18.68
  In Stock
Grease Filter
★★★★★
★★★★★
23 Reviews
PartSelect Number PS3506741
Manufacturer Part Number WB02X11534
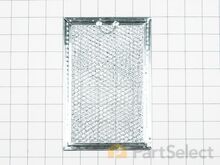
This is a replacement grease filter for your microwave. Sometimes known as the air filter, this part fits underneath your microwave and catches grease. As a result, your grease filter can become clogged, and this is the part you will need to replace it. It measures approximately 7 inches by 7 inches. Most microwaves have two grease filters, but this part is sold individually.
Installation Instructions
Anita D from LACEY, WA
original grease filter fell apart while washing it and couldn't be put back together
Can't believe GE Profile allows such a flimsy filter to be used at all. These filters should not just fall apart while running water through them.

I ordered replacement 4 replacements because I'm sure this will happen again. Part Select fortunately had replacements! You just slide the new filter in place, no tools required. Thanks Part Select.
Read more...

Appliance Type

Related Parts

Popular General Electric Microwave Models

Below are the most popular General Electric Microwave models we have. Enter your model number in the search box to find your model.