Samsung Parts
- Search your model number to find:
- Genuine OEM parts guaranteed to fit
- Free manuals and guides
- Repair instructions and videos

Popular Samsung Parts
- Door won’t open or close
- See more...
- Door won’t open after self cleaning cycle
- Element will not heat
- Little to no heat when baking
- See more...
- Noisy
- See more...
- Not Heating
- See more...
2. Removed two bolts at bottom front of machine and took off the bottom front panel.
3. Removed three bolts from black plastic exit vent and took it out to give more room to access everything.
4. removed two wires and screws on the limit thermostat. Did the reverse to place the new one.
5. Removed wires (remembering placement), then holder screw. rotated the Gas Dryer Sensor counter clockwise to release the bottom tab so the sensor can be taken off the flame tube. Did the reverse to place the new one on.
6. Removed the one screw on the gas/flame tube that holds the bracket and igniter inside the flame tube. Removed the wires fro the igniter (remember placement) Slid the whole assembly toward the back of the machine to get the tube off the gas valve then rotated the whole assembly counter-clocwise to release the tab on the left side of the bracket. This was a little tight and had to work with it a bit to get the tab out and slide the whole piece out of the flame tube.
7. Once the tube and igniter were out i removed the scree that holds the igniter and replaced with the new one. Made sure no dust, etc. was in the piece.
8. Did the reverse to place the tube/igniter back into the flame tube.
9. Carefully and forcefully removed the wire connectors to the two coils. These were tough to get off. Removed the two screws that hold the bracket that holds the two coils in place. Slid the coils off the spindles remembering which one has the two wire connection and which one has the three wire connection and the way they went on. Replaced the old with the new. Placed the bracket onto the new coils and made sure the little bumps on the top are in the holes in the bracket. Tightened the screws to hold the coil bracket. Reattached the wire connectors to the coils making sure they go ALL the way back on.
10. Vaccumed everything I could to get lint, dust, etc. out.
11.Replaced the black vent plastic.
12 Made sure the exit vent on the back was not crimped or clogged. Checked the little flap door where the vent goes outside to make sure it opens and closes super easy to no air flow is restricted.
13. For testing I left the bottom panel open. Make sure you closed the door, reconnect the plug and turn the gas valve back on. Hit the go button on autodry or timed dry. The door must be closed to create the closed circulation of the system so the fan sucks the flame into the tube otherwise the flame will not fire deep into the tube and will set off one fo the overheat sensors. After hitting the go button your drum will start to rotate, then a few seconds later you'll hear a click and your igniter will start to burn bright orange. Another click and the gas should flow and ignite.
14. This shows that you've fixed the ignition problem. I just replaced everything I thought that could be wrong in stead of hunting and trial and error. All the parts were about $137 so I thought it was worth making sure.
15. IMPORTANT: If during your test the flame turns off after a little while then turns back on only to turn off again, don't panic. This happened to me as well. I found that you need to run the dryer with wet clothes in the dryer. The wetness in the clothes will keep the autodry sensor from shutting off the dryer since there will be moisture in the exhaust. If it's on timed dry the wet clothes will cool the exhaust air and keep the overheat sensors from turning the heat off. So no heating of dry clothes to get out wrinkles. Just dry the wet clothes. This is all I did and it's been working great so far. Good Luck! Read more...
- Door won’t open or close
- See more...
- Drum Not Spinning
- Noisy
- See more...
- Not Heating
- See more...
- Noisy
- See more...
Most sites said the support rollers could cause this.
I found your site PartSelect and with help of your diagrams of the machine ordered the parts I thought were needed plus other parts that might cause the problem.
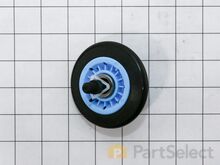
With machine torn down I replaced the rollers.
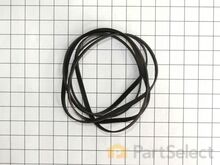
I had also ordered the main drive belt and idler assembly with the rollers and these also needed replacement. It is a good idea to order other suspect parts when doing this type of repair since you can return the parts not needed.
Your return policy is great.
Edward Brennan Read more...
- Door not closing properly
- See more...
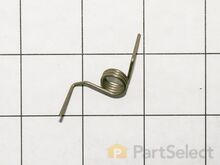
"Repair a Broken Microwave Door Latch" to install. At first I struggled a bit hooking up the spring to the frame, but then I used a slim plier to hold the spring (instead of my fingers) and that did the trick. Read more...
Samsung Appliance Types
- Samsung Refrigerator Parts
- Samsung Fridge Parts
- Samsung Dryer Parts
- Samsung Microwave Oven Combo Parts
- Samsung Oven Parts
- Samsung Range Parts
- Samsung Stove Parts
- Samsung Washer Parts
- Samsung Dishwasher Parts
- Samsung Microwave Parts
- Samsung Air Conditioner Parts
Popular Samsung Models
Below are the most popular Samsung models we have. Enter your model number in the search box to find your model.
- NX58H5600SS Gas Range
- NX58H5600SS 5.8 Cu. Ft. Self-Cleaning Freestanding Gas Convection Range
- NX58H5600SS 5.8 Cu. Ft. Self-Cleanin Gas Convection Range
- NX58H5600SS Gas Range
- NX58H5600SS GAS RANGE
- NX58H5600SS GAS RANGE
- NX58H5600SS 5.8 Cu. Ft. Self-Cleanin Gas Convection Range
- NX58H5600SS 5.8 Cu. Ft. Self-Cleaning Freestanding Gas Convection Range
- NX58H5600SS Samsung Nx58h5600ss/Aa-00 Gas Range
- NX58H5600SS Samsung Nx58h5600ss/Aa-01 Gas Range
- RF4287HARS Samsung Rf4287hars/Xaa-03 Refrigerator
- RF4287HARS REFRIGERATOR
- RF4287HARS Samsung Rf4287hars/Xaa-02 Refrigerator
- RF4287HARS 28 Cu. Ft. French Door Refrigerator Stainless Steel - Rf4287
- RF4287HARS REFRIGERATOR
- RF4287HARS Refrigerator
- RF4287HARS 28 Cu. Ft. French Door Refrigerator Stainless Steel - Rf4287
- RF4287HARS REFRIGERATOR
- RF4287HARS Samsung Rf4287hars/Xaa-01 Refrigerator
- RF4287HARS Samsung Rf4287hars/Xaa-00 Refrigerator


