Air Conditioner Parts

Popular Air Conditioner Parts

Your Price
$36.13
   In Stock
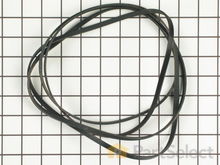
Air Conditioner BELT DRIVE
★★★★★
★★★★★
167 Reviews
PartSelect Number PS16542496
Manufacturer Part Number WE03X29897
This Drive Belt is 89.5" long and comes in black, featuring four ribs on the inside for a better grip. This is a long belt that wraps all the way around the dryer drum, around a tension pulley, and then around the drive motor pulley, allowing all the parts to work together, spinning the drum as the motor rotates. If the drum will not turn when the dryer is turned on the belt is likely broken. It is common for belts to stretch or become brittle over time, which is what leads to the breakage. If broken, it should be replaced; the drum simply cannot spin without this belt. Refer to your model number and user manual to check if this part is right for you. Ensure you use work gloves to protect your hands from sharp internal parts during this repair. Please note: When comparing the length of your old belt to the length of the belt as stated here, remember that a small amount of stretching and contortion may occur with belts over time for a range of different reasons. Unless your belt is drastically different in length, this belt is what you are looking for despite any small inaccuracies. You will need to remove power to your appliance, remove the main panel, and access the motor drive to slip your new belt back into place.
Fixes these symptoms
Installation Instructions
Edwin from Seattle, WA
Dryer making grinding noises
We live in a Condominium, space is tight especially in the Utility room where the washer/dryer are located. Turned dryer breaker off at the electical panel.
Removed the top cover and front assembly w/door and front drum support, right where the unit was located. Had to gain rear access to loosen drum drive belt so undid the dryer vent hose to floor connection through a front acess hole. Moved the unit out to the breakfast nook as well as disconnecting the power cable from the wall socket. Removed the rear access panel covers and unhooked the drive belt. At the front removed the top screws off the lower cross member to allow spreading of the side covers to allow the removal of the drum. Removed drum and found the bearing bushing gone, reduced to powder.
Using the supplied instuction sheet, replaced the rear bearing assembly, replaced the drum after vacumming the whole interior and started the reassembly of the unit using the new belt and moved the unit back into place. Reconnected the power cable and dryer vent then lastly replaced the lint filter and selector knob. Closed the breaker and turned on the machine, no noise!!!
Incidently I am 78 years old. Thanks PartSelect.
Read more...
Your Price
$18.58
   In Stock
Air Conditioner Drum Bearing Slide - White (Sold individually)
★★★★★
★★★★★
157 Reviews
PartSelect Number PS755842
Manufacturer Part Number WE1M504
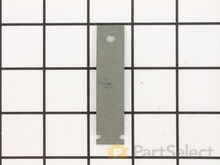
This authentic, white Drum Bearing Slide, also known as the bearing drum slide, glide, or pad, is a plastic, easy-to-install part for your dryer. It replaces the dryer's front drum slide to allow for easier movement. You'll know if this part is an issue if your dryer is unable to tumble properly or is very noisy. Damage can come from regular use. The part attaches to the outermost side of the bearing. Check both slides for signs of wear, because they often wear at the same rate, and should be replaced at the same time; there are 2 of these particular slides per dryer. This part is sold individually, so you'll need to purchase multiple parts if replacing both at the same time.
Fixes these symptoms
Installation Instructions
Matthew from Plainfield, IL
Due to over loading of the dryer the drum ruined the slides and was making a bad noise due to plastic rubbing plastic
It was pretty easy. After already taking apart the dryer to install a new belt I knew exactly my plan of action. I removed the two screws that hold the top panel of the dryer to the front panel. I then removed the top panel and removed the screws that hold the front to each side panel. I than pulled the front away from the cabinet and drum. I put the new slides in place and installed a new felt strip. I put it back together and that was that. Very easy. Read more...
Your Price
$14.29
   In Stock
Air Conditioner Drum Bearing Slide - Green (Sold individually)
★★★★★
★★★★★
27 Reviews
PartSelect Number PS6447706
Manufacturer Part Number WE1M1067
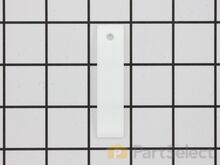
This original equipment manufacturer Drum Bearing Slide is a plastic, green, easy-to-install part for your dryer. It replaces the dryer's front drum slide to allow for easier movement. You'll know if this part is an issue if your dryer is unable to tumble properly or is very noisy. Damage can come from regular use. As the slides start to break down it may cause your dryer to make noise or not dry clothes in the usual amount of time. You will need to purchase two for both sides of your dryer. They attach to the outer-most sides of the bearing. The manufacturer recommends replacing both slides at the same time. Take this opportunity to clean out the lint and dust in the dryer, to keep it running smoothly. This is a genuine replacement part that comes directly from the manufacturer. This item is sold individually. The part attaches to the outermost side of the bearing. Although this part is denoted as being "Green" in its title, many users and technicians have noted that its true colour is closer to a dark gray or black.
Fixes these symptoms
Installation Instructions
Matthew from Plainfield, IL
Due to over loading of the dryer the drum ruined the slides and was making a bad noise due to plastic rubbing plastic
It was pretty easy. After already taking apart the dryer to install a new belt I knew exactly my plan of action. I removed the two screws that hold the top panel of the dryer to the front panel. I then removed the top panel and removed the screws that hold the front to each side panel. I than pulled the front away from the cabinet and drum. I put the new slides in place and installed a new felt strip. I put it back together and that was that. Very easy. Read more...
Your Price
$11.73
   In Stock
Air Conditioner Light Bulb - 40W
★★★★★
★★★★★
66 Reviews
PartSelect Number PS884734
Manufacturer Part Number 8009
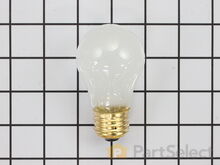
This an authentic OEM 40-Watt replacement light bulb, used in a number of household appliances. It is specially designed to withstand extreme temperatures, which is why these replacement bulbs are most often used to light the inside of refrigerators and ranges. It features a standard socket base, which means you simply unscrew the burnt-out bulb and screw in the replacement. Depending on the appliance you may require a screwdriver or nut driver to access the light bulb. We recommend you wear work gloves while handling this replacement part. It is constructed of glass and metal and is sold individually. Depending on the appliance and location of the bulb within it, you may want to consider disconnecting power and using a flashlight for easier access to unscrewing and re-screwing in your bulb during this repair.
Installation Instructions
judie from mays landing, NJ
interior drawers were off their rollers
pulled the washer out and replaces the top roller system on both sides and the replaced the weels and brackets on the bottom drwaer. however i had trouble putting the dish washer back correctly and had to call a repairman to adjust the dishwasher and alighn it to open and close properly. but i did do good inside. i feel it was easy and a success. thank you for having the supplies for us to attempt to repair it on our own. Read more...
Your Price
$94.64
   In Stock
Air Conditioner Dryer Heating Element
★★★★★
★★★★★
139 Reviews
PartSelect Number PS11741416
Manufacturer Part Number WP3387747
When connected to electricity the dryer heating element (Metal frame, Metal element coil, Ceramic coil insulators) glows red hot and generates heat. When air is blown over it, it heats the air which is used to dry the clothes. The heating element fits inside the heater housing inside the dryer. Wear and tear on the heater coil from use will eventually cause the coil to break and the element to fail. When this part fails it can cease to produce any heat. Alternately, the coil could break and short to ground allowing the dryer to continue to heat even when turned off. The latter is a fire hazard and the dryer should be disconnected from power until the element is replaced. If the element coil breaks, the element needs to be replaced. This model is 11 by 5 inches with 5/16” terminals, metal and ceramic, and comes in black. It is sold individually.
Fixes these symptoms
Installation Instructions
Alan from Brooksville, FL
Burned out heater element
Remove the kick plate from the bottom of the dryer by sliding a putty knife along the top edge to release the plastic clamps, one on each side about 4" in from the edges. The kick plate folds out and down. You will see the heat shield on the right, held in by one hex head screw. Remove screw and heat shield. The element is positioned in an open-front housing and is fastened to the left side of the housing by two hex head screws, located on the "rail" of the element and right near the two wires. Remove the hex-head screws that hold the element in place and disconnected the two wires by pulling them out by hand or with needle nose pliers. The only difficulty here is the cramped working area...I recommend a stubby socket driver for these two screws. Most of this I had to do by feel because I could not see the screw heads. Once the screws are out and the wires have been disconnected, slide the old element straight out toward you. You may need to disconnect a small plastic hose located to the left front of the element, but this hose just pulls right off. Vacume the dust & lint build-up out of the whole area, wipe out the element housing and clean up the whole underside of the dryer prior to installing the new element. Installation is reverse of removal. It also might be a good opportunity to clean out your exhaust duct and the vent to the outside. (Never use the aluminum foil-accordian-type duct.) If the exterior dryer vent has any kind of screen over it, remove it and get rid of it. Screens collect lint, lint builds up and burns out elements. Read more...
Your Price
$11.56
   In Stock
Air Conditioner Duct Felt Seal
★★★★★
★★★★★
42 Reviews
PartSelect Number PS12722961
Manufacturer Part Number WE09X27634
This is a duct felt seal for a dryer. The duct felt seal allows the front-load dryer drum to glide smoothly on the front panel. Your dryer will not function properly if the drum felt seal is compromised. Disconnect power to the dryer before completing this repair. You will need to remove the front of the dryer to gain access to the felt seal. This felt seal may differ in appearance from your original but will function the same as your original. This is an OEM replacement part that is sourced directly from the authentic manufacturer.
Fixes these symptoms
Installation Instructions
Matthew from Plainfield, IL
Due to over loading of the dryer the drum ruined the slides and was making a bad noise due to plastic rubbing plastic
It was pretty easy. After already taking apart the dryer to install a new belt I knew exactly my plan of action. I removed the two screws that hold the top panel of the dryer to the front panel. I then removed the top panel and removed the screws that hold the front to each side panel. I than pulled the front away from the cabinet and drum. I put the new slides in place and installed a new felt strip. I put it back together and that was that. Very easy. Read more...
Your Price
$34.14
   In Stock
Air Conditioner Front Drum Bearing
★★★★★
★★★★★
84 Reviews
PartSelect Number PS960316
Manufacturer Part Number WE3M26
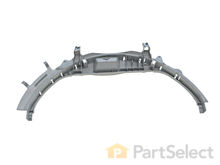
This Front Drum Bearing (Top Bearing, Dryer Drum Front Support Bearing, Drum Support Bearing, Dryer Drum Glide Bearing) holds the drum bearing and slides for the drum to turn on. The front drum bearing attaches onto the inside of the dryer front panel. When this part fails, the drum may no longer turn freely, make odd sounds, and not dry properly due to the drum no longer sealing. This part needs to be replaced if it is broken (often due to normal wear and tear), no longer able to hold the drum bearing slide securely, or has been eroded by the drum movement. This part is about 10 inches in height and 22 inches in width, and comes in white plastic. Sold individually.
Fixes these symptoms
Installation Instructions
Daniel from Chicago, IL
Dryer was squeeling when running.
I removed the two screws at the front above the drum opening (with the dryer door open). The top panel then lifts off. I removed the screw at each side that holds the front panel to the side panels, tilted the front panel forward, which disengages the front of the drum from the front drum glide bearing. I then lifted the front panel slightly, unhooking the bottom of the panel from the dryer base, and swung the front panel aside. I removed the existing top drum bearing guide, which was disintegrated, and snapped in the new bearing guide, with the nylon slide strips installed in the bearing guide. Next pulled out the old felt strip, and pressed the new one in place. I then put the bottom of the front panel back into the bottom of the dryer front, and while lifting the drum to asure it fit over the bearing guide, pushed the front panel back to a vertical position to mate with the side panels. I then replaced the side panel screws, replaced the top, and replaced the front top panel screws. Read more...
Your Price
$50.71
   In Stock
Air Conditioner Refrigerator Center Crisper Drawer Slide Rail - White
★★★★★
★★★★★
171 Reviews
PartSelect Number PS11757048
Manufacturer Part Number WPW10671238
This is a center crisper rail for your refrigerator. This part acts as a support rail for the crisper drawer by holding the center of the crisper frame. You will need to replace this part is if your current drawer is not opening or closing properly. This crisper rail is white and it is made entirely of plastic. It is roughly 13.5 inches long, and 2.5 inches wide. This is an easy repair which requires no tools.
Fixes these symptoms
  • Clicking sound
  • Door won’t open or close
  • Fridge and Freezer are too warm
  • See more...
Installation Instructions
Ruth from Roxbury, MA
Cracked & Snapped Center Crisper Rail
A very easy fix took all of five minutes Read more...
Your Price
$6.87
   In Stock
Air Conditioner WHEEL & BUSHING ASS
★★★★★
★★★★★
6 Reviews
PartSelect Number PS16745479
Manufacturer Part Number 5304532229
The single rack roller kit comes with one axle/clip and one wheel/roller. The rack wheel is designed to allow the rack of your dishwasher to roll in and out. If the rack will not complete this task, or you notice that your dishwasher is not cleaning dishes properly, you may need to replace the rack wheel. The single rack roller kit is made of white plastic, and clips to the dishwasher rack with the included axle/clip. Many of our customers have described this repair as easy, and you will not require any tools to complete it. Lower rack roller and bracket assembly, grey. Wheel has been updated. If wheel pictured is not like old one, you may need to replace all wheels.
Fixes these symptoms
Installation Instructions
CHRIS from ROANOKE, VA
Water leaking from Inlet Valve
Remove the bottom cover plate. Disconnect the water inlet and black rubber hose. Remove 2 mounting screws. Pull out electrical connector. Reverse order. Be sure to get the brass inlet connector really tight so it won't leak. I did the final tightning after the part is mounted. Not a bad repair at all. The only problem was that it leaked in the first place and messed up my subfloor and laminate flooring. Read more...
Your Price
$18.20
   In Stock
Air Conditioner Push-to-Start Switch
★★★★★
★★★★★
24 Reviews
PartSelect Number PS3487190
Manufacturer Part Number WE4M416
This switch is used to activate the dryer.
Fixes these symptoms
  • Touchpad does not respond
  • Will Not Start
  • Won’t Start
  • See more...
Installation Instructions
Gary from LAVALLETTE, NJ
replaced start button and start switch
disconnect power plug unscrew 3 screws in back. lean forward remove button disconnect 2 wires in back of switch. put switch connect 2 wires and button. connect 3 screws in the back. ready to start working Read more...

Air Conditioner Brands

Related Air Conditioner Parts

Popular Air Conditioner Models

Below are the most popular Air Conditioner models we have. Enter your model number in the search box to find your model.