White-Westinghouse Parts

Westinghouse Appliance Parts

Popular White-Westinghouse Parts

Your Price
$41.43
   In Stock
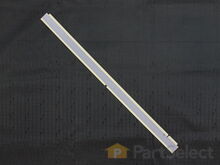
Westinghouse Door Shelf Retainer Bar
★★★★★
★★★★★
166 Reviews
PartSelect Number PS734935
Manufacturer Part Number 240534901
This door shelf retaining bar, also known as refrigerator door bar retainer or fridge door rack, is a genuine part sourced from the original manufacturer. It is a white This manufacturer-certified Door Shelf Retainer Bar, sometimes otherwise known as the door rack or bar retainer, is a white, plastic part which can be easily installed onto the inside of the refrigerator or freezer door to hold items on the door shelves. It holds items in your fridge and will show physical damage if broken or warped, at which time it should be replaced. Check your user manual and model number to see if this part is right for you. No tools are required for this installation, the part should simply snap into place. This part measures roughly 25 inches wide, 3 inches high, and 5 inches deep. This part is sold individually, and we recommend checking the other door shelf retaining bars on your refrigerator or freezer at the same time as ordering this part to ensure that no others need to be replaced, as they often wear or warp at similar speeds.
Fixes these symptoms
Installation Instructions
Cynthia from Long Beach, CA
The retainer door shelf broke 3 years ago
I just snapped the new shelves in place and !voila! I should've done this years ago. Read more...
Your Price
$19.73
   In Stock
Westinghouse Light Bulb
★★★★★
★★★★★
11 Reviews
PartSelect Number PS12751166
Manufacturer Part Number 316538904
This OEM 40 watt appliance light bulb is used for some ranges, refrigerators, freezers, and microwaves. Simply locate the existing bulb, unscrew it from its socket, and replace with new light bulb. If the existing bulb is broken in the socket, disconnect the power to the refrigerator and use a pair of needle nose pliers to grip the internal fragments of the bulb to unscrew. Replace with the new bulb and reconnect the power to the refrigerator. These bulbs are sold individually and are a commonly replaced part; consider ordering a spare.
Installation Instructions
Colin from Hollis, NY
Ice-Maker and Water Dispenser not working.
First I disconnected the power cord, then removed the screws that held the bracket that holds the base for the water-filer in place. I then disconnected the water lines(intake and outflow). Next I removed the screws that held the water-filter's base in place. I then disconnected the release lock mechanism for the filter and finally removed the water-filter base. I did the reverse to install the new water-filter base. Previously I had tested the intake water line and noticed the water was flowing with enough pressure upto the water-filter's base but no water was exiting thru the outflow line, which leads to the Ice-Maker and Dispenser. I had tried changing the filter but that didn't solve the problem it was then I had realized that the Base was the problem. The actual problem was the spring-loaded valves for both the intake and outflow lines, which had a plastic prong that protrudes out of the base that is triggered by the filter when installed. The two prongs were worn-down so the filter wasn't activating the spring-loaded release valve to let the water thru. As for the light, I just unscrewed it. Read more...
Your Price
$51.09
   In Stock
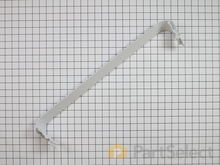
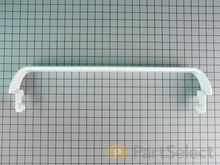
Westinghouse Door Shelf Retainer Bar
★★★★★
★★★★★
77 Reviews
PartSelect Number PS734936
Manufacturer Part Number 240534701
The Door Shelf Retainer Bar, also known as a refrigerator door rack, is a white, plastic part which can be easily installed onto your fridge door. It holds items in your fridge and will show physical damage if broken, at which time it should be replaced. Check your user manual and model number to see if this part is right for you. To install this part, you will need to remove the old one by unlocking the tabs, which can be slid with your fingers. To install the new shelf, line it up with the shelf cut-outs, over the tabs, and gently press it down to lock it into place. This part generally fits the middle door shelf of refrigerators. This is a part that frequently requires multiple parts per refrigerator. Because it is sold individually, you will need to purchase as many door racks as necessary to complete your repair.
Fixes these symptoms
Installation Instructions
Lannie from Buffalo, WY
door rack was broken
pulled broke rack off, snapped new one in place. Yeah!! No more broken jars on the floor. Read more...
Your Price
$11.88
   In Stock
Westinghouse Crisper Cover Support - Front
★★★★★
★★★★★
78 Reviews
PartSelect Number PS2358880
Manufacturer Part Number 241993101
This crisper cover front support is used to keep the crisper shelf in place and may need replacing if the door will not open or close. This white, OEM part measures roughly 1 inch in diameter and can be used for the front and the rear support, as designed by the manufacturer, and mounts to the inside cabinet wall. Replacing this part is an easy repair, and will require a small flat blade screwdriver, a putty knife, and a soft hammer. Remove the crisper and shelf from the refrigerator before replacing the support. The crisper cover front support is held in place with a locking pin. To remove the old part, you will first need to push the pin into the interior of the cabinet using the screwdriver, and then you can pull the support out with a putty knife. If you cannot get the pin out you can use a flat-blade screwdriver to push it down and out of sight and it will not harm anything in your refrigerator After removing the pin and attaching the new support, simply use the soft hammer to lock the new pin in place.
Fixes these symptoms
Installation Instructions
Peter from Amherst, NY
Support studs were broken
Used pliers to remove the residual broken stud that was still attached to the wall of the refrigerator, and then just pushed the new part in place. The longest time was spent in removing the food and crisper drawers. Read more...
Your Price
$12.59
   In Stock
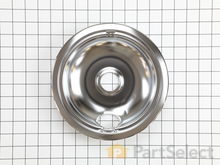
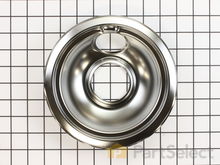
Westinghouse Drip Bowl - 8"
★★★★★
★★★★★
100 Reviews
PartSelect Number PS437595
Manufacturer Part Number 316048413
This chrome drip bowl is designed for use with electric cooktops and ranges. This drip bowl is sold individually. At the widest point this part has a diameter of approximately 10 inches. It sits beneath the surface burner element. It catches any drips or spills coming from the cookware on your burner. Because the cooktop is a high-traffic area of the kitchen, these bowls often get damaged, or get so dirty they can no longer be adequately cleaned. When replacing this part you need to remove the burner element. While you have it out we recommend inspecting the terminals and the element for any corrosion, arcing, or discoloration. Any of those things could be a sign of a bigger problem, and it indicates that the element and terminal block should be replaced.
Fixes these symptoms
Installation Instructions
John from Nisswa, MN
Old pans/bowls were corroded
Very easy---simply unplug the burners, remove the old pans and replace with the new ones

I was extremely pleased with the easy ordering and prompt delivery of parts that actually fit as they should!
Read more...
Your Price
$47.59
   In Stock
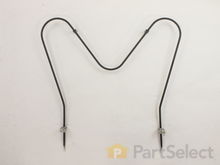
Westinghouse Oven Bake Element
★★★★★
★★★★★
416 Reviews
PartSelect Number PS438018
Manufacturer Part Number 316075103
The Oven Bake Element is a black, metal part which supplies heat to the oven. This element is 19-1/2" wide x 18-1/2" long and has 3-1/2" inserts. It is rated as "Easy" to install by users, and attaches to the bottom of the oven. If you notice visible damage, or that your oven is not receiving heat properly then it may be a problem with this part. Check your model number and user manual to see if this is the right part for you. It is important for you to disconnect your appliance from the power source before performing this repair. After disconnecting your appliance, remove the two screws/nuts connecting the old element, pull it out, and discard if faulty. Simply connect the new element prongs where the old element fit, and screw it back in. You may need a flashlight when making this repair.
Fixes these symptoms
  • Element will not heat
  • Little to no heat when baking
  • Little to no heat when broiling
  • See more...
Installation Instructions
David from Shawnee, KS
Oven woudn't heat
1. Removed two screws, pulled out the element, voltage tested the element and determined it was an open circuit (bad element).
2. Ordered the part from partselect.com
3. Disconnected element, connected the new one, and screwed it back in.
Read more...
Your Price
$153.41
   In Stock
Westinghouse Refrigerator Ice Maker Assembly
★★★★★
★★★★★
80 Reviews
PartSelect Number PS12364147
Manufacturer Part Number 241798231
This 8-cube ice maker is used to create ice for your refrigerator. The ice maker receives water from the water inlet valve and will freeze until ice cubes are formed. Once the water has been frozen the cubes will be ejected from the mold in to the ice bucket. The ice maker will continue the process until the ice bucket has reached the limit. If your ice maker is not making ice you may need to replace this part. Please remember to disconnect the power and water supply before starting your repair. This ice maker is a genuine OEM part.
Fixes these symptoms
  • Clicking sound
  • Ice maker not making ice
  • Ice maker won’t dispense ice
  • See more...
Installation Instructions
Juan from Miami, FL
Broken ice maker
Unplugged faulty ice maker, removed two screws holding it to the refrigerator and took it out. Reversed the operation with the new ice maker and after a few minutes presto, we have ice. Read more...
Your Price
$50.33
   In Stock
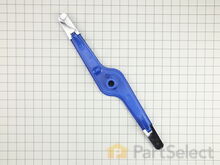
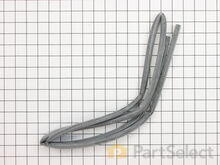
Westinghouse Drawer Support Rail - Right Side
★★★★★
★★★★★
138 Reviews
PartSelect Number PS430917
Manufacturer Part Number 240530701
This manufacturer-certified drawer support rail supports the right side of the sliding drawer. It is a track that helps the drawer slide open and closed with ease. If you are having trouble opening or closing your fresh food drawer, check the support rails for any blockage, or visible damage. If the rail is damaged, it should be replaced to ensure no further damage is done to the drawer itself. The repair is straightforward: unscrew and remove the existing support rail, then fasten the new rail in place. This genuine OEM replacement part is made of plastic and is white in color. NOTE: This part is sold separately from the left side drawer support rail. The part measures approximately 16 inches long by 1 inch high.
Fixes these symptoms
Installation Instructions
Jane from Owosso, MI
broken refrigerator door shelves
snapped right on and removed screws, insert and replace screws. Read more...
Your Price
$16.24
   In Stock
Westinghouse Terminal Block Kit
★★★★★
★★★★★
35 Reviews
PartSelect Number PS470125
Manufacturer Part Number 5303935058
This part connects the wire harness to the surface element and is used for ranges. The kit includes interchangeable mounting brackets, ceramic wire nuts, heat shrink protective tubing, and wires. If your range/oven is having symptoms such as burner not heating, heating elements not working, burning smell, or if the oven is making a buzzing noise then this could be the solution. The tools needed to replace the kit are wire strippers, a heat gun or hair dryer, and #1 square heard screw driver. Refer to the installation/instructional video for further guidance to accurately replace the element.
Fixes these symptoms
  • Element will not heat
  • Oven not heating evenly
  • Will Not Start
  • See more...
Installation Instructions
Steven from Taylors, SC
rental property stove only had 2 working burners and bottom drawer off track
first i took out burners then i took out the screws of the termnal block bracket. i then raised the lid on the stoveand clipped the wires on all 4 of the terminal block kits.i then slipped the shrink wrap on wires and used the wire nuts to connect wires together then heated the shrink wrap. I then put screws back in terminal block brackets. I then put the burners on while looking under lid so i would know they were making good connections as this is a bad design from factory. if you pull out burners to clean them and they are not put back in right you dont have a good connection and that causes the terminal blocks to get hot and melt. thats what happened in my case.
As far as the drawer glides they just snap into place
Read more...
Your Price
$62.48
   In Stock
Westinghouse Rear Drum Bearing Kit
★★★★★
★★★★★
102 Reviews
PartSelect Number PS459829
Manufacturer Part Number 5303281153
This rear drum bearing kit is designed for use with dryers. It supports the rear of the drum in your appliance as it tumbles your clothes during the drying cycle. If your drum will not tumble, or if it is making a lot of noise, it could be an issue with this part. This is a ball-and-socket style bearing. You will need to replace this if the bushing has worn out, or if the ball support is damaged. This kit includes one bearing, one ball shaft, one ball bearing, one ball bearing retainer, a small tube of high temperature lubricant and installation screws. Unplug your dryer before you begin this repair.
Fixes these symptoms
Installation Instructions
charles from new holland, OH
Dryer squealed like a pig and at times the drum stopped rotating
First thought the problem was a stretched drum belt or bad idler pulley. Ordered a new belt and idler assy plus spring. Replaced those items with relative ease following suggestions obtained at this site.However, problem persisted and I now suspected a bad drum bearing. Odered the bearing kit and replaced same using the following procedure.
1. Removed the cover from the back of the dryer (held in place via two phillip head screws)
2. Pushed down on the idler assy and removed the idler spring to release the drum belt.
3. Inserted flat tip screwdriver between the top panel and the dryer main body in the front of the dryer to pry the top loose from the two retaining clips.
4. used phillips screwdriver to remove the two retaining screws (one left, one right) that hold the front panel to the main body of the dryer. (about a foot down from the top of the dryer).
5. disconnected the wiring plug on the top right hand side at the top of the dryer.
6. lifted the front panel slightly removing it from the main body and placed it to the side.
7. lifted the rear of the drum to release it from the bearing bracket and removed the drum belt.
8. Pulled the drum through the front of the dryer body and moved it to an open work area.
9. Reached into the Dryer and loosened the two
bearing bracket screws with a nut driver. Here's where another pair of hands would have come in handy. Holding the ground bar on the back of the drum with on hand, reached into the dryer and finished removing the bracket screws somehow managing not to drop the tiny grounding ball (size of a BB) Removed the badly damaged plastic bracket, grounding bar, and grounding ball and set
them aside to be discarded later.
10. Used impact driver with phillips attachment to remove two of the three screws that hold the bearing to the back of the drum (these are on the inside) The third screw's head stripped out and I had a very difficult time removing it. Had it not been for that, the job would have taken less than an hour.
11. I had my wife hold the bearing in place while I started the three retaining screws.
12. My wife also got behing the dryer and held the grounding bar in place while I installed the new bearing bracket . (this kept me from loosing the grounding ball)
I just reversed the rest of the procedures to install the drum belt, drum, front panel, etc.
The dryer works like new now, doesn't squeal.
Also replaced the on/off switch knob (just pulled the old one from the stem and slid the new one on.
Read more...

Westinghouse Appliance Types

Popular Westinghouse Models

Below are the most popular Westinghouse models we have. Enter your model number in the search box to find your model.