White-Westinghouse Dryer Parts
- Search your model number to find:
- Genuine OEM parts guaranteed to fit
- Free manuals and guides
- Repair instructions and videos

Popular White-Westinghouse Dryer Parts
- Drum Not Spinning
- Marks left on clothes
- Noisy
- See more...
- Drum Not Spinning
- Marks left on clothes
- Noisy
- See more...
1. Removed the cover from the back of the dryer (held in place via two phillip head screws)
2. Pushed down on the idler assy and removed the idler spring to release the drum belt.
3. Inserted flat tip screwdriver between the top panel and the dryer main body in the front of the dryer to pry the top loose from the two retaining clips.
4. used phillips screwdriver to remove the two retaining screws (one left, one right) that hold the front panel to the main body of the dryer. (about a foot down from the top of the dryer).
5. disconnected the wiring plug on the top right hand side at the top of the dryer.
6. lifted the front panel slightly removing it from the main body and placed it to the side.
7. lifted the rear of the drum to release it from the bearing bracket and removed the drum belt.
8. Pulled the drum through the front of the dryer body and moved it to an open work area.
9. Reached into the Dryer and loosened the two
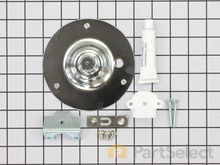
bearing bracket screws with a nut driver. Here's where another pair of hands would have come in handy. Holding the ground bar on the back of the drum with on hand, reached into the dryer and finished removing the bracket screws somehow managing not to drop the tiny grounding ball (size of a BB) Removed the badly damaged plastic bracket, grounding bar, and grounding ball and set
them aside to be discarded later.
10. Used impact driver with phillips attachment to remove two of the three screws that hold the bearing to the back of the drum (these are on the inside) The third screw's head stripped out and I had a very difficult time removing it. Had it not been for that, the job would have taken less than an hour.
11. I had my wife hold the bearing in place while I started the three retaining screws.
12. My wife also got behing the dryer and held the grounding bar in place while I installed the new bearing bracket . (this kept me from loosing the grounding ball)
I just reversed the rest of the procedures to install the drum belt, drum, front panel, etc.
The dryer works like new now, doesn't squeal.
Also replaced the on/off switch knob (just pulled the old one from the stem and slid the new one on. Read more...
- Marks left on clothes
- Noisy
- See more...
What I would add to previous reviews is to pull the front off or the little acces grill in back and check to see what kind of belt you have. According to the model #, It showed the wide flat belt when in fact I had the smaller ribbed belt. Glad I checked before ordering.
A few things that will make your life easier is once you have the old upper guide/seal removed, put down the glue then use several med sized plastic spring clamps to hold the seal in place while the glue sets up, (@ 20-30 min). Their cheap and you should have some around anyway. When replacing the seals I would go ahead and replace the belt too. It's cheap and if your machine is 5+ yrs old probably is worn. Total cost of repair was about $60 (inc shipping). Took about 1 hr 20 min total time. Most of that time was scrapping the old seal material/ glue off the dryer front. Actual disassembly and repair maybe 1/2 hour. Other little tip is the clips for the lid of dryer is to use a flat screwdriver and gently push straight in until it's compressed enough to release the lid, it will pop up when pushed in far enough. That one took me a while to figure out.
Thanks to Part Select for such a helpful site. My dryer is like new again. Read more...
- Marks left on clothes
- Noisy
- See more...
- Drum Not Spinning
- Noisy
- See more...
- Element will not heat
- Little to no heat when baking
- Little to no heat when broiling
- See more...
- Marks left on clothes
- Noisy
- See more...
- Marks left on clothes
- Noisy
- See more...
First, unplug the dryer. Then, open the top so that you can get access to the work area. On each side of the inside front, there is a screw that connects the front panel to the side panels. Unscrew those screws and pull the front panel until it disconnects from the side panels. Be careful as there are wires that are secured to the bottom of the top inside lip of the front panel. One set of wires goes to the light bulb in the dryer door. You don't need to disconnect the wires, but be sure you don't damage the wires by pulling the front panel too far away from the dryer.
Once you have the front panel out of the way, you can see the front drum glide. In my case, one half was loose as the plastic plugs that pop into recesses to hold the glide in place had broken off. Remove the damaged glide section and replace it with the new section, popping the plastic plugs into the recesses. Don't be afraid to slap the glide to lock the plugs in place.
For the felt, I cut the part of the old felt that was pulling away from the front panel. I then used a flat-head screwdriver and wire brush to remove as much of the old adhesive as I could. Then, using the high-heat adhesive that came with the new felt, I put a generous amount on the front panel where the felt needed to go. I used a toothpick to spread the adhesive to get maximum area coverage. I let it set for a minute or two, and then placed the new felt. I used small clamps to keep the felt in place until the adhesive had time to bond. I only kept the clamps in place for 10 minutes.
Once I removed the clamps, I let the felt continue to adhere to the front panel for 24 hours before reassembling the dryer. Again, be careful of the wires connected to the front panel as it appears very easy for them to be pinched or cut when putting the front panel back in place.
When the dryer was reassembled, I plugged it back in and have had no more troubles. Read more...
- Noisy
- Not Heating
- Too hot
- See more...
1) Remove the two screws from the rear / upper panel (below the control panel).
2) Snap the front side using a flat head screw driver.
3) On the inside front, remove two screws (one on each side) from the upper side and snap the door assembly off.
4) Remove the rear motor access panel (two screws) and appying tension to the spring remove the belt.
5) Pull the drum upwards (verticaly) unnapping it from the rear wall and remove it horizontally through the front panel.
6) Disconect the four leads to the heating element and remove the four screws from the rear of the dryer and replace the heating element.
Follow the same steps backwards to put the dryer together again. Read more...
Westinghouse Dryer Appliance Types
Related Westinghouse Dryer Parts
- Westinghouse Dryer Seals and Gaskets
- Westinghouse Dryer Hardware
- Westinghouse Dryer Knobs
- Westinghouse Dryer Panels
- Westinghouse Dryer Brackets and Flanges
Popular Westinghouse Dryer Models
Below are the most popular Westinghouse Dryer models we have. Enter your model number in the search box to find your model.
- WER211ES0 White
- WER211CES0 White
- WEQ332HS0 Electric
- WGR211ES0 White
- WGQ332HS1 Gas
- WER111ES0 White
- SGR341AS0
- SER341AQ1
- SGR341CC0 White
- SGQ2152HS0
- SGR341AS3 White / Gas
- SER341AS0
- DE500PXW1 Westinghouse Dryer Model DE500PXW1 Parts
- DG170AXF1 Westinghouse Dryer Model DG170AXF1 Parts
- DE100ADD1 Westinghouse Dryer Model DE100ADD1 Parts
- DE170ADW1 Westinghouse Dryer Model DE170ADW1 Parts
- SER341AS2 White / Electric
- SGR351CQ0 White
- DE500ADW1 Westinghouse Dryer Model DE500ADW1 Parts
- DE395ADW2 Westinghouse Dryer Model DE395ADW2 Parts


