RCA Parts

RCA Appliance Parts

Popular RCA Parts

Your Price
$216.23
   In Stock
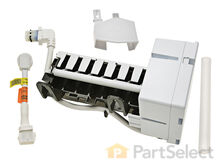
RCA Ice Maker
★★★★★
★★★★★
77 Reviews
PartSelect Number PS1993870
Manufacturer Part Number WR30X10093
This 10 by 5 inch ice maker (Electromechanical Icemaker Kit, Ice Maker Assembly) produces ice. This particular model will produce seven crescent shaped cubes every cycle. It is constructed of plastic and metal, and comes in black/white. This kit includes a set of installation instructions, a 4-pin round plug-in connector, 6 post plug-in connectors, tube and fill cup. The ideal temperature of a freezer is zero degrees Fahrenheit. If the temperature in your freezer is at an appropriate level yet ice is still not being made, it could be an issue with the water inlet valve or your ice maker assembly. If you determine it is the ice maker, this is the replacement you need. The ice maker can break from normal wear and accidental damage. Ice makers will need to be replaced every 3-10 years depending on the frequency of usage and water quality. This model is mounted on the freezer wall.
Fixes these symptoms
  • Ice maker dispenses too little ice
  • Ice maker dispenses too much ice
  • Ice maker not making ice
  • See more...
Installation Instructions
Michael from Bradenton, FL
ice maker not working properly and door seal worn
Two screws held the icemaker on. You do not even have to take them all the way out to remove the IM. Replacement of the water valve was just as easy except they (parts manufacturer) updated the flange nut with a compression fitting and it took me a minute looking at it before I realize what was going on. The door seal could not be easier, no tools just a few minutes of time Read more...
Your Price
$88.17
   In Stock
RCA Rear Drum Bearing Kit
★★★★★
★★★★★
24 Reviews
PartSelect Number PS267529
Manufacturer Part Number WE25M40
This rear drum bearing kit includes a shaft, ground strap, bearing, seven screws, and installation instructions. The bearing plate comes with a slot in it for the ground strap. This part helps keep your dryer running as smoothly as possible with as little noise as possible by supporting the back of the dryer drum and reducing friction as the drum rotates. Over time, your drum bearing will wear out, cause your dryer to be noisy, and you will have to replace it. There may be some sharp internal parts, so be sure to wear work gloves during repair.
Fixes these symptoms
Installation Instructions
Michael from Warwick, RI
the rear drum bearing was worn the dryer became very noisy
i removed the scews just above thr opened dryer door, i was then able to swing the dryer top cover back. i then removed the lower front panel screws ,the the screws securing the front of the dryer ( where the door is ) and removed it. there are just 2 wires to disconnect. after the front is removed you gain full access for drum removal, remove the belt make sure the wires are not in the way and remove the drum.i also used a vacuume to clean the inside of the dryer. the front drum slides are very easy to replace only 2 screws each.remove old parts install new parts then just put the dryer back together in the reverse order i took it apart. after re-assembly i turned the dryer on it was so quiet running my wife and dogs were very happy. ps. i just want to thank the people at partselect for having all my parts in stock and for the speed in which i received them. other than having to repair my dryer it was a very pleasant experiance. Read more...
Your Price
$8.56
   In Stock
RCA Light Switch
★★★★★
★★★★★
59 Reviews
PartSelect Number PS8758429
Manufacturer Part Number WR23X10725
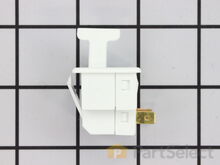
The interior light of your refrigerator is controlled by a switch that is activated when the door is opened and closed. If your refrigerator light will not turn on, there could be an issue with the switch. The switch is spring loaded and is a generally closed type of switch meaning there should be no continuity when the button is depressed, and continuity through the switch when the button is not depressed. This plastic, white, OEM switch is sourced directly from the manufacturer, is sold individually and is easy to replace. The repair usually takes less than 15 minutes and requires a flat blade screwdriver and needle nose pliers.
Fixes these symptoms
Installation Instructions
Jonathan from Lilburn, GA
Sticking Light Switch
I applied some tips learned by reading other reviews. So before I started I grabbed my trusty vise grip pliers and a small screw driver. I locked onto the switch actuator, the part that the refrigerator door pushes in, with the vise grips and pulled on it just hard enough to get the screw driver inserted in the right side to push in the catch clip so the switch could be pulled out further each time the catch clip was depressed to the next detent. Then I used the screw driver on the left site to encourage the switch past the detents on the left and very quickly the switch was out of the mount. The wires from the refrigerator pulled out with the old switch. I unplugged the old switch from the wires and plugged in the new switch and shoved the new switch back into the mount, wiggled it a couple of times to make sure it was secure and the job was done. Once I applied the vise gripes at first, the whole job took less than a minute. Read more...
Your Price
$127.09
   In Stock
RCA Crisper Drawer Cover
★★★★★
★★★★★
81 Reviews
PartSelect Number PS890565
Manufacturer Part Number WR32X10398
The crisper drawer cover sits on top of your vegetable crispers and helps to maintain proper crisper temperatures. It also doubles as a sturdy lower shelf for extra storage in your refrigerator. If the drawer cover is damaged or cracked, it will not be able to do either of its jobs, and should be replaced. This replacement cover features shallow, wide grooves to prevent leaks and to catch spills. It also has rail brackets underneath to hold the drawer, allowing the drawer to slide in and out. It is made with some added structural rigidity that makes it stronger and more durable than the original. This model measures 24 1/2 inches long x 19 inches wide x 2 5/8 inches deep.
Fixes these symptoms
Installation Instructions
Kim from Bronx, NY
Vegetable pan cover broke down the middle
When the cover came to my apartment, I crossed my fingers that the piece would fit . Well, within 5 minutes the old cover was out and the new cover in. And it looks better than new! Finally, I don't have to hold my vegetable drawers up with a D battery! Read more...
Your Price
$31.02
   In Stock
RCA Door Shelf Retainer Bar End Cap - Left or Right Side
★★★★★
★★★★★
14 Reviews
PartSelect Number PS298977
Manufacturer Part Number WR2X8345
This end cap is sold individually. It can be used for the right or left side of either the freezer or refrigerator door shelves.
Installation Instructions
Angela from Minneapolis, MN
Door Retainer Bar and End Caps were missing
Placed bar into end caps and slide end caps into slots in the door. Took about 1 minute! Very easy! Read more...
Your Price
$61.87
   In Stock
RCA Bake Element
★★★★★
★★★★★
63 Reviews
PartSelect Number PS249247
Manufacturer Part Number WB44K5012
At the floor of your electric oven is the bake element. This partially open-style element comes with push-on terminals. The bake element will likely provide most of the heat for baking. Therefore, if the oven is not heating properly, or if food is burnt on top and undercooked below, your bake element may be at fault. If you can see that the element has been separated or blistered, you should replace the part immediately. If there is no visible damage, turn the oven on and check to see if the element heats evenly. If the element is not heating evenly, or if it is not heating at all, use a multi-meter to test for electrical continuity to see if the element needs replacing.
Fixes these symptoms
  • Element will not heat
  • Little to no heat when baking
  • Little to no heat when broiling
  • See more...
Installation Instructions
Timothy from Cordova, TN
Bake element cracked on its own
Flipped the breaker. Removed shelf, Find the right size nut socket, unscrew the two screws, pull the element out a little bit, disconnect the wires (on pretty tight), pull out element, clean out any mess in the oven, compare element with new one to make sure its the same size and such, connect wires to new element, replace screws, flip breaker back, turn on for a few minutes to make sure it works. Piece of cake. Read more...
Your Price
$34.79
   In Stock
RCA Idler Pulley Wheel
★★★★★
★★★★★
7 Reviews
PartSelect Number PS265721
Manufacturer Part Number WE12X83
A dryer's idler pulley wheel serves to help the belt to rotate the drum.
Fixes these symptoms
Installation Instructions
Gregory from Princeton Junction, NJ
Control switch did not function and one burner worked only occasionally
First, I used the PatrSelect website, which has great prices, and has helpful diagrams. Once I had all the parts, I worked with my wife to turn off the power at our home junction box. Next, I lifted off the cover over the control area of this range. I removed four nuts to lift out the panel that holds the four controls and the fan switch. I removed the wires from the broken controls, removed the two screws holding each control in place, then screwed the new ones in place. I would recommend trimming the posts on the controls to the correct size before screwing them in place, because it is easier to grip them and not bend them when they are not mounted. I reconnected the wires and replaced the panel. For the "receptacle", I followed the instructions provided regarding cutting the wire and placing the wire nut and heat shrink tubing. I opened the unit that houses the burners to get easy access. Read more...
Your Price
$11.92
   In Stock
RCA Drip Bowl - 6 Inch
★★★★★
★★★★★
23 Reviews
PartSelect Number PS244697
Manufacturer Part Number WB32X107
The drip bowl on your range is designed to catch any spills that may occur when cooking. This drip bowl is chrome in color and is 6 inches in diameter. The chrome drip bowl is intended for use with rolled, terminal-style plug-in surface element units. The drip bowl is located beneath the surface element, so you will need to remove the element prior to swapping out the old drip bowl for a new one. Many of our customers have rated this repair as easy, and you will not require any tools to complete it. This part is sold individually.
Installation Instructions
Anthony from Mpls, MN
belt broken, pulley worn out
Removed 4 screws from top of control panel , remove 2 from back to lossen top of dryer. Removed rear lower access cover,6 screws on back of dryer exposing pulley and tensioner, remove broken belt and vaccuumed out a ton of lint , removed pulley and tensioner and replaced. From the front remove 4 screws and take off front of dryer, disconnecting several wires, again vaccumed out lint, lifter drum evough to replace belt. Reassembled Read more...
Your Price
$32.83
   In Stock
RCA Retainer Bar End Cap - Left or Right Side
★★★★★
★★★★★
11 Reviews
PartSelect Number PS299562
Manufacturer Part Number WR2X9144
Sold individually.
Installation Instructions
rose from cleveland, OH
the little plastic thingy's were broken
I took the broken part off the bar, put the new part on the bar, snapped it into the fridge, threw the old part out, opened the fridge admired my work, while I was ther I grabbed a beer....couldnt have gone better. Read more...
Your Price
$31.89
   In Stock
RCA Drive Belt
★★★★★
★★★★★
25 Reviews
PartSelect Number PS2350043
Manufacturer Part Number WE12X10014
This belt has a length of 87 inches, width of 1/4”, flat, with 4 ridges.
Fixes these symptoms
Installation Instructions
Michael from Warwick, RI
the rear drum bearing was worn the dryer became very noisy
i removed the scews just above thr opened dryer door, i was then able to swing the dryer top cover back. i then removed the lower front panel screws ,the the screws securing the front of the dryer ( where the door is ) and removed it. there are just 2 wires to disconnect. after the front is removed you gain full access for drum removal, remove the belt make sure the wires are not in the way and remove the drum.i also used a vacuume to clean the inside of the dryer. the front drum slides are very easy to replace only 2 screws each.remove old parts install new parts then just put the dryer back together in the reverse order i took it apart. after re-assembly i turned the dryer on it was so quiet running my wife and dogs were very happy. ps. i just want to thank the people at partselect for having all my parts in stock and for the speed in which i received them. other than having to repair my dryer it was a very pleasant experiance. Read more...

RCA Appliance Types

Popular RCA Models

Below are the most popular RCA models we have. Enter your model number in the search box to find your model.