GE Parts

GE Appliance Parts

Popular GE Parts

Your Price
$27.00
   In Stock
GE Temperature Sensor
★★★★★
★★★★★
63 Reviews
PartSelect Number PS304103
Manufacturer Part Number WR55X10025
This sensor (Temperature Sensor, Thermistor, Refrigerator Temperature Sensor) sends the temperature reading of the compartment to the control board. If you notice your refrigerator is too warm, too cold, or not defrosting properly, then there may be a problem with your sensor. The temperature sensor can break from material fatigue or through normal use, and should be replaced. It is attached to the evaporator and control housing in your appliance. It measures approximately 1.25 inches long with 18 inch wire leads, and is constructed out of plastic. This part comes in white, beige. It includes the sensor, with wire leads.
Fixes these symptoms
  • Doesn’t stop running
  • Freezer not defrosting
  • Freezer section too warm
  • See more...
Installation Instructions
Gerald from San Clemente, CA
Fridge too warm, evaporator icing up
After replacing the defrost heater, main board and thermistor I still had the same problem. Called a repair guy and he (with the help of GE on the phone) diagnosed that the temperature sensor was bad. So I ordered from partselect and installed it and it fixed the problem. Been good for a couple months (knocking on wood). To install I had to cut the 2 wires to the old sensor, crimp the 2 new wires on and snap the new sensor to the clip on the evaporator. Very easy. Make sure you seal the ends of the wire crimps so moisture doesn't get in and corrode the connection. Read more...
Your Price
$36.13
   In Stock
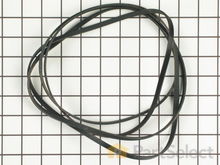
GE BELT DRIVE
★★★★★
★★★★★
163 Reviews
PartSelect Number PS16542496
Manufacturer Part Number WE03X29897
This Drive Belt is 89.5" long and comes in black, featuring four ribs on the inside for a better grip. This is a long belt that wraps all the way around the dryer drum, around a tension pulley, and then around the drive motor pulley, allowing all the parts to work together, spinning the drum as the motor rotates. If the drum will not turn when the dryer is turned on the belt is likely broken. It is common for belts to stretch or become brittle over time, which is what leads to the breakage. If broken, it should be replaced; the drum simply cannot spin without this belt. Refer to your model number and user manual to check if this part is right for you. Ensure you use work gloves to protect your hands from sharp internal parts during this repair. Please note: When comparing the length of your old belt to the length of the belt as stated here, remember that a small amount of stretching and contortion may occur with belts over time for a range of different reasons. Unless your belt is drastically different in length, this belt is what you are looking for despite any small inaccuracies. You will need to remove power to your appliance, remove the main panel, and access the motor drive to slip your new belt back into place.
Fixes these symptoms
Installation Instructions
Edwin from Seattle, WA
Dryer making grinding noises
We live in a Condominium, space is tight especially in the Utility room where the washer/dryer are located. Turned dryer breaker off at the electical panel.
Removed the top cover and front assembly w/door and front drum support, right where the unit was located. Had to gain rear access to loosen drum drive belt so undid the dryer vent hose to floor connection through a front acess hole. Moved the unit out to the breakfast nook as well as disconnecting the power cable from the wall socket. Removed the rear access panel covers and unhooked the drive belt. At the front removed the top screws off the lower cross member to allow spreading of the side covers to allow the removal of the drum. Removed drum and found the bearing bushing gone, reduced to powder.
Using the supplied instuction sheet, replaced the rear bearing assembly, replaced the drum after vacumming the whole interior and started the reassembly of the unit using the new belt and moved the unit back into place. Reconnected the power cable and dryer vent then lastly replaced the lint filter and selector knob. Closed the breaker and turned on the machine, no noise!!!
Incidently I am 78 years old. Thanks PartSelect.
Read more...
Your Price
$12.98
   In Stock
GE Light Bulb - 40W
★★★★★
★★★★★
7 Reviews
PartSelect Number PS217532
Manufacturer Part Number 40A15
This 40-Watt light bulb is sold individually and is a genuine OEM replacement option for your home appliances. It is specially designed to withstand extreme temperatures, so this bulb is compatible with a variety of appliance types including refrigerators, ranges, microwaves, and dryers. It features a frosted glass bulb with a standard metal socket base, which allows you to easily unscrew the burnt-out light and twist the new bulb into place. Depending on your appliance, there may be a guard or cover protecting the lightbulb, in which case you may require additional tools to remove the cover. We recommend disconnecting the power supply to your appliance before changing the lightbulb.
Installation Instructions
J. Douglas from Grass Valley, CA
Broken plastic parts
Cleaned the refrigerator as the old parts were removed. Installed new parts as the old parts were removed so as to easily identify the replacement parts. Very easy and wife was extremely happy after old plastic parts self destructed over a period of months and refrigerator was essentially unusable on the bottom two drawers. Read more...
Your Price
$216.23
   In Stock
GE Ice Maker
★★★★★
★★★★★
76 Reviews
PartSelect Number PS1993870
Manufacturer Part Number WR30X10093
This 10 by 5 inch ice maker (Electromechanical Icemaker Kit, Ice Maker Assembly) produces ice. This particular model will produce seven crescent shaped cubes every cycle. It is constructed of plastic and metal, and comes in black/white. This kit includes a set of installation instructions, a 4-pin round plug-in connector, 6 post plug-in connectors, tube and fill cup. The ideal temperature of a freezer is zero degrees Fahrenheit. If the temperature in your freezer is at an appropriate level yet ice is still not being made, it could be an issue with the water inlet valve or your ice maker assembly. If you determine it is the ice maker, this is the replacement you need. The ice maker can break from normal wear and accidental damage. Ice makers will need to be replaced every 3-10 years depending on the frequency of usage and water quality. This model is mounted on the freezer wall.
Fixes these symptoms
  • Ice maker dispenses too little ice
  • Ice maker dispenses too much ice
  • Ice maker not making ice
  • See more...
Installation Instructions
Michael from Bradenton, FL
ice maker not working properly and door seal worn
Two screws held the icemaker on. You do not even have to take them all the way out to remove the IM. Replacement of the water valve was just as easy except they (parts manufacturer) updated the flange nut with a compression fitting and it took me a minute looking at it before I realize what was going on. The door seal could not be easier, no tools just a few minutes of time Read more...
Your Price
$18.58
   In Stock
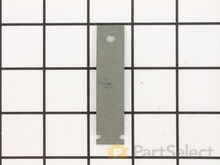
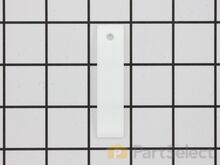
GE Drum Bearing Slide - White (Sold individually)
★★★★★
★★★★★
157 Reviews
PartSelect Number PS755842
Manufacturer Part Number WE1M504
This authentic, white Drum Bearing Slide, also known as the bearing drum slide, glide, or pad, is a plastic, easy-to-install part for your dryer. It replaces the dryer's front drum slide to allow for easier movement. You'll know if this part is an issue if your dryer is unable to tumble properly or is very noisy. Damage can come from regular use. The part attaches to the outermost side of the bearing. Check both slides for signs of wear, because they often wear at the same rate, and should be replaced at the same time; there are 2 of these particular slides per dryer. This part is sold individually, so you'll need to purchase multiple parts if replacing both at the same time.
Fixes these symptoms
Installation Instructions
Matthew from Plainfield, IL
Due to over loading of the dryer the drum ruined the slides and was making a bad noise due to plastic rubbing plastic
It was pretty easy. After already taking apart the dryer to install a new belt I knew exactly my plan of action. I removed the two screws that hold the top panel of the dryer to the front panel. I then removed the top panel and removed the screws that hold the front to each side panel. I than pulled the front away from the cabinet and drum. I put the new slides in place and installed a new felt strip. I put it back together and that was that. Very easy. Read more...
Your Price
$14.29
   In Stock
GE Drum Bearing Slide - Green (Sold individually)
★★★★★
★★★★★
27 Reviews
PartSelect Number PS6447706
Manufacturer Part Number WE1M1067
This original equipment manufacturer Drum Bearing Slide is a plastic, green, easy-to-install part for your dryer. It replaces the dryer's front drum slide to allow for easier movement. You'll know if this part is an issue if your dryer is unable to tumble properly or is very noisy. Damage can come from regular use. As the slides start to break down it may cause your dryer to make noise or not dry clothes in the usual amount of time. You will need to purchase two for both sides of your dryer. They attach to the outer-most sides of the bearing. The manufacturer recommends replacing both slides at the same time. Take this opportunity to clean out the lint and dust in the dryer, to keep it running smoothly. This is a genuine replacement part that comes directly from the manufacturer. This item is sold individually. The part attaches to the outermost side of the bearing. Although this part is denoted as being "Green" in its title, many users and technicians have noted that its true colour is closer to a dark gray or black.
Fixes these symptoms
Installation Instructions
Matthew from Plainfield, IL
Due to over loading of the dryer the drum ruined the slides and was making a bad noise due to plastic rubbing plastic
It was pretty easy. After already taking apart the dryer to install a new belt I knew exactly my plan of action. I removed the two screws that hold the top panel of the dryer to the front panel. I then removed the top panel and removed the screws that hold the front to each side panel. I than pulled the front away from the cabinet and drum. I put the new slides in place and installed a new felt strip. I put it back together and that was that. Very easy. Read more...
Your Price
$73.07
   In Stock
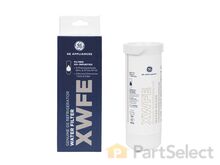
GE Refrigerator Ice and Water Filter
★★★★★
★★★★★
76 Reviews
PartSelect Number PS8746144
Manufacturer Part Number MWFP
This OEM ice and water filter fits side-by-side and bottom-freezer GE models. The most common reason you would need to change this part is if you have never updated your model and it is no longer filtering your water. This also may lead to your refrigerator not dispensing water or ice properly. Manufacturers recommend you change your filter every six months to ensure it properly filters impurities. Depending on the model, a red light might also indicate that the filter is due for a replacement. Note: As per the manufacturer, this is an updated water filter. If you have never installed the updated part or your old model was made by Culligan, you may need the adapter to install the filter. See related parts. This filter is sold individually This filter is located inside the refrigerators upper right corner. It is common for water to drip from the dispenser when being changed so place a cloth underneath before you begin this repair. To remove the filter, turn it to the left until it releases without pulling down. Fill the new filter with tap water to prepare it. Position the new filter into the holder taking note of the arrows. The arrow on the front should be facing out. Gently push up on the filter and turn it to the right to secure it. Do not over-tighten. To release air in the system run 1-1/2 gallons of water through it. If your model has a reset button, press and hold this for a few seconds to reset it. Adapter, PartSelect #: PS220347
Fixes these symptoms
  • Fridge too warm
  • Ice maker dispenses too little ice
  • Ice maker not making ice
  • See more...
Installation Instructions
Fred from River Ridge, LA
Ice Maker stopped dispensing ice through Ice Maker Dispensor.
After taking Ice Maker's ice collection container out, I noticed that the plastic cup drive was broken. I did a websearch for repair and replacement parts for our GE refrigerator. I found PartSelect website easy to navigate and find the replacement part necessary...and placed an order.

Once I received the shipment, I placed the Cup Drive into position and used the flat edge of a knife to allow the Cup Drive to slide into the tight-fitting position necessary. After positioning into place, I placed the ice collection bin back into the freezer...turned the ice-maker back on...and waited for ice to be made. A day later, the ice maker had produced enough ice to test the ice maker's dispensing mechinism. The cup drive worked perfectly...and ice began to be dispensed. The dispensor has been working ever since.

I also replace the ice and water filter...another very easy task...of unscrewing the old and replacing with the new filter. After replacing the filter, I let the water dispensor run for 2 minutes to flush all air out the system. The water dispensor work perfectly.
Read more...
Your Price
$8.56
   In Stock
GE Light Switch
★★★★★
★★★★★
59 Reviews
PartSelect Number PS8758429
Manufacturer Part Number WR23X10725
The interior light of your refrigerator is controlled by a switch that is activated when the door is opened and closed. If your refrigerator light will not turn on, there could be an issue with the switch. The switch is spring loaded and is a generally closed type of switch meaning there should be no continuity when the button is depressed, and continuity through the switch when the button is not depressed. This plastic, white, OEM switch is sourced directly from the manufacturer, is sold individually and is easy to replace. The repair usually takes less than 15 minutes and requires a flat blade screwdriver and needle nose pliers.
Fixes these symptoms
Installation Instructions
Jonathan from Lilburn, GA
Sticking Light Switch
I applied some tips learned by reading other reviews. So before I started I grabbed my trusty vise grip pliers and a small screw driver. I locked onto the switch actuator, the part that the refrigerator door pushes in, with the vise grips and pulled on it just hard enough to get the screw driver inserted in the right side to push in the catch clip so the switch could be pulled out further each time the catch clip was depressed to the next detent. Then I used the screw driver on the left site to encourage the switch past the detents on the left and very quickly the switch was out of the mount. The wires from the refrigerator pulled out with the old switch. I unplugged the old switch from the wires and plugged in the new switch and shoved the new switch back into the mount, wiggled it a couple of times to make sure it was secure and the job was done. Once I applied the vise gripes at first, the whole job took less than a minute. Read more...
Your Price
$11.56
   In Stock
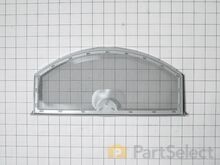
GE FELT TRAP DUCT
★★★★★
★★★★★
42 Reviews
PartSelect Number PS12722961
Manufacturer Part Number WE09X27634
This is a duct felt seal for a dryer. The duct felt seal allows the front-load dryer drum to glide smoothly on the front panel. Your dryer will not function properly if the drum felt seal is compromised. Disconnect power to the dryer before completing this repair. You will need to remove the front of the dryer to gain access to the felt seal. This felt seal may differ in appearance from your original but will function the same as your original. This is an OEM replacement part that is sourced directly from the authentic manufacturer.
Fixes these symptoms
Installation Instructions
Matthew from Plainfield, IL
Due to over loading of the dryer the drum ruined the slides and was making a bad noise due to plastic rubbing plastic
It was pretty easy. After already taking apart the dryer to install a new belt I knew exactly my plan of action. I removed the two screws that hold the top panel of the dryer to the front panel. I then removed the top panel and removed the screws that hold the front to each side panel. I than pulled the front away from the cabinet and drum. I put the new slides in place and installed a new felt strip. I put it back together and that was that. Very easy. Read more...
Your Price
$13.21
   In Stock
GE Evaporator Fan Grommet - Red
★★★★★
★★★★★
20 Reviews
PartSelect Number PS963756
Manufacturer Part Number WR02X12008
If you notice that your refrigerator or freezer is noisy or too warm, you may need to replace the evaporator fan grommet. This part is red in color, and is about 1 inch in diameter. The evaporator fan grommet is located behind the evaporator fan cover in the back of the freezer. You will need to remove the evaporator fan cover to access the evaporator fan and complete this repair. Before you begin this repair, ensure the power to the refrigerator is disconnected. You will need a pair of needle nose pliers, a small flat blade screw driver and both a 1/4 and 5/16-inch nut driver to complete this repair.
Fixes these symptoms
  • Clicking sound
  • Freezer section too warm
  • Fridge too warm
  • See more...
Installation Instructions
alex from rohnert park, CA
evaporator fan making lots of noise
the repair was really easy!!! took longer to put the little clip on the fan part than it was to install the whole moter and put everthing back together

save money do it yourself.....
Read more...

GE Appliance Types

Popular GE Models

Below are the most popular GE models we have. Enter your model number in the search box to find your model.