GE Dryer Parts
Find your part
Enter your model number or a part number and click "Search"
Popular GE Dryer Parts
Your Price
$30.26
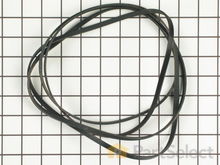
BELT DRIVE
Removed the top cover and front assembly w/door and front drum support, right where the unit was located. Had to gain rear access to loosen drum drive belt so undid the dryer vent hose to floor connection through a front acess hole. Moved the unit out to the breakfast nook as well as disconnecting the power cable from the wall socket. Removed the rear access panel covers and unhooked the drive belt. At the front removed the top screws off the lower cross member to allow spreading of the side covers to allow the removal of the drum. Removed drum and found the bearing bushing gone, reduced to powder.
Using the supplied instuction sheet, replaced the rear bearing assembly, replaced the drum after vacumming the whole interior and started the reassembly of the unit using the new belt and moved the unit back into place. Reconnected the power cable and dryer vent then lastly replaced the lint filter and selector knob. Closed the breaker and turned on the machine, no noise!!!
Incidently I am 78 years old. Thanks PartSelect. Read more...
PartSelect Number PS16542496
Manufacturer Part Number WE03X29897
This Drive Belt is 89.5" long and comes in black, featuring four ribs on the inside for a better grip. This is a long belt that wraps all the way around the dryer drum, around a tension pulley, and then around the drive motor pulley, allowing all the parts to work together, spinning the drum as the motor rotates. If the drum will not turn when the dryer is turned on the belt is likely broken. It is common for belts to stretch or become brittle over time, which is what leads to the breakage. If broken, it should be replaced; the drum simply cannot spin without this belt. Refer to your model number and user manual to check if this part is right for you. Ensure you use work gloves to protect your hands from sharp internal parts during this repair. Please note: When comparing the length of your old belt to the length of the belt as stated here, remember that a small amount of stretching and contortion may occur with belts over time for a range of different reasons. Unless your belt is drastically different in length, this belt is what you are looking for despite any small inaccuracies. You will need to remove power to your appliance, remove the main panel, and access the motor drive to slip your new belt back into place.
Fixes these symptoms
- No heat or not enough heat
- Noisy
- Shuts off too soon
- See more...
Installation Instructions
Edwin from Seattle, WA
Dryer making grinding noises
We live in a Condominium, space is tight especially in the Utility room where the washer/dryer are located. Turned dryer breaker off at the electical panel. Removed the top cover and front assembly w/door and front drum support, right where the unit was located. Had to gain rear access to loosen drum drive belt so undid the dryer vent hose to floor connection through a front acess hole. Moved the unit out to the breakfast nook as well as disconnecting the power cable from the wall socket. Removed the rear access panel covers and unhooked the drive belt. At the front removed the top screws off the lower cross member to allow spreading of the side covers to allow the removal of the drum. Removed drum and found the bearing bushing gone, reduced to powder.
Using the supplied instuction sheet, replaced the rear bearing assembly, replaced the drum after vacumming the whole interior and started the reassembly of the unit using the new belt and moved the unit back into place. Reconnected the power cable and dryer vent then lastly replaced the lint filter and selector knob. Closed the breaker and turned on the machine, no noise!!!
Incidently I am 78 years old. Thanks PartSelect. Read more...
Your Price
$17.95
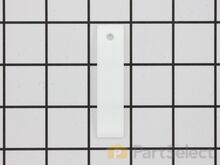
Drum Bearing Slide - White
PartSelect Number PS755842
Manufacturer Part Number WE1M504
This authentic, white Drum Bearing Slide, also known as the bearing drum slide, glide, or pad, is a plastic, easy-to-install part for your dryer. It replaces the dryer's front drum slide to allow for easier movement. You'll know if this part is an issue if your dryer is unable to tumble properly or is very noisy. Damage can come from regular use. The part attaches to the outermost side of the bearing. Check both slides for signs of wear, because they often wear at the same rate, and should be replaced at the same time; there are 2 of these particular slides per dryer. This part is sold individually, so you'll need to purchase multiple parts if replacing both at the same time.
Fixes these symptoms
- Marks left on clothes
- No heat or not enough heat
- Noisy
- See more...
Installation Instructions
Matthew from Plainfield, IL
Due to over loading of the dryer the drum ruined the slides and was making a bad noise due to plastic rubbing plastic
It was pretty easy. After already taking apart the dryer to install a new belt I knew exactly my plan of action. I removed the two screws that hold the top panel of the dryer to the front panel. I then removed the top panel and removed the screws that hold the front to each side panel. I than pulled the front away from the cabinet and drum. I put the new slides in place and installed a new felt strip. I put it back together and that was that. Very easy.
Read more...
Your Price
$13.80
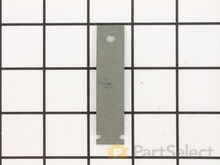
Drum Bearing Slide - Green
PartSelect Number PS6447706
Manufacturer Part Number WE1M1067
This original equipment manufacturer Drum Bearing Slide is a plastic, green, easy-to-install part for your dryer. It replaces the dryer's front drum slide to allow for easier movement. You'll know if this part is an issue if your dryer is unable to tumble properly or is very noisy. Damage can come from regular use. As the slides start to break down it may cause your dryer to make noise or not dry clothes in the usual amount of time. You will need to purchase two for both sides of your dryer. They attach to the outer-most sides of the bearing. The manufacturer recommends replacing both slides at the same time. Take this opportunity to clean out the lint and dust in the dryer, to keep it running smoothly. This is a genuine replacement part that comes directly from the manufacturer. This item is sold individually. The part attaches to the outermost side of the bearing. Although this part is denoted as being "Green" in its title, many users and technicians have noted that its true colour is closer to a dark gray or black.
Fixes these symptoms
- Marks left on clothes
- No heat or not enough heat
- Noisy
- See more...
Installation Instructions
Matthew from Plainfield, IL
Due to over loading of the dryer the drum ruined the slides and was making a bad noise due to plastic rubbing plastic
It was pretty easy. After already taking apart the dryer to install a new belt I knew exactly my plan of action. I removed the two screws that hold the top panel of the dryer to the front panel. I then removed the top panel and removed the screws that hold the front to each side panel. I than pulled the front away from the cabinet and drum. I put the new slides in place and installed a new felt strip. I put it back together and that was that. Very easy.
Read more...
Your Price
$11.17
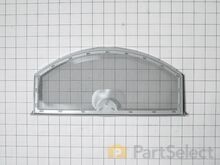
FELT TRAP DUCT
PartSelect Number PS12722961
Manufacturer Part Number WE09X27634
This is a duct felt seal for a dryer. The duct felt seal allows the front-load dryer drum to glide smoothly on the front panel. Your dryer will not function properly if the drum felt seal is compromised. Disconnect power to the dryer before completing this repair. You will need to remove the front of the dryer to gain access to the felt seal. This felt seal may differ in appearance from your original but will function the same as your original. This is an OEM replacement part that is sourced directly from the authentic manufacturer.
Fixes these symptoms
- Marks left on clothes
- No heat or not enough heat
- Noisy
- See more...
Installation Instructions
Matthew from Plainfield, IL
Due to over loading of the dryer the drum ruined the slides and was making a bad noise due to plastic rubbing plastic
It was pretty easy. After already taking apart the dryer to install a new belt I knew exactly my plan of action. I removed the two screws that hold the top panel of the dryer to the front panel. I then removed the top panel and removed the screws that hold the front to each side panel. I than pulled the front away from the cabinet and drum. I put the new slides in place and installed a new felt strip. I put it back together and that was that. Very easy.
Read more...
Your Price
$61.04
Front Drum Bearing
PartSelect Number PS960316
Manufacturer Part Number WE3M26
This Front Drum Bearing (Top Bearing, Dryer Drum Front Support Bearing, Drum Support Bearing, Dryer Drum Glide Bearing) holds the drum bearing and slides for the drum to turn on. The front drum bearing attaches onto the inside of the dryer front panel. When this part fails, the drum may no longer turn freely, make odd sounds, and not dry properly due to the drum no longer sealing. This part needs to be replaced if it is broken (often due to normal wear and tear), no longer able to hold the drum bearing slide securely, or has been eroded by the drum movement. This part is about 10 inches in height and 22 inches in width, and comes in white plastic. Sold individually.
Fixes these symptoms
- Marks left on clothes
- Noisy
- Takes too long to dry
- See more...
Installation Instructions
Daniel from Chicago, IL
Dryer was squeeling when running.
I removed the two screws at the front above the drum opening (with the dryer door open). The top panel then lifts off. I removed the screw at each side that holds the front panel to the side panels, tilted the front panel forward, which disengages the front of the drum from the front drum glide bearing. I then lifted the front panel slightly, unhooking the bottom of the panel from the dryer base, and swung the front panel aside. I removed the existing top drum bearing guide, which was disintegrated, and snapped in the new bearing guide, with the nylon slide strips installed in the bearing guide. Next pulled out the old felt strip, and pressed the new one in place. I then put the bottom of the front panel back into the bottom of the dryer front, and while lifting the drum to asure it fit over the bearing guide, pushed the front panel back to a vertical position to mate with the side panels. I then replaced the side panel screws, replaced the top, and replaced the front top panel screws.
Read more...
Your Price
$62.80
Rear Drum Bearing Kit
PartSelect Number PS267529
Manufacturer Part Number WE25M40
This rear drum bearing kit includes a shaft, ground strap, bearing, seven screws, and installation instructions. The bearing plate comes with a slot in it for the ground strap. This part helps keep your dryer running as smoothly as possible with as little noise as possible by supporting the back of the dryer drum and reducing friction as the drum rotates. Over time, your drum bearing will wear out, cause your dryer to be noisy, and you will have to replace it. There may be some sharp internal parts, so be sure to wear work gloves during repair.
Fixes these symptoms
- Marks left on clothes
- Noisy
- Will not tumble
- See more...
Installation Instructions
Michael from Warwick, RI
the rear drum bearing was worn the dryer became very noisy
i removed the scews just above thr opened dryer door, i was then able to swing the dryer top cover back. i then removed the lower front panel screws ,the the screws securing the front of the dryer ( where the door is ) and removed it. there are just 2 wires to disconnect. after the front is removed you gain full access for drum removal, remove the belt make sure the wires are not in the way and remove the drum.i also used a vacuume to clean the inside of the dryer. the front drum slides are very easy to replace only 2 screws each.remove old parts install new parts then just put the dryer back together in the reverse order i took it apart. after re-assembly i turned the dryer on it was so quiet running my wife and dogs were very happy. ps. i just want to thank the people at partselect for having all my parts in stock and for the speed in which i received them. other than having to repair my dryer it was a very pleasant experiance.
Read more...
Your Price
$14.00
Light Bulb
PartSelect Number PS10063224
Manufacturer Part Number WE05X20431
This light bulb, also known as a drum lamp, illuminates and lights up the dryer drum when the door is open. If the light bulb in the dryer is burnt out or lighting is inconsistent, replacing it can solve this problem. No tools are required for this replacement. To repair, first locate the top section in the interior of the dryer and check the bulb. Next, unscrew the bulb by making three to four turns. Pro tip: the bulb cannot be screwed straight in, instead lean it at a 45-degree angle. Refer to the diagram provided by the manufacturer for further instruction and guidance. Remember to unplug the dryer from the power source for your safety.
Installation Instructions
Daniel from Chicago, IL
Dryer was squeeling when running.
I removed the two screws at the front above the drum opening (with the dryer door open). The top panel then lifts off. I removed the screw at each side that holds the front panel to the side panels, tilted the front panel forward, which disengages the front of the drum from the front drum glide bearing. I then lifted the front panel slightly, unhooking the bottom of the panel from the dryer base, and swung the front panel aside. I removed the existing top drum bearing guide, which was disintegrated, and snapped in the new bearing guide, with the nylon slide strips installed in the bearing guide. Next pulled out the old felt strip, and pressed the new one in place. I then put the bottom of the front panel back into the bottom of the dryer front, and while lifting the drum to asure it fit over the bearing guide, pushed the front panel back to a vertical position to mate with the side panels. I then replaced the side panel screws, replaced the top, and replaced the front top panel screws.
Read more...
Your Price
$32.01
Idler Pulley Wheel
PartSelect Number PS265721
Manufacturer Part Number WE12X83
A dryer's idler pulley wheel serves to help the belt to rotate the drum.
Fixes these symptoms
- Noisy
- Will Not Start
- Will not tumble
- See more...
Installation Instructions
Anthony from Mpls, MN
belt broken, pulley worn out
Removed 4 screws from top of control panel , remove 2 from back to lossen top of dryer. Removed rear lower access cover,6 screws on back of dryer exposing pulley and tensioner, remove broken belt and vaccuumed out a ton of lint , removed pulley and tensioner and replaced. From the front remove 4 screws and take off front of dryer, disconnecting several wires, again vaccumed out lint, lifter drum evough to replace belt. Reassembled
Read more...
Your Price
$15.08
Door Latch
PartSelect Number PS3502777
Manufacturer Part Number WE1M1011
This door latch is designed for your dryer, and is mounted to the dryer frame. The door latch holds the door of your dryer closed while the machine is operating. If your dryer door is not catching on the door strike, and will not stay closed, you may need to replace the door latch. This part is square in shape, and is approximately 3/4-inch in length, by 3/4-inch in width. The part is made of white plastic with a metal tab. To access the door latch, you will need to remove the top and side panels on your dryer. To complete this repair, simply pop the damaged door latch out of position, and snap the new one into place.
Fixes these symptoms
- Door won’t close
- Shuts off too soon
- Will Not Start
- See more...
Installation Instructions
robert from mount joy, PA
dryer door wont stay shut
pulled out door striker anddoor latch out with pliers and just pushed in new parts. works like new in under a min.
Read more...
Your Price
$10.62
Door Strike
PartSelect Number PS266893
Manufacturer Part Number WE1X1192
The door strike for your dryer is mounted on the dryer door. It fits into the door latch and keeps the door closed. If the door strike is damaged or missing, the door will not lock properly and not only will this cause the door to swing open, but it won’t allow the dryer to start properly. It is a small piece of metal, about 1 inch in length and is sold individually.
Fixes these symptoms
- Door won’t close
- Will Not Start
- See more...
Installation Instructions
robert from mount joy, PA
dryer door wont stay shut
pulled out door striker anddoor latch out with pliers and just pushed in new parts. works like new in under a min.
Read more...
Appliance Type
Related Parts
- General Electric Dryer Bearings
- General Electric Dryer Belts
- General Electric Dryer Brackets and Flanges
- General Electric Dryer Caps and Lids
- General Electric Dryer Circuit Boards and Touch Pads
- General Electric Dryer Drums and Tubs
- General Electric Dryer Elements and Burners
- General Electric Dryer Filters
- General Electric Dryer Handles
- General Electric Dryer Hardware
- General Electric Dryer Knobs
- General Electric Dryer Latches
- General Electric Dryer Legs and Foots
- General Electric Dryer Motors
- General Electric Dryer Panels
- General Electric Dryer Seals and Gaskets
- General Electric Dryer Sensors
- General Electric Dryer Switches
- General Electric Dryer Thermostats
- General Electric Dryer Timers
- General Electric Dryer Valves
- General Electric Dryer Wheels and Rollers
Popular General Electric Dryer Models
Below are the most popular General Electric Dryer models we have. Enter your model number in the search box to find your model.
- DBVH512EF0WW Electric
- GTDP180ED0WW
- GTDP490ED0WS
- DCVH515EF0WW Electric
- GTD42EASJ2WW DRYER
- GTD33EASK0WW ELECTRIC DRYER
- DBXR463ED2WW Electric
- DBSR453EB2WW Electric
- DBSR463EG6WW
- DHDSR46EE1WW Electric
- DHDVH52EF0WW Electric
- DBXR463ED1WW Electric
- DBXR463EG1WW Electric
- DBSR453EB3WW Electric
- DBXR463EG6WW
- GTDP300EM1WS
- DHDSR46EG6WW
- GTDP490ED2WS
- DWSR483EG8WW
- GTDX180ED0WW