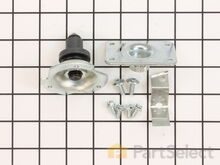
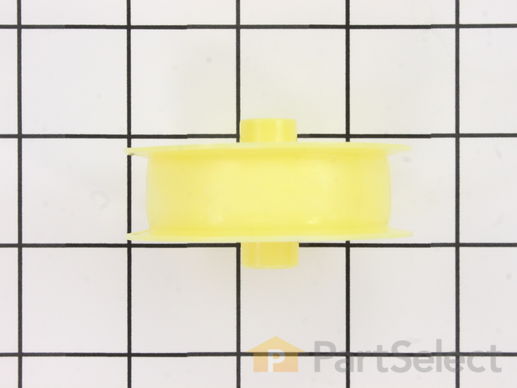
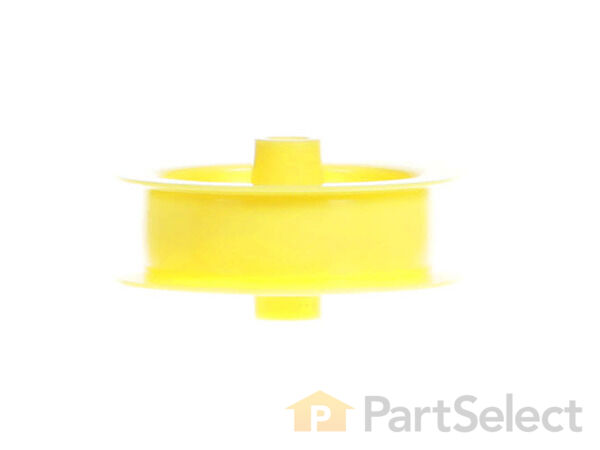
Part Location Diagram of WE12X83 GE Idler Pulley Wheel
See part 216 in the diagram
Replacing your General Electric Dryer Idler Pulley Wheel
( Grid squares measure 1x1 inch )
Customer Service Representative

Get in touch, we're here to help!

Monday to Saturday
8am - 9pm EST

customerservice@partselect.com

Idler Pulley Wheel WE12X83

★★★★★
★★★★★
7 Reviews

Rated by 17 customers 

Easy 

1- 2 hours 

Ratings submitted by customers like you who bought this part.

$ 34.76
  In Stock
Get FREE EconoShip on orders over $100! T&C apply

Get this part fast! Average delivery time for in-stock parts via standard shipping: 1.8 days.

Does this part fit my model?

Need help finding your model number?
PartSelect Number PS265721
Manufacturer Part Number WE12X83
Manufactured by GE for General Electric, Hotpoint, Whirlpool, Kenmore
Product Description

Idler Pulley Wheel Specifications

A dryer's idler pulley wheel serves to help the belt to rotate the drum.
How Buying OEM Parts Can Save You Time and Money

How Buying OEM Parts Can Save You Time and Money

Part Videos

Replacing your General Electric Dryer Idler Pulley Wheel

Replacing your General Electric Dryer Idler Pulley Wheel
Troubleshooting
This part fixes the following symptoms:
Noisy
This part works with the following products:
Dryer.
Part# WE12X83 replaces these:
AP2043227, 275158, WE12X83, WE12M0008, WE12M8, WE12X0080, WE12X0083, WE12X0092, WE12X80, WE12X92
Back to Top
Customer Reviews
Average Rating:
★★★★★
★★★★★
7 Reviews
5.0
Filter By Rating:
  • 5 Stars
    7
  • 4 Stars
    0
  • 3 Stars
    0
  • 2 Stars
    0
  • 1 Star
    0
Sort by:
  • 1
Sorry, we couldn't find any existing reviews that matched. Try using some different or simpler keywords.
  • 1
Customer Repair Stories
 Average Repair Rating: 3.1 / 5.0, 17 reviews. What's this?
Sort by:
  • 1
  • 2
Sorry, we couldn't find any existing installation instruction that matched.
Replace broken drum belt and belt idler pully wheel.
Watched video instruction, paying attention to what it showed in machine. Several virsions of similar designs over the years, look over yours and note access points, take pictures as you go! Just pay attention, it is very logical. Spread the side panels to get the drum in and out, and pay attention to drum axel in back and the bushing it rides in. Be patient, be firm but gentle, no real forcing needed if you are alligned. Be sure the grooves of belt are on the drum, drive wheel on motor, no twists. Reverse order to reassemble. There are several internet videos of models with same basic setup, so look at others if one doesn't show the detail you need to see, or clear some uncertainty. Your local hardware to sorce push fastening for the idler wheel to shaft if you mash it up, they are cheep and several styles will work.
  • David from EASTON, CT
  • Difficulty Level:
    Really Easy
  • Total Repair Time:
    1- 2 hours
  • Tools:
    Pliers, Screw drivers, Socket set, Wrench set
1 person found this instruction helpful.
Was this instruction helpful to you?
Thank you for voting!
Excessive Drum Noise While Drying Clothes
The PartSelect company's "how to" repair videos are OUTSTANDING. Thank you! The videos provided a comprehensive overview of what to expect in terms of clothes dryer disassembly, component replacement and reassembly. The videos were invaluable tutorials for prior-to-disassembly work.

I ordered all the following parts which I felt were likely excessively worn--white and green bearing slides (two of each required), rear drum bearing kit, drive belt, and idler pulley wheel--to address the noisiness issue.

For your consideration: Since our dryer is 12 years old and would be disassembled anyway, I decided to order a new dryer drum belt and idler pulley, to replace these two constant-use items as preventive maintenance.

Two notes.
One: When replacing the dryer drum bearing parts, you need a T25 torx bit to loosen and remove the three torx-head screws. But using my T25 torx bit-head-style screwdriver, it was impossible to loosen them. Fortunately, I had a T25 torx bit, which I could mount in a socket wrench, which DID allow me to loosen those three torx-head screws without damage/breakage. WHEW! Recommend you are similarly prepared!
Two: If you purchase the "Rear Drum Bearing Kit," it already comes with the the "Drum Bearing Sleeve" and "Retainer O-Ring" components I thought I would also need--no need to purchase separately. I returned those two items, unopened, for a refund.

All together, from dryer disassembly to, component replacement, to a thorough vacuuming/cleaning, to reassembly and an operational check, it took about four hours. The dryer is now nearly noiseless again! Success!

I consider myself reasonably good with tools and have a fair amount of electrical and mechanical skill. My wife assisted with extra hands a couple times, too, seriously reducing my frustration level. Depending on your abilities, you'll take more time or less time than the four hours it took me. I'm certain I saved at least a couple hundred dollars by doing this maintenance myself.

In summary, the PartSelect person taking my order was knowledgeable and professional, I received my parts two days after ordering, the parts worked perfectly, and the company refunded my two, unopened returned parts promptly. Overall, a terrific experience. I highly recommend them to any capable do-it-yourselfer.

Thanks, PartSelect!
Other Parts Used:
Drum Bearing Slide - Green (Sold individually) Drive Belt Drum Bearing Slide - White (Sold individually) Rear Drum Bearing Kit Idler Pulley Wheel
  • DENNIS from RALEIGH, NC
  • Difficulty Level:
    A Bit Difficult
  • Total Repair Time:
    More than 2 hours
  • Tools:
    Pliers, Screw drivers, Socket set
6 of 6 people found this instruction helpful.
Was this instruction helpful to you?
Thank you for voting!
Belt broke
Removed drum replaced pulley attached pulley spring to catch on motor bracket put belt on drum put drum in aligned belt and pulley released. Spring replaced door and top
Other Parts Used:
Drum Bearing Slide - Green (Sold individually) Drive Belt Idler Pulley Wheel
  • Richard from LUMBERTON, TX
  • Difficulty Level:
    Very Easy
  • Total Repair Time:
    15 - 30 mins
  • Tools:
    Screw drivers, Wrench (Adjustable)
2 of 2 people found this instruction helpful.
Was this instruction helpful to you?
Thank you for voting!
Dyer made a squealing/screeching noise
I have read other postings which describe most of the procedure very well, so I'm just going to add things that should be considered, which I have not read about here.
Removing the drum proved difficult due to the lack of room on the two sides.The vent blower motor bracket is at the front bottom of the dryer, and when the two screws on either the left or right side are removed, the dryer sides spread more easily and allow the drum to be removed or re-installed more easily.
Next, the rear drum bearing I bought has a rubber o-ring which holds it in place. There is a good chance this o-ring will be hard and brittle after years of service, and will crumble when removed, in order to replace the bearing. I had to run to the local hardware store to get a new o-ring, and could only find one that did was not rated for high heat usage. I presumed once the drum is re-installed that the bearing can't dislodge even with a missing o-ring. I think it just holds the bearing in place while removing and re-installing the drum, but I cannot be certain about this.So if you plan to replace the rear drum bearing, make sure to also order the o-ring that holds it in place. It is doubtful you can re-use the old one depending on the age of your dryer.
Replacing the old white belt tensioning pulley requires the removal and re-installation of a "nut" that has no threads. It is forced on and off and not simple to re-install. The removal was easy simply by using a wrench to "unscrew" it counterclockwise. But re-installing it is another matter. It requires force to get it back onto the shaft. I saw a tip to use a 7/16" socket placed over the nut and hit with a hammer while bracing the bracket from the other side. I did this by used a smaller tool, linesman's pliers, which provided the force needed. Install it about 1/4" past the end of the bracket shaft. Careful, that nut has sharp edges and I ended up bleeding from that process. Three hands would help: one to brace the bracket, one to hold the nut and socket in place, and one to hammer. So good luck with that. Probably there is a smarter way to do this.
If you replace the old white plastic belt tensioning pulley with a new yellow one, it is not simple to understand how to re-install the belt properly. The videos do not do the trick adequately. I did find one on youtube where they removed the dryer side in order to show the belt installation and I had an "aha moment". Since you cannot see the belt, the pulleys, the motor, or anything else during installation, it is not a simple thing to do. Here are my tips: Before re-installing the drum, move the belt tensioning pulley bracket to the right (when facing the dryer front) and you will see a little spot where the bracket will stay to the right when engaged in this spot. Engage the bracket and then proceed to re-install the drum. That way, when you reach under the drum to set the belt properly on the pulleys, you won't have to engage the tensioning bracket without being able to see. Once the belt is in place, carefully remove the bracket from the right holding spot and allow it to move back to the left operating position. I used two hands and don't think I could have done it with one. When the belts are new, they can be naturally twisted and you have to be careful to install the belt with no twist. I had to do it twice to get it right. If someone can take up the top belt slack for you, it's easy to feel the belt underneath the drum and get any twists out.
Next, i had a hard time inserting the drum back into the dryer and finding the hole where the bearing inserts. The problem is, if you are not careful, it's easy to move, bend, or break the heater wires which surround the hole you need to locate blindly and slip the drum bearing into. I did bend those wires, but luckily not break them. In hindsight, applying some masking tape to the rear inside panel of the dryer right at the top, left and right of the drum BEFORE removing the drum would have made it much easier estimating the proper drum height while maneuvering the bearing into the rear hole. Then remove the masking tape when done.
I ordered a new top plastic front bearing that supports the drum in the front. Good thing I did because mine was split about 5" where one set of the green and white sliders install. I had one white "plastic" insert visible. The other one plus the two green bearings were totally missing. No wonder it was squealing.
Finally, the hardest part for me was re-installing the top of the dryer! Take a good look before removing it so you can see exactly how the top fits to the dryer and how the parts need to be lined up first.
Thanks to PartSelect.com! Every part was correct and the installation videos gave me so much help. Also, parts arrived in two days, which surprised me. I will be ordering all parts here.
Other Parts Used:
Duct Felt Seal Drum Bearing Slide - Green (Sold individually) Drive Belt Front Drum Bearing Drum Bearing Slide - White (Sold individually) Drum Bearing Sleeve Idler Pulley Wheel
  • KENNETH from HOLLAND, PA
  • Difficulty Level:
    A Bit Difficult
  • Total Repair Time:
    More than 2 hours
  • Tools:
    Screw drivers, Wrench (Adjustable)
6 of 6 people found this instruction helpful.
Was this instruction helpful to you?
Thank you for voting!
making noise
Replaced idler pulley and belt very simple
Other Parts Used:
Drive Belt Idler Pulley Wheel
  • Lissa from Redlands, CA
  • Difficulty Level:
    Really Easy
  • Total Repair Time:
    Less than 15 mins
41 of 77 people found this instruction helpful.
Was this instruction helpful to you?
Thank you for voting!
squeeling dryer
pulled off door, front panel and rear access panel. unscrewed drum. cleaned every thing. removed and replaced front slides, belt idler pulley and rear bearing. Reassembled everything. Dryer is as quiet as a it was when brand new.
Other Parts Used:
Drive Belt Rear Drum Bearing Front Drum Slide Kit Idler Pulley Wheel
  • Dean from Mahtomedi, MN
  • Difficulty Level:
    Easy
  • Total Repair Time:
    30 - 60 mins
  • Tools:
    Socket set
20 of 33 people found this instruction helpful.
Was this instruction helpful to you?
Thank you for voting!
This is the case of the squeaking clothes eating dryer,
After several weeks of my wife and kids complaining about that monster in the other room squeaking and jumping around eating all of their clothes I decided to investigate. I removed the plug in from the socket, pulled the dryer out a few feet and decide to follow the instructions I had come across on my iPad, the videos that were listed on parts select were very helpful to watch as I started the repair job, I removed the bad components as instructed in the video, looked up my part numbers on parts select web site and placed the order. Wow within 2 days my parts had arrived and I was ready to reassemble the dryer. That task was very simple thanks to those videos, I was so surprised at the amount of detail that was given, even looking at the parts assembly diagram was very detailed, the repair was completed in no time, with in 45 minutes the parts were installed and the dryer was plugged back in and ready for a test run ! My wonderful wife and kids were so happy to see that daddy had tamed that monster and the clothes would no longer be eaten by that big white monster, they jumped for joy!!!! Every one was happy once again!!! It was so simple a cave man could do it Thanks to you parts select we saved money on a service call, saved money on the parts, and most important that monster will no longer jump around squeaking and yelping and begging for more clothes hubby says, parts select your the best!!!! Thank you Roger Ozbun
Other Parts Used:
Duct Felt Seal Front Drum Bearing Rear Drum Bearing Kit Drum Bearing Slide - Green (Sold individually) Drum Bearing Slide - White (Sold individually) Idler Pulley Wheel
  • Roger from Taylorsville, IN
  • Difficulty Level:
    Really Easy
  • Total Repair Time:
    1- 2 hours
  • Tools:
    Pliers, Screw drivers, Wrench (Adjustable)
5 of 8 people found this instruction helpful.
Was this instruction helpful to you?
Thank you for voting!
drum bearing failed
took two screws off the front. They were behind the door. These screws held the top on. Lifted top off and took two screws from the frame holding the front door and panel on. Disconnected three wires and removed front panel. Laid dryer over on right side and removed four screws from bottom and back,two from control panel and removed left side.lifted drum out and removed belt. Removed nut cap and idler pulley wheel. Replaced same. removed three screws holding screen and rear drum bearing to drum. Replaced same. Removed electric heat coils from back and removed receiver for rear drum bearing. Replaced same. Put everything back in reverse order. Works better than new!!
Other Parts Used:
Drive Belt Nut Rear Drum Bearing Kit Idler Pulley Wheel
  • CHARLES from MORGANTON, NC
  • Difficulty Level:
    Easy
  • Total Repair Time:
    30 - 60 mins
  • Tools:
    Nutdriver, Pliers, Screw drivers
17 of 29 people found this instruction helpful.
Was this instruction helpful to you?
Thank you for voting!
squeeking
Opened door and found recessed screws that screw into the top of the dry and removed them and then the front removed very easy. Then took of the plate on the back of the dryer to get to the pulley that the drive belt was on and took the belt off the pulley. The dry drum then slid out very easy, there was 2 of use which helped with the ease of getting the drum out. We replace the bearing and the idler pulley wheel. Vaccummed the lent out and then put it back together. Now it is squeek free.
Other Parts Used:
Rear Drum Bearing Rear Drum Bearing Kit Idler Pulley Wheel
  • carl from vinita, OK
  • Difficulty Level:
    Really Easy
  • Total Repair Time:
    30 - 60 mins
  • Tools:
    Nutdriver, Screw drivers
1 of 3 people found this instruction helpful.
Was this instruction helpful to you?
Thank you for voting!
worn out drum bearing(squeaky)
If you're dis-assembling the dryer panels to remove the drum to acess the bearing located at the rear of the drum,don't hesitate to buy a idler pulley kit and a belt.It's easier to change them now,while it's apart. besides,their all pretty much in the same state of wear! In lew of prying my son away from the computer,an extra set of hands is a help, I used a scrap piece of 4x4 with a 1 inch whole bored in one side to place the bearing end into to steady it to get the screws started. otherwise you need to have 6ft.arms! re-assembly wasn't bad, a magnetic tipped #3 screw driver eliminates the frustration of dropping panel screws down inside the partially assembled body.
Other Parts Used:
Nut Rear Drum Bearing Kit Idler Pulley Wheel
  • Warren from Ballston Lake, NY
  • Difficulty Level:
    A Bit Difficult
  • Total Repair Time:
    30 - 60 mins
  • Tools:
    Screw drivers
47 of 66 people found this instruction helpful.
Was this instruction helpful to you?
Thank you for voting!
  • 1
  • 2
Questions and Answers

We're sorry, but our Q&A experts are temporarily unavailable.
Please check back later if you still haven't found the answer you need.

6 questions answered by our experts.
Sort by:
  • 1
Sorry, we couldn't find any existing answers that matched.Try using some different or simpler keywords, or submit your new question by using the "Ask a Question" button above!
Betty
September 26, 2017
Dryer is making loud nose when dryer is on and running. Will the belt fix this problem and should i get the pulley too.
For model number Dbxr463ed2www
PartSelect logo
Hi Betty, Thank you for your inquiry. If the dryer is making noise There are some parts that you will need to check to see which one is causing the issue. You will need to check the drum glides or slides, the drum bearings, the drum support rollers and shaft, the drive belt, the idler pulley, the felt drum seal, the blower wheel and housing, the baffles and the motor. I hope this helps. Thank you and have a great day!

2 people found this helpful.

Was this helpful?
Thank you for voting!
Traci
November 5, 2019
My dryer makes a squealing noise when there is a heavy load and sometimes with lighter loads. I was thinking it is my ideler pulley but i’m not sure
For model number DCVH680EJOBB
PartSelect logo
Hello Traci, thank you for your question. We would recommend checking the idler pulley wheel, belt, felt seal and the front plastic bearing. It sounds like the heavier loads are putting strain on the drum and causing that noise. I hope this helps.

2 people found this helpful.

Was this helpful?
Thank you for voting!
Lynn
March 10, 2020
I change the drum belt and the felt belt on the lower door and still makes noise what is the problem
For model number DBLR333EE2WW
PartSelect logo
Hi Lynn, thank you for your question. There are a few other parts that are more commonly the issue than the ones you listed above. The parts you may need to replace are two of these: PS755842, two of these: PS6447706, and one of this part: PS960316. Good luck with your repair.

1 person found this helpful.

Was this helpful?
Thank you for voting!
Scott
November 25, 2022
How to open
For model number GFDR485EFIRR
PartSelect logo
Hi Scott, thank you for your inquiry. We have researched your model and attached a relevant video that might help you with your problem. We hope this is what you were looking for!

1 person found this helpful.

Was this helpful?
Thank you for voting!
Betty
September 27, 2017
The dryer makes a squealing noise very loud. When the dryer is running. Sometimes it stops squealing but starts back up until it finishes.
For model number DBXR463ED2WW
PartSelect logo
Hi Betty, Thank you for the great question. The noise could be a number of things. First it is good to check the belt. Make sure it is not rubbing or needs to be replaced.While you are checking the belt you can check the Idler Pulley the belt sits on. Make sure the wheel is in good condition and not damaged. You will also need to check the Front Drum Bearing and the Slides. The slides will wear down over time and if not replaced the tabs on the bearing will also wear off and the bearing will need to be replaced with the slides. There is also a Felt Seal that attaches to the bottom half of the drum on the front. This prevent the drum from rubbing and causing the noise as well. If you are replacing the Front Drum Bearing and Slides it is a good idea to replace the Felt at the same time. If all of these parts check out then the problem would be the Rear Drum Bearing Kit. Hope this helps!

1 person found this helpful.

Was this helpful?
Thank you for voting!
Related Parts:
Carroll
November 8, 2018
Dryer makes a loud noise when drying heavy loads (towels) then as the clothes become dryer the noise stops. Medium to small loads no noise replaced the drum support bearing with glides and slides, new belt, new elt, and replaced the dryer bearing (rear). Saw no visible signs that the idler pulley was bad took the pulley off applied high temp synthetic grease inside pulley and on the arm didn't help. What do you recommend to do next? Thanks, carroll
For model number GE DRYER DBST453EB3WW
PartSelect logo
Hi Carroll, Thank you for your question. There are some other parts that you will need to check to see which ones are causing the issue. There is a felt strip in the back of the drum that runs along the bottom of the tub that may have come off. If it came off and moved towards the front of the drum, it can rub against the metal at the front of the dryer and cause this noise. Another part that may cause the noise you are hearing is the motor. If a load of clothes in the dryer is too heavy it can cause strain on the motor and also cause the noise you are hearing. I hope this helps. Thank you and have a great day!

1 person found this helpful.

Was this helpful?
Thank you for voting!
  • 1
You May Also Need ?
Model Cross Reference
This part works with the following models:
PartSelect Number: PS265721
Manufacturer Part Number: WE12X83
Brand
Model Number
Description
Kenmore
363DDE8109VML
Dryer
Kenmore
363DDE8200GAL
Dryer
Kenmore
363DDE8509RCMA
Dryer - Kenmore Dryer Model 363.DDE8509RCMA (363DDE8509RCMA, 363 DDE8509RCMA) Parts
Kenmore
363DDE8509RCMAA
Dryer
Kenmore
363DDE8509RCMW
Dryer - Kenmore Dryer Model 363.DDE8509RCMW (363DDE8509RCMW, 363 DDE8509RCMW) Parts
Kenmore
363DDE8509RCMWW
Dryer
Kenmore
363DDE9200GAL
Dryer
Kenmore
363DDE9600RCMA
Dryer - Kenmore Dryer Model 363.DDE9600RCMA (363DDE9600RCMA, 363 DDE9600RCMA) Parts
Kenmore
363DDE9600RCMAA
Dryer
General Electric
61140418
Dryer
General Electric
61140419
Dryer
General Electric
61148418
Dryer
General Electric
61148419
Dryer
General Electric
62140418
Dryer
General Electric
62140419
Dryer
General Electric
62148418
Dryer
General Electric
62148419
Dryer
General Electric
62160T3WB
Dryer
General Electric
62160T5WB
Dryer
General Electric
62170419
Dryer
General Electric
62180419
Dryer
General Electric
62188419
Dryer
General Electric
62190419
Dryer
General Electric
62190429
Dryer
General Electric
62190439
Dryer
General Electric
62190449
Dryer
General Electric
62190459
Dryer
General Electric
62190479
Dryer
General Electric
62198419
Dryer
General Electric
62198429
Dryer
Customer Service Representative

Get in touch, we're here to help!

Monday to Saturday
8am - 9pm EST

Contact Customer Service