Hotpoint Range Parts
Find your part
Enter your model number or a part number and click "Search"
Popular Hotpoint Range Parts
Your Price
$12.53
Light Bulb - 40W
PartSelect Number PS217532
Manufacturer Part Number 40A15
Installation Instructions
J. Douglas from Grass Valley, CA
Broken plastic parts
Cleaned the refrigerator as the old parts were removed. Installed new parts as the old parts were removed so as to easily identify the replacement parts. Very easy and wife was extremely happy after old plastic parts self destructed over a period of months and refrigerator was essentially unusable on the bottom two drawers.
Read more...
Your Price
$49.79
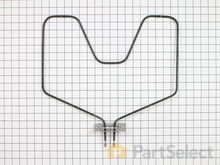
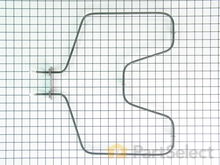
Bake Element - 220V 2300W
PartSelect Number PS249466
Manufacturer Part Number WB44X5082
This bake element goes in the bottom of your range and is 220 volts and 2300 watts. This closed hinged style element with screw-in terminals measures at 15-1/4 inches long and 18-1/4 inches wide. The bottom bake element provides heat for baking. Tools you will need for this repair include pliers, screwdrivers, and an adjustable wrench. Before you begin this installation, remember to shut off the house circuit breaker or unplug your range. For safety purposes we also recommend wearing work gloves.
Fixes these symptoms
- Element will not heat
- Little to no heat when baking
- Little to no heat when broiling
- See more...
Installation Instructions
Wilbur from Taylorville, IL
element quit working
Unhooked electrical wiring from unit and rehooked new unit to electrical wiring.
Read more...
Your Price
$55.68
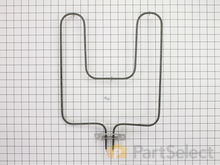
Broil Element
PartSelect Number PS249411
Manufacturer Part Number WB44X173
The broil element is located at the top of the oven and gives off heat in order to bake evenly. If you notice that the element is not heating up or is not cooking evenly it could be because it is broken or burnt out. The depth of the screw-on terminals is 2-3/4 inches and they are 1-1/4 inches apart. Does not include mounting bracket. All you need for this simple repair is small screwdriver. To complete this repair, you will need to first turn the oven off (or shut off the house circuit breaker), remove the two screws that are holding the old element in place, remove the two wires from the old part, and then connect them to the new part and screw back into place.
Fixes these symptoms
- Element will not heat
- Little to no heat when baking
- Little to no heat when broiling
- See more...
Installation Instructions
Harry from Rancho Santa Margarita, CA
Needed to replace cracked bake & broil element
This repair is very simple and only required about 15-20 minutes per unit. After turning off the power to your oven at the main breaker box, it's just a matter of removing two 1/4" screws and pulling out the units. The tricky part is removing the power plugs to the elements and not letting them slip back into the insulation. Once you plug in the new elements and screw them back in you are good to go. Once note, while you have everything out, it is a great opportunity to give your oven a good cleaning.
Read more...
Your Price
$60.15
Flat Style Oven Igniter Kit
PartSelect Number PS231280
Manufacturer Part Number WB13K21
The flat style oven igniter kit comes with a mounting bracket and a wire connector with a plug. The igniter kit is used to light the oven burner. If you notice that your oven will not heat up properly, the igniter kit may need to be replaced. This flat style gas oven igniter has a body length of 3-3/4 inches. When completing this repair, the connector plug might need to be removed and spliced to the range wiring using porcelain wire nuts. Before you begin this repair, be sure to disconnect the power source from the oven, and shut off the gas supply.
Fixes these symptoms
- Element will not heat
- Gas igniter glows, but will not light
- Gas smell
- See more...
Installation Instructions
Sidney from Marysville, CA
The igniter glowed, but never got hot enough to ignite the propane, so I did smell propane.
First, I removed the two screws that held the heat shield in place. Second, I removed the one screw that held a small wire covering. That covering kept the wires inside the back wall of the range. Third, I removed the two screws that held the Igniter Kit, and unplugged it from the back of the range. I then carefully put the new igniter in, and reassembled everything in reverse order. It only took about 30 minutes to do the repair, and 30 minutes of cleaning and wiping of the broiler area. (It is amazing what you see when you take things apart). I should have been wiping things up over the past few months. Overall, a very easy repair. I ordered the part at 12:30 in the afternoon, and FedEx delivered it the next morning at 11:30, all for the regular shipping price of $6.95. VERY HAPPY.....
Read more...
Your Price
$13.45
Light Cover
PartSelect Number PS247415
Manufacturer Part Number WB36X192
This light bulb lens covers the interior light bulb in an oven, range, or stove. No tools are necessary to replace this part. Simply slide off the wire bracket to remove the existing light bulb lens. Disconnect power to your appliance before this repair. It is recommended to check the light bulb while the lens cover is removed in case it needs to be replaced. Be sure to remove all broken glass, if applicable, before installing new lens. This part is sourced directly from the genuine manufacturer, and is sold individually.
Installation Instructions
Edward from Ashland, MA
I Tried to remove Oven Light and got a spark that took out the Control Panel.
Oven light was easy - Snapped the Wire Bail, removed the Glass Protect and removed the buld. Installed new bulb, installed Glass Protect and snapped the Wire Bail. The Control Panel was a little harder and had to remove the 4 screws holding the metal Back Plate cover. I wrote down all the wire connections and then unplugged the wires. I took a 1/4 nutdriver and removed 4 screws holding Control panel in place and removed the Panel. The new control panel did not come with the Switch Face Plate so I removed the old one with a razor blade. The Switch Face Plate had plenty of adhessive so I just aligned the Face Plate with the Control Panel and seated it in place - thankfully it held firmly. I installed the Control Panel with Face Plate into the range and secured it with 4 screws using nutdriver. I plugged the wire connectors into the Control Panel and installed the Metal Back Plate to the range and secured it with 4 screws. Plugged the Range into the sockets and checked it for operation. Everything worked Ok including the new oven light.
Read more...
Your Price
$49.61
INFINITE HEAT SWITCH KIT
2. Lift range lid.
3. Remove back panel. Loosen the 6 - 1/4" nuts, then lift up slightly, which compresses the "latch" at the top middle. Let down and panel comes off easily.
(Note: Do not remove wires yet)
4. Remove control knob from front panel by pulling gently, exposing 2 small tap screws
5. unscrew the 2 small tap screws, freeing the switch.
6. NOTE THE EXISTING WIRING! Each terminal has a letter. Take a photo or drawing for reference, because the new switch's post locations were not the same as the old.
7. In my case I had to replace the terminal block kit with a new one. (don't try the aftermarket one's at Home Depot...bad idea event though they say Hotpoint) so I ran those wires first. Easy removal of old, only one wire clip, then fish the wires through. Secure with tap screw at burner location.
8. Hook up the wires. The ones coming from the burner don't seem to matter which one goes to which post but make sure you're replacing them on the posts that the original were on. What I did was just unhook the old posts one at a time and find the corresponding letter on the new one.
9. Break off stem at length of old switch with pliers. make sure you find where off and on are on the switch. Orient the off at the top, then push through from back of range.
10. Screw the 2 tap screws in, securing the switch.
11. Place the orange retainer oriented with flat side the same as the knob, and push the knob back in place.
12. Close lid, replace back panel
13. Insert drip pan/burner into terminal block and secure in drip pan. If your burner plugs are corroded or exposed, replace the burner as it will short out.
14. Plug in to socket and test before pushing range back into place. Read more...
PartSelect Number PS16216966
Manufacturer Part Number WB21X36771
The infinite switch controls the stove top surface burner. This switch will work with most of the electrical range models with coil burner elements.
Fixes these symptoms
- Element will not heat
- Will Not Start
- See more...
Installation Instructions
Scott from Olathe, KS
Front burner would not heat up
1. Pull out range and unplug from socket.2. Lift range lid.
3. Remove back panel. Loosen the 6 - 1/4" nuts, then lift up slightly, which compresses the "latch" at the top middle. Let down and panel comes off easily.
(Note: Do not remove wires yet)
4. Remove control knob from front panel by pulling gently, exposing 2 small tap screws
5. unscrew the 2 small tap screws, freeing the switch.
6. NOTE THE EXISTING WIRING! Each terminal has a letter. Take a photo or drawing for reference, because the new switch's post locations were not the same as the old.
7. In my case I had to replace the terminal block kit with a new one. (don't try the aftermarket one's at Home Depot...bad idea event though they say Hotpoint) so I ran those wires first. Easy removal of old, only one wire clip, then fish the wires through. Secure with tap screw at burner location.
8. Hook up the wires. The ones coming from the burner don't seem to matter which one goes to which post but make sure you're replacing them on the posts that the original were on. What I did was just unhook the old posts one at a time and find the corresponding letter on the new one.
9. Break off stem at length of old switch with pliers. make sure you find where off and on are on the switch. Orient the off at the top, then push through from back of range.
10. Screw the 2 tap screws in, securing the switch.
11. Place the orange retainer oriented with flat side the same as the knob, and push the knob back in place.
12. Close lid, replace back panel
13. Insert drip pan/burner into terminal block and secure in drip pan. If your burner plugs are corroded or exposed, replace the burner as it will short out.
14. Plug in to socket and test before pushing range back into place. Read more...
Your Price
$44.16
Bake Element - 240V
PartSelect Number PS249424
Manufacturer Part Number WB44X200
This is a 240 volt bake element for your oven or range. The kit comes with two installation screws and the element. The element functions by supplying heat from the bottom of the oven to bake or cook your food. You may need to replace the bake element if your oven is not heating properly. This is a black metal part (Width 13 inches, length 16.5 inches, depth 1-1/2 inches ) which can be installed onto your range with a screwdriver. Installation is rated as "medium" difficulty. This element is the part that heats to allow cooking, and if broken or missing you'll be unable to cook. This part attaches to the lower section of the range. Refer to your model number and user manual to ensure this part is right for you. Each screw gets screwed into each wire terminal with a Phillips screw driver. Hold the wires forward to make sure the wires do not fall back through the rear of the oven. Unplug your appliance or shut off your circuit breaker to the appliance before installing the new part.
Fixes these symptoms
- Element will not heat
- Little to no heat when baking
- Little to no heat when broiling
- See more...
Installation Instructions
Beth from Matthews, NC
Replacment of the bake unit
The hardest part was removing the old nuthead screws off the old bake burner. Once those were off installing the new bake element was simple. One screw in each wire terminal, two hex head screws to hold the unit in place. Works like a charm!
Read more...
Your Price
$8.70
RECEPTACLE PUSH-IN
PartSelect Number PS752188
Manufacturer Part Number WB08T10026
This part is the replacement light socket for your oven. The oven light socket provides power to the light, and at the same time holds the light bulb in place.
Installation Instructions
Richard from Menifee, CA
No problems encountered.
Used nutdriver to remove screws holding cover over oven light socket, unclipped electrical connectors, removed socket by hand, then reversed the foregoing. Easy.
Read more...
Your Price
$11.64
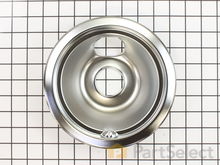
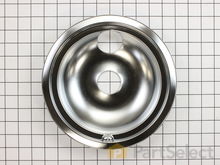
Trim Ring - 8 Inch
Lastly, I've been looking for the correct parts/sizes in stores for years (yes, I should have tried this sooner). I was delighted to finally find a place that actually had the correct parts. Read more...
PartSelect Number PS244479
Manufacturer Part Number WB31X5014
This 8 inch high rise burner trim ring is intended for use with detached style low rise tilt lock surface mount burners on ranges.
Installation Instructions
Cynthia from Tampa, FL
Needed to replace Drip Pans and Trim Rings for old stove
Repair was simple (just lift off the old and put on the new). What was pleasantly surprising was how quickly I received the parts (amazing)! Lastly, I've been looking for the correct parts/sizes in stores for years (yes, I should have tried this sooner). I was delighted to finally find a place that actually had the correct parts. Read more...
Your Price
$118.66
Bake Element - Push On Terminals - 240V
PartSelect Number PS249238
Manufacturer Part Number WB44K10005
The bake element is located on the bottom of the oven. If your oven will not heat properly it may be due to a faulty or damaged baking element. If you can see that the element has been separated or blistered, you should replace the part immediately. If there is no visible damage, turn the oven on and check to see if the element heats evenly. If the element is not heating evenly, or if it is not heating at all, it will need to be replaced. This element is 19 inches wide x 19 inches long, and has male spade push on terminals.
Fixes these symptoms
- Element will not heat
- Little to no heat when baking
- Oven is too hot
- See more...
Installation Instructions
Ronald from Nassau, NY
Lower bake Element would not heat.
First I slid the stove out and unpluged it, then removed two screws,slid out element, disconected two wires, slid new element in to place, pluged two wires in ,put into place and installed two screws, pluged stove back in, and turned on to try. Works perfect.
Read more...
Appliance Type
Related Parts
- Hotpoint Range Brackets and Flanges
- Hotpoint Range Caps and Lids
- Hotpoint Range Circuit Boards and Touch Pads
- Hotpoint Range Doors
- Hotpoint Range Drawers and Glides
- Hotpoint Range Drip Bowls
- Hotpoint Range Elements and Burners
- Hotpoint Range Grates
- Hotpoint Range Handles
- Hotpoint Range Hardware
- Hotpoint Range Hinges
- Hotpoint Range Igniters
- Hotpoint Range Insulations
- Hotpoint Range Knobs
- Hotpoint Range Lights and Bulbs
- Hotpoint Range Racks
- Hotpoint Range Seals and Gaskets
- Hotpoint Range Switches
- Hotpoint Range Thermostats
- Hotpoint Range Trims
- Hotpoint Range Valves
- Hotpoint Range Wire Plugs and Connectors
Popular Hotpoint Range Models
Below are the most popular Hotpoint Range models we have. Enter your model number in the search box to find your model.
- RB787WH1WW Freestanding, Electric
- RB757WH1WW Freestanding, Electric
- RB757BH1WH Freestanding, Electric
- RB757WH4WW Freestanding, Electric
- RA720K5WH
- RA724K1WH Freestanding, Electric
- RB790SH1SA Freestanding, Electric
- RB526DP1WW Freestanding, Electric
- RB526H3WW Freestanding, Electric
- CS980SN1SS
- RB787WB1WW Freestanding, Electric
- RA720K1WH Freestanding, Electric
- RGB745WEH7WW Freestanding, Gas
- RB787BH1BB Freestanding, Electric
- RB787WC5WW Freestanding, Electric
- RB787WC1WW Freestanding, Electric
- RA724K4WH
- RB787WC2WW Freestanding, Electric
- RGB530DEP1WW Freestanding, Gas
- RB757BC2WH Freestanding, Electric