Stove Parts

Shop By Brand

Popular Stove Parts

Your Price
$7.44
  In Stock
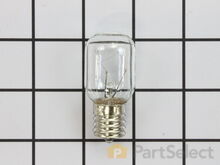
Light Bulb - 40W
★★★★★
★★★★★
(63)
PartSelect Number PS884734
Manufacturer Part Number 8009
This an authentic OEM 40-Watt replacement light bulb, used in a number of household appliances. It is specially designed to withstand extreme temperatures, which is why these replacement bulbs are most often used to light the inside of refrigerators and ranges. It features a standard socket base, which means you simply unscrew the burnt-out bulb and screw in the replacement. Depending on the appliance you may require a screwdriver or nut driver to access the light bulb. We recommend you wear work gloves while handling this replacement part. It is constructed of glass and metal and is sold individually. Depending on the appliance and location of the bulb within it, you may want to consider disconnecting power and using a flashlight for easier access to unscrewing and re-screwing in your bulb during this repair.
Installation Instructions
judie from mays landing, NJ
interior drawers were off their rollers
pulled the washer out and replaces the top roller system on both sides and the replaced the weels and brackets on the bottom drwaer. however i had trouble putting the dish washer back correctly and had to call a repairman to adjust the dishwasher and alighn it to open and close properly. but i did do good inside. i feel it was easy and a success. thank you for having the supplies for us to attempt to repair it on our own. Read more...
Your Price
$19.06
  In Stock
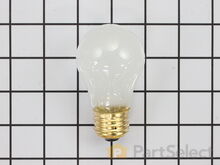
Light Bulb
★★★★★
★★★★★
(11)
PartSelect Number PS12751166
Manufacturer Part Number 316538904
This OEM 40 watt appliance light bulb is used for some ranges, refrigerators, freezers, and microwaves. Simply locate the existing bulb, unscrew it from its socket, and replace with new light bulb. If the existing bulb is broken in the socket, disconnect the power to the refrigerator and use a pair of needle nose pliers to grip the internal fragments of the bulb to unscrew. Replace with the new bulb and reconnect the power to the refrigerator. These bulbs are sold individually and are a commonly replaced part; consider ordering a spare.
Installation Instructions
Colin from Hollis, NY
Ice-Maker and Water Dispenser not working.
First I disconnected the power cord, then removed the screws that held the bracket that holds the base for the water-filer in place. I then disconnected the water lines(intake and outflow). Next I removed the screws that held the water-filter's base in place. I then disconnected the release lock mechanism for the filter and finally removed the water-filter base. I did the reverse to install the new water-filter base. Previously I had tested the intake water line and noticed the water was flowing with enough pressure upto the water-filter's base but no water was exiting thru the outflow line, which leads to the Ice-Maker and Dispenser. I had tried changing the filter but that didn't solve the problem it was then I had realized that the Base was the problem. The actual problem was the spring-loaded valves for both the intake and outflow lines, which had a plastic prong that protrudes out of the base that is triggered by the filter when installed. The two prongs were worn-down so the filter wasn't activating the spring-loaded release valve to let the water thru. As for the light, I just unscrewed it. Read more...
Your Price
$12.53
  In Stock
Light Bulb - 40W
★★★★★
★★★★★
(6)
PartSelect Number PS217532
Manufacturer Part Number 40A15
Installation Instructions
J. Douglas from Grass Valley, CA
Broken plastic parts
Cleaned the refrigerator as the old parts were removed. Installed new parts as the old parts were removed so as to easily identify the replacement parts. Very easy and wife was extremely happy after old plastic parts self destructed over a period of months and refrigerator was essentially unusable on the bottom two drawers. Read more...
Your Price
$67.98
  In Stock
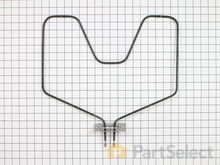
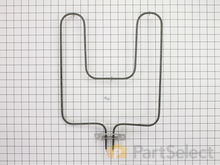
Bake Element
★★★★★
★★★★★
(47)
PartSelect Number PS11750369
Manufacturer Part Number WPW10207397
The bake element is located at the bottom of the oven and gives off heat in order to bake evenly. If you notice that the element is not heating up or is not cooking evenly, it could be because it is broken or burnt out. All you need for this simple repair is a small screwdriver. To complete this repair, you will need to first turn the oven off (or shut off the house circuit breaker), remove the two screws that are holding the old element in place, remove the two wires from the old part, and then connect them to the new part and screw back into place.
Fixes these symptoms
  • Element will not heat
  • Little to no heat when baking
  • Oven not heating evenly
  • See more...
Installation Instructions
Daniel from Cheraw, SC
I broke the Bake Element while cleaning the oven.
I removed the two screws that held the bake element in place. Next I removed the Bake Element. I had to unscrew the oven to go behind it because when one piece off of the element broke, it slide back behind the oven. I pushed the wire back thru the piece holes, connected the Element, and pushed the element with the wires back through the holes. I rescrewed the element in place and the oven. PartSelect helped me to save this year's Christmas. Read more...
Your Price
$25.24
  In Stock
Temperature Sensor
★★★★★
★★★★★
(43)
PartSelect Number PS10059162
Manufacturer Part Number WB21X22134
The temperature sensor, also known as the oven temperature sensor assembly is usually found in the back of the oven. The function of the oven temperature sensor assembly is to measure the temperature inside your oven while it is on and send the temperature back up to the electronic control, which adjusts as necessary. If your oven is having difficulty achieving warmer temperatures and/or keeping warmer temperatures up, you may want to test your temperature sensor. Before you make this repair remember to unplug your range from the power source, and turn off the gas shut off valve.
Fixes these symptoms
  • Element will not heat
  • Little to no heat when baking
  • Little to no heat when broiling
  • See more...
Installation Instructions
Peter from stamford, CT
Oven would go in to a F2 Error
Removed six 1/4" hex nuts on rear of oven. Then through front/inside removed a single 1/4" hex nut to actually remove sensor. Unplug sensor connector, remove. Reversed steps, push oven back in place and plugged in. Tested oven function. Read more...
Your Price
$47.99
  In Stock
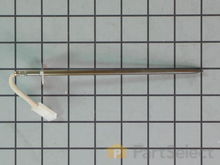
Temperature Sensor
★★★★★
★★★★★
(15)
PartSelect Number PS820208
Manufacturer Part Number 316217002
The oven temperature sensor for your range may also be called a probe. The quick connect on this part may differ than your original piece. If the temperature sensor does not fit you will have to cut off the quick connect, and then wire together with porcelain wire nuts. The function of the oven temperature sensor is to measure the temperature in the oven and signal the other heating components. Before you begin this repair make sure to disconnect the power to the range. The tools required for this installation include a number two Phillips screwdriver or a number two square head screwdriver, and maybe a pair of wire strippers and crimpers.
Fixes these symptoms
  • Element will not heat
  • Little to no heat when baking
  • Oven is too hot
  • See more...
Installation Instructions
Dan from Bellevue, ID
Oven not heating to desired temperature
Replaced clock control by removing surface burner control knobs and plastic nuts, and then the cover over the oven control. Two screw hold the clock in place, after removal and disconnecting the plug-in you can reinstall the new clock control. The Heat Sensor inside the oven will also need to be replaced. It is located inside the oven and attached with two screws; the back of the oven will need to be removed to unplug. Reverse removal procedure and turn the power back on to the stove. Read more...
Your Price
$15.12
  In Stock
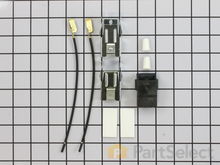
Main Terminal Block Kit
★★★★★
★★★★★
(12)
PartSelect Number PS471605
Manufacturer Part Number 5304409888
Terminal block kits are also known as terminal boards, or terminal strips, and they are found in a wide variety of household appliances. Most often in ranges, wall ovens, and dryers. This kit attaches the power cord to the inner wiring of your appliance. If the terminal block is faulty, your appliance will not get the power it needs to operate properly. When removing the old block pay close attention to the wire placement, this will make installing your new part much easier. If you notice any of the wires or wire terminals are corroded or damaged they will also need to be replaced.
Fixes these symptoms
  • Element will not heat
  • Little to no heat when baking
  • Little to no heat when broiling
  • See more...
Installation Instructions
Timothy from Spring Valley, AL
Cord was not tightened enough by delivery crew.
PF alarm appeared on display. Noticed clicking when cord was moved. Had arced for some time and melted original block. New part slightly different. Only has 3 lugs, old one had six. Stack using washers provided. Take note of colors before disassembly. Use caution while working through access opening. The edges are sharp. Only tools needed are phillips screwdriver, deep socket for lug nuts. Nut driver optional. Hope this is helpful. Read more...
Your Price
$10.52
  Special Order
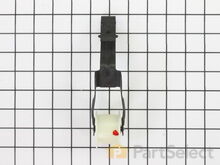
LENS
★★★★★
★★★★★
(5)
PartSelect Number PS16218465
Manufacturer Part Number 5304524341
The Frigidaire light bulb lens covers the interior light bulb in an oven. No tools are necessary to replace this item. After unplugging the appliance, slide off the wire bracket to remove the existing light bulb lens. Be sure to remove all broken glass, if applicable, before installing the new lens. It is recommended to check the state of the light bulb while the lens is off. This part is made of glass. The lens is a genuine Frigidaire part, sourced directly from the manufacturer, and is sold individually.
Installation Instructions
Jim from Harrison, MI
Lower baking element would not heat up.
Your online instructions said to remove the two screws and pull out the heating element about 3 inches and disconnect. When I did this the element came out but not where it was connect to the wire., I could not locate the wire from the front of the oven. I then pulled out the oven from the built in cabinet and removed the rear panel. Then inserted the element with the 2 screws from the front and connect the wires to the element from the back of the oven. Jim Read more...
Your Price
$86.91
  In Stock
Temperature Sensor
★★★★★
★★★★★
(7)
PartSelect Number PS11748765
Manufacturer Part Number WPW10131825
The temperature sensor measures the temperature inside the oven. If your oven is too hot, not heating evenly, is not heating enough when baking, or simply will not start, you could have a faulty temperature sensor. A faulty temperature sensor can be a fire risk. If your sensor is not working properly, you should look to replace it straight away. A failed oven sensor is most often responsible for F3 or F4 error messages on electronically-controlled ovens. Make sure you disconnect the power to your range before you start your repair.
Fixes these symptoms
  • Element will not heat
  • Little to no heat when baking
  • Oven is too hot
  • See more...
Installation Instructions
Nicholas from OWENS X RDS, AL
Over heating oven and uneven baking. Oven thought it was in self cleaning mode.
Sensor replacement was removing 2 screws and gently pulling on old sensor until the clip comes out. Secured the other end of the wires so that it did not fall back inside. Then connected the new sensor clip to the oven wire, then gently returning wire into oven, and then screwing the sensor into place.
The baking element was easier than the sensor. Removed the 2 screws holding the element into the back bottom of the oven, and pulled the element forward to disconnect from clamps. Inserted new element into clamps and screwed it in. ***NOTE that there will be a smell from the new element. This smell is normal. If the smell continues after a couple minutes stop the oven and wait an hour before reattempting.
Read more...
Your Price
$44.16
  In Stock
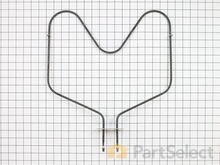
Bake Element - 240V
★★★★★
★★★★★
(101)
PartSelect Number PS249424
Manufacturer Part Number WB44X200
This is a 240 volt bake element for your oven or range. The kit comes with two installation screws and the element. The element functions by supplying heat from the bottom of the oven to bake or cook your food. You may need to replace the bake element if your oven is not heating properly. This is a black metal part (Width 13 inches, length 16.5 inches, depth 1-1/2 inches ) which can be installed onto your range with a screwdriver. Installation is rated as "medium" difficulty. This element is the part that heats to allow cooking, and if broken or missing you'll be unable to cook. This part attaches to the lower section of the range. Refer to your model number and user manual to ensure this part is right for you. Each screw gets screwed into each wire terminal with a Phillips screw driver. Hold the wires forward to make sure the wires do not fall back through the rear of the oven. Unplug your appliance or shut off your circuit breaker to the appliance before installing the new part.
Fixes these symptoms
  • Element will not heat
  • Little to no heat when baking
  • Little to no heat when broiling
  • See more...
Installation Instructions
Beth from Matthews, NC
Replacment of the bake unit
The hardest part was removing the old nuthead screws off the old bake burner. Once those were off installing the new bake element was simple. One screw in each wire terminal, two hex head screws to hold the unit in place. Works like a charm! Read more...

Brands

Popular Stove Models

Below are the most popular Stove models we have. Enter your model number in the search box to find your model.