KitchenAid Stove Parts
Find your part
Enter your model number or a part number and click "Search"
Popular KitchenAid Stove Parts
Your Price
$7.44
Light Bulb - 40W
PartSelect Number PS884734
Manufacturer Part Number 8009
This an authentic OEM 40-Watt replacement light bulb, used in a number of household appliances. It is specially designed to withstand extreme temperatures, which is why these replacement bulbs are most often used to light the inside of refrigerators and ranges. It features a standard socket base, which means you simply unscrew the burnt-out bulb and screw in the replacement. Depending on the appliance you may require a screwdriver or nut driver to access the light bulb. We recommend you wear work gloves while handling this replacement part. It is constructed of glass and metal and is sold individually. Depending on the appliance and location of the bulb within it, you may want to consider disconnecting power and using a flashlight for easier access to unscrewing and re-screwing in your bulb during this repair.
Installation Instructions
judie from mays landing, NJ
interior drawers were off their rollers
pulled the washer out and replaces the top roller system on both sides and the replaced the weels and brackets on the bottom drwaer. however i had trouble putting the dish washer back correctly and had to call a repairman to adjust the dishwasher and alighn it to open and close properly. but i did do good inside. i feel it was easy and a success. thank you for having the supplies for us to attempt to repair it on our own.
Read more...
Your Price
$6.04
Touch-Up Paint - White
PartSelect Number PS385132
Manufacturer Part Number 72017
This touch-up paint can be used on a wide variety of household appliances. It is most often used on washers, dryer, refrigerators, dishwashers, ranges, freezers, trash compactors, or microwaves. It is an 18 ml, or.6 fluid ounces, bottle of touch-up paint. It also features a brush for easy application. This quick-drying, long-lasting paint is perfect for fixing any nicks, scratches, or chips on the exterior of your appliance. This paint is white in color, and provides a durable finish.
Installation Instructions
Michelle from Richardson, TX
Scratches in Surface
This product comes in a bottle with a brush like Liquid Paper. It goes on incredibly easy. A second coat might be needed. I wanted to prevent rust from setting in so I covered the scratches and dings. The paint is a little brighter since my washer is 10 years old but it still looks great.
Read more...
Your Price
$86.91
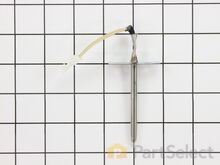
Temperature Sensor
The baking element was easier than the sensor. Removed the 2 screws holding the element into the back bottom of the oven, and pulled the element forward to disconnect from clamps. Inserted new element into clamps and screwed it in. ***NOTE that there will be a smell from the new element. This smell is normal. If the smell continues after a couple minutes stop the oven and wait an hour before reattempting. Read more...
PartSelect Number PS11748765
Manufacturer Part Number WPW10131825
The temperature sensor measures the temperature inside the oven. If your oven is too hot, not heating evenly, is not heating enough when baking, or simply will not start, you could have a faulty temperature sensor. A faulty temperature sensor can be a fire risk. If your sensor is not working properly, you should look to replace it straight away. A failed oven sensor is most often responsible for F3 or F4 error messages on electronically-controlled ovens. Make sure you disconnect the power to your range before you start your repair.
Fixes these symptoms
- Element will not heat
- Little to no heat when baking
- Oven is too hot
- See more...
Installation Instructions
Nicholas from OWENS X RDS, AL
Over heating oven and uneven baking. Oven thought it was in self cleaning mode.
Sensor replacement was removing 2 screws and gently pulling on old sensor until the clip comes out. Secured the other end of the wires so that it did not fall back inside. Then connected the new sensor clip to the oven wire, then gently returning wire into oven, and then screwing the sensor into place. The baking element was easier than the sensor. Removed the 2 screws holding the element into the back bottom of the oven, and pulled the element forward to disconnect from clamps. Inserted new element into clamps and screwed it in. ***NOTE that there will be a smell from the new element. This smell is normal. If the smell continues after a couple minutes stop the oven and wait an hour before reattempting. Read more...
Your Price
$36.00
2 Piece Broiler Pan
shipment & arrival of new parts unbelievably fast....thanks Read more...
PartSelect Number PS971245
Manufacturer Part Number 4396923
This is cookware designed for use in your range or oven. It is a two-piece dish that is used to grill or cook food while the broil function is on, meaning it can withstand high temperatures. This set includes both the pan and the grid. The grid is the top part. The slotted design allows grease to easily drip into to the pan below. Not only does it catch all of the drippings, it also prevents splatter and smoke while cooking. The pan can also be used separately for baking and roasting. This cookware features a durable porcelain finish, which means it is incredibly easy to clean, and is dishwasher safe. It is roughly 1.5 inches deep, and measures approximately 16.5 inches by 12.5 inches. If your two-piece broil plan is lost, rusted, or damaged this is the replacement you need.
Installation Instructions
Lois from Elmer, NJ
Bought house & stove was missing rack & broiler
slid in grooveshipment & arrival of new parts unbelievably fast....thanks Read more...
Your Price
$101.82
Inner Door Glass
PartSelect Number PS11742543
Manufacturer Part Number WP4449259
This inner door glass is a heat resistant part that fits into a stove, oven, wall oven, cooktop, or range as the inner glass panel of the appliance door. The glass panel allows you to see the items being cooked or heated in the appliance. Handle with caution and be sure to use gloves, as the door is heavy and the glass is breakable. Do not replace the glass until the appliance is cool to the touch. This genuine manufacturer part is approximately 20 inches by 10 inches. The inner glass door is sold individually and contains the glass panel only.
Installation Instructions
Robert from Wildwood, MO
Broke the glass panel inside the oven door -- dropped a baking dish on the glass!
Easily removed the door from the oven by releasing clips attached to the door hinge -- very nicely engineered. Removed about 6 philips head screws to allow the door assembly to be taken apart for access to the glass. Lifted out the broken glass, cleaned the inside of the door, installed the new glass, reassembled the door (a two minute project), and reattached the door to the oven. Cleaning the inside of the door took longer than the actual repair!
Read more...
Your Price
$76.98
Oven Rack
PartSelect Number PS11749669
Manufacturer Part Number WPW10179152
This oven rack is chrome in color and is approximately 24 inches wide by 16 inches deep. If your old oven rack is damaged, you should consider replacing it. Many of our customers have determined this repair to be very easy. You will not require any tools to complete it. To replace the oven rack, simply pull the old rack out, and replace it with the new one. Make sure to put the new rack back in the oven with the beveled edge in first. To keep your oven racks clean, we recommend that you pull them out before using the self-cleaning function on your oven.
Installation Instructions
Kevin from Joliet, IL
Replaced our oven racks, becasue I (the husband) forgot to remove them before the "Self-Clean" process and they turned colors just as the instruction manual said they would !!
Easy, pulled out the old dis-colored racks and slid the new ones in. I was VERY happy with the quick receipt of my order. If I ever need parts again,this is where I will go
Read more...
Your Price
$54.09
SOCKT-LITE
of the housing. After you unhook the 3 lead wires
that are attached to the unit. All you have to do is push in on the clips and release the unit. Then you
snap in the new unit. Attach the 3 wire leads, put a
oven bulb in the socket end, and the install the light cover Read more...
PartSelect Number PS16730838
Manufacturer Part Number W11594027
The light socket on your electric range connects the power source to the light bulb. If your oven light is malfunctioning, you may need to replace the light socket. The light socket is located in the back of your range, so in order to access it you will need to remove the back panel. Many of our customers have rated this repair as easy, and it should take less than 15 minutes. Before you begin this repair, make sure to disconnect the power source from your range. This is an OEM part sourced directly from the manufacturer.
Fixes these symptoms
- Will Not Start
- See more...
Installation Instructions
Edmund from Emporium, PA
Socket Light had a bad thread
Socket Lite come with clips attached to the outsideof the housing. After you unhook the 3 lead wires
that are attached to the unit. All you have to do is push in on the clips and release the unit. Then you
snap in the new unit. Attach the 3 wire leads, put a
oven bulb in the socket end, and the install the light cover Read more...
Your Price
$55.70
Range High-Limit Thermostat
First I slid the stove out and removed the back of the stove held in place by 8 Phillips screws. The thermostat fuse is located near the top middle on the back of the stove. Remove the 2 screws holding it in place. Disconnect the wires, plug in the new part. Put it all back together. Job done in less than 30 minutes.
This repair would have cost $164 through A&E factory service. Read more...
PartSelect Number PS11747248
Manufacturer Part Number WP9759242
This thermostat is also known as a thermal cut-off fuse and is used in conjunction with your range. This part establishes and maintains the internal temperature of the oven cavity. When the temperature of your range gets too hot it will trip the high-limit thermostat safety, this will cut the power to the oven so that it does not continue to overheat. For this installation, you will need a Phillips screwdriver and a pair of needle-nose pliers. If your oven does not heat after a self-cleaning cycle you may need to replace the high-limit thermostat.
Fixes these symptoms
- Door won’t open after self cleaning cycle
- Element will not heat
- Little to no heat when baking
- See more...
Installation Instructions
Joseph from Worthington, PA
Self Cleaning blows the thermostat fuse
Something Kitchen Aid wont tell you but running a self clean on this model stove blows the fuse located on the back of the stove. First I slid the stove out and removed the back of the stove held in place by 8 Phillips screws. The thermostat fuse is located near the top middle on the back of the stove. Remove the 2 screws holding it in place. Disconnect the wires, plug in the new part. Put it all back together. Job done in less than 30 minutes.
This repair would have cost $164 through A&E factory service. Read more...
Your Price
$41.60
Oven Halogen Bulb
PartSelect Number PS11742576
Manufacturer Part Number WP4452164
Sold Individually.
Installation Instructions
Rex from Amarillo, TX
Oven lights out
There are two lights in this model oven. The glass will open by pulling outward on the near end. Since these are halogen bulbs I used a clean cloth to hold the bulb while replacing. Bulbs are expensive especially when purchased from Kitchen Aid dealer. I got two bulbs from PartsSelect delivered in two days for considerably less.
Read more...
Your Price
$156.89
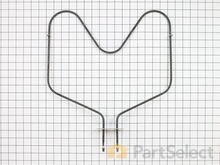
Broil Element
PartSelect Number PS11750371
Manufacturer Part Number WPW10207400
This broil element is found on the roof of the oven.
Fixes these symptoms
- Element will not heat
- Little to no heat when baking
- Little to no heat when broiling
- See more...
Appliance Type
Popular KitchenAid Stove Models
Below are the most popular KitchenAid Stove models we have. Enter your model number in the search box to find your model.