Cultivator Parts

Popular Cultivator Parts

Your Price
$4.99
   Special Order
Cultivator Sleeve
PartSelect Number PS9997616
Manufacturer Part Number 692512002
Sleeves, also known as tool holders/adapters, are used to allow you to connect other accessories to a multi-tool, holding and securing them in the process. This sleeve has an approximately 3/4-inch outer diameter and 1/4-inch inner diameter/bore and is compatible with different models of multi-tool. Because this part is a high-use part, it is recommended that you order multiple to avoid running out in the future. To avoid having to replace it as often, make sure to clean the sleeve after each use and handle it with care. If you notice high wear on the sleeve or have difficulty keeping attachments connected, it likely needs to be replaced. To replace it, you may need an Allen wrench, screwdriver or other tools.
Installation Instructions
Edward from ROSAMOND, CA
lost parts
ordered parts and installed Read more...
Your Price
$5.20
   In Stock
Cultivator Adapter Blade
PartSelect Number PS9997610
Manufacturer Part Number 692496002
Your Price
$3.99
   In Stock
Cultivator Nut-Lock, Ni
PartSelect Number PS8953555
Manufacturer Part Number 3296-42
This Ni Nut-Lock, or Nylock Nut, is a Silver 1/4 x 20 metal nut. Sold individually, it can be adjusted using a wrench or socket and torque wrench to the manufacturer specfications, and is used to secure the sheer pin in place, on the impeller assembly. These nuts are a one-time use part due to their locking mechanism. You'll know the nut has broken when it appears to have damaged threads or rounded off edges. Customers found this to be an easy repair.
Your Price
$6.59
   In Stock
Cultivator Primer
★★★★★
★★★★★
3 Reviews
PartSelect Number PS11826485
Manufacturer Part Number P005003120
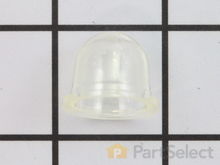
This Primer Bulb is a clear, plastic, individually sold part with an Outer Diameter of 0.720 inches (18.30 mm) and a Height of 0.674 inches (17.12 mm). With Flange: 0.842" (21.40 mm). This part is rated as Easy to install by customers, and attaches to the primer pump assembly. If the part shows signs of breakage, such as cracks appearing due to the bulb drying out, or fatigue, then it must be replaced. Refer to your owners manual/model number to ensure you are choosing the correct part.
Fixes these symptoms
Your Price
$6.21
   In Stock
Cultivator Bearing
★★★★★
★★★★★
3 Reviews
PartSelect Number PS9006914
Manufacturer Part Number 532009040
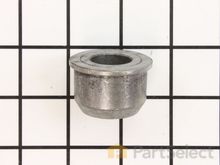
The OEM bearing, also known as the flange bearing, is silver, made of metal, and sold individually. It is used on riding mowers to secure the wheel in place and allow it to rotate freely on the shaft. Over time, the part may become worn and damaged, which you will notice if you experience a squealing or grinding sound from the wheel in question, or you notice the wheel is sloppy on the shaft. You will need a hammer and punch to complete this repair, which most of our customers rated as easy. Make sure you tap the new bearing into place evenly inside the tire rim.
Installation Instructions
robert from EUREKA, CA
transaxle rotated forward on 2015 Husqvarna YT42DXLS
2015 Husqvarna YT42DXLS. Both transaxle support struts broke causing the transaxle rotated forward and shear transaxle mounting bracket. The transaxle was not damaged. All 3 parts required replacement. There are some good youtube videos to watch to show how to complete the repair.

HINT: I removed the mower deck and placed jack stands under the frame to support the rear end of the mower. I then supported the transaxle with a floor jack. This worked great for positioning/aligning the transaxle up to the frame after the new mounting bracket was installed.

HINT: Due to the shearing of the transaxle mounting bracket, it was difficult to get a socket to seat correctly on the some of the nuts securing the transaxle to the mounting bracket. I highly recommend getting 4 new nuts because you will likely damage/strip the nut while removing it.

HINT: The youtube videos all show removing the rear tires. The rear tires can be difficult to remove; and there are some interesting youtube videos on removing stuck rear tires. If you have a stuck rear tire, you can complete the repair with the tires on; it is just a bit more challenging to squeeze your hands behind the tire to reach the bolts. I was able to only get one tire off.

HINT: If I wasn't able to do the repair with the rear tire on, my idea for getting the rear tire off was to fabricate a bracket that would work with a gear puller. The plan was to utilize the two symmetrical 1/4 inch-ish size holes in the rim to install 12" long bolts. I would then install a C-channel over the bolts, which would place the C-channel directly over the axle. I would then drill a hold in the C-channel for the gear puller bolt to go through. The shoulders of the gear puller bracket would then push against the c-channel. I was planning on using a few large fender washers on the back side of the rim to help prevent the rim from getting damaged when pulling the tire. You will be pulling the rim about 3 inches to get it off the axle.

HINT: It look four hours to repair plus another half hour of watching youtube videos; probably would have taken two hours if I didn't spend two hours trying to take off one of the rear tires that was stuck.

HINT: Since I was working under the mower, I also replaced the drive (motion) belt as preventative maintenance.
Read more...
Your Price
$3.99
   In Stock
Cultivator Cap Axle Black 1 50 x 1 00
★★★★★
★★★★★
1 Review
PartSelect Number PS9007667
Manufacturer Part Number 532104757
This genuine black cap axle, also sometimes known as the dust cap, is around 2 inches in diamater and sold individually. Comprised of plastic, it is designed to keep debris out of the hub and axle of your lawn mower or garden tractor. Over time, your dust cap may become damaged or lost due to wear and tear. If this happens, dirt and debris can freely enter the axle and hub, causing damage. This is an easy repair to make and does not require any tools. Just look for the cap axle on the rim of the wheel to make your repair.
Installation Instructions
Anthony from OLIVEHILL, TN
Wheel bushings were bad
Removed old clip removed rim from tractor, removed grease fitting on rim, took hammer and screw driver knocked out old bushing turned rim over knocked out other bushing. Press in new bushings reinstalled grease fitting slide tire back on tractor, put retaining washers on then locking clip put on dust cover grease at grease fitting. Repeat other side. Read more...
Your Price
$3.99
   In Stock
Cultivator Spark Plug Bpm-8Y
★★★★★
★★★★★
1 Review
PartSelect Number PS9263506
Manufacturer Part Number 15901019830
This Spark Plug Bpm-8y is a silver and white OEM part. Made of steel and ceramic it is individually sold, and is an electrical part. It is installed with a spark plug socket and is rated as Easy to install. It is attached inside of the cylinder head, and is used to ignite the air fuel mixture inside the combustion chamber. You can clean the spark plug with a fine sandpaper of 180 or more, then spray it with carburator cleaner and wipe dry. However, even after regular maintenance, spark plugs need to be changed as part of good engine fine-tuning. Regap to manufacturer specifications. Refer to your owners manual or model number to ensure you are choosing the correct product. Note: If your engine has more than one cylinder and sounds like it has a miss, you can remove each spark plug wire one at a time to find the miss. If the engine drops in rpm when you remove the wire, then that cylinder is fine, if it does not drop then you have found your miss!
Your Price
$7.09
   In Stock
Cultivator Air Filter
★★★★★
★★★★★
7 Reviews
PartSelect Number PS9195232
Manufacturer Part Number A226001410
This part is the replacement air filter for your small engine, used for outdoor power equipment. It has a black plastic rim that is approximately 2.5 inches by 2.5 inches. The air filter in your small engine prevents dirt and debris from entering the cylinder, where it can cause more serious damage. If your air filter is clogged, it can decrease your engine performance, and it will need to be cleaned or replaced. If the filter is damaged, it will need to be replaced as well. This is an OEM part sourced directly from the manufacturer, and is it sold individually.
Installation Instructions
Paul from SENECA, SC
Fuel line grommet rotted
This blower is quite old looked on YouTube. Removed grommet with needle nose pliers. Removed tank to install new parts. I had trouble getting return line off carb so planned to reuse it after grommet was in place. Thin was a mistake because the seated grommet compresses the holes. Took unnecessary time to get it through. With my trimmer with all lines in place. Hardest part was to get the grommet to seat even with silicone. Read more...
Your Price
$4.99
   In Stock
Cultivator Primer Pump
PartSelect Number PS8858167
Manufacturer Part Number 12318140630
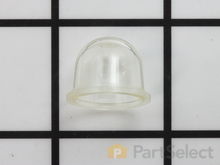
The Primer Pump, aka the Pump Bulb, is a clear, individually sold, plastic part, sourced from the original equipment manufacturer. It has an Outer Diameter of 0.616 Inches, 15.66mm and is 0.558 Inches and 14.19mm in height. This part is used to pump fuel from the tank to the carburator and is rated Easy to install. This part installs onto the primer assembly. If the part dries out or starts leaking that means it is broken (likely due to fatigue or general wear) and must be replaced. Check the model number to ensure you are choosing the right part.
Your Price
$3.99
   In Stock
Cultivator Clevis Pin
★★★★★
★★★★★
1 Review
PartSelect Number PS9009427
Manufacturer Part Number 532132673
This clevis pin is an OEM replacement part that is compatible with various makes and models of tiller and is sold as an individual part. The purpose of this pin is to snap or break under a certain amount of pressure if your tiller is jammed, to protect the more valuable components of your tiller. Measuring at approximately 2-inches long and made of high-quality metal, replacing this pin should only require pliers to swap out the old pin for the new.

Cultivator Brands

Popular Cultivator Models

Below are the most popular Cultivator models we have. Enter your model number in the search box to find your model.