Washer Dryer Combo Parts

Popular Washer Dryer Combo Parts

Your Price
$13.45
   In Stock
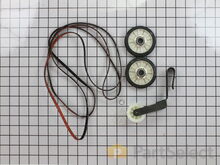
Washer Dryer Combo Drum Support Roller Kit
★★★★★
★★★★★
198 Reviews
PartSelect Number PS1570070
Manufacturer Part Number 12001541
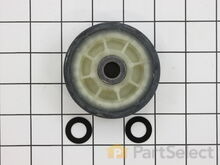
The drum support roller (Dryer Drum Support Roller, Drum Roller and Washer Assembly) holds the drum in the proper position while it spins on the support wheels. This part rotates on the roller shaft which is attached to the rear bulkhead. This part should be replaced whenever it does not rotate easily on the roller shaft. If you’re noticing a thump, scrape, or squeal while your drum is spinning, it may be your drum support rollers. Take a look at your existing drum rollers; if one or both of them are worn or broken, you’ll need to replace them. The drum support roller is subject to constant wearing when your dryer is in use, which causes them to break down over time. This part features 1 roller and 2 small washers, and measures approximately 3 inches in diameter. It is constructed with a combination of plastic, metal and rubber. This model comes in black/beige.
Fixes these symptoms
  • Drum Not Spinning
  • Marks left on clothes
  • Noisy
  • See more...
Installation Instructions
gerry from west covina,, CA
noisy rollers, broken latch
first, I unplug the power supply of the dryer then I removed the two screws at the bottom of the dryer then pulled out the front part of the dryer,unplugged the blue & yellow wire for the on/off switch for the door,at the back of the dryer I unscrew the pannel for the belt,disconect the belt,and I unscrew the four screws on both side of the front pannel to remove the front cover of the drum. Once I removed the front cover of the drum I can now remove the drum itself to access the drum support roller. I unscrew the rollers then replace it with the new once. It was an easy job.
Thank you.
Read more...
21% OFF
Your Price
$17.89
$22.67
   In Stock
Washer Dryer Combo Dryer Drum Support Roller
★★★★★
★★★★★
40 Reviews
PartSelect Number PS11752609
Manufacturer Part Number WPW10314173
This drum support roller is sold individually. Most dryers require two. The tri-rings are included. This is a drum support roller for a dryer. It is a genuine replacement part. This part is sold separately. Most dryers require two drum rollers. It is recommended to check and replace both drum support rollers at the same time to ensure proper drum rotation and because they often wear at the same rate. The drum support roller holds the drum in the proper position while it spins on the support wheels. If rollers are worn out, they will cause the dryer to be noisy.
Fixes these symptoms
  • Drum Not Spinning
  • Marks left on clothes
  • Noisy
  • See more...
Installation Instructions
Jeff from Phoenix, AZ
noisy and slow drum speed
1. disconnect power,gas and vent lines
2. pop off top of unit
3. remove front of dryer
4. lay unit on its back
5. remove drum and replace pulley assembly,belt,drum rollers of which it has 2 rear and 2 front
6. reverse above and then remove filter-vent housing and scrape off old seal install new seal
7. re-connect power,gas and vent use again
8. only sad part to whole job was seeing how cheaply whirlpool now makes thier products
Read more...
Your Price
$54.08
   In Stock
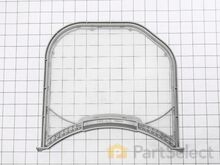
Washer Dryer Combo Dryer Lint Filter
★★★★★
★★★★★
168 Reviews
PartSelect Number PS3531962
Manufacturer Part Number ADQ56656401
The Dryer's Lint Filter is used to collect lint during the dryer cycle as it passes through the dryer vent, in order to prevent damage to the machine. This manufacturer-approved part comes in gray, measures around 12 inches wide by 11 inches high, and is easy to install. It slides into the lint filter slot in your dryer. If there is visible damage to the screen then it's time to replace the part. We recommend that you thoroughly clean the lint filter before every load, but even with good maintenance, this hard-working part is often damaged or worn over time. If your dryer isn't drying quickly, the filter may be responsible. The manufacturer has made an authorized substitution to the lint filter. Special details: When replacing lint screen ADQ56656401 you may need to also replace lint screen housing MCK49049101 and lint screen guide MEA49050001 to prevent items from catching on the lint screen, depending on your model.
Fixes these symptoms
Installation Instructions
David from Annapolis, MD
Filter parts chipped - replaced
Removed existing parts using screwdriver, positioned new parts in dryer and re-inserted screws, tightened - done. Piece of cake, even for someone who cannot saw a straight line with a chop saw. Read more...
Your Price
$4.38
   In Stock
Washer Dryer Combo Agitator Directional Cogs
★★★★★
★★★★★
395 Reviews
PartSelect Number PS388034
Manufacturer Part Number 80040
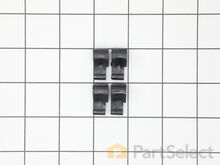
This kit is used for replacing the agitator directional cogs (Agitator Dogs, Agitator Repair Kit, Washer Agitator Dogs, Agitator Dog Ears). The agitator is what creates the thrusting motion in your washer to tumble your clothes during the washer cycle. Your agitator will rotate one way, and not the other. The agitator dogs are what prevent the agitator from rotating in both directions, while allowing it to rotate in one direction. Your agitator cogs may be malfunctioning if you can manually rotate the agitator in both directions. If broken they will need to be replaced. Cogs can be found by simply removing the softener dispenser and then removing the agitator cap. The are attached to the agitator. This replacement part features 4 agitator directional cogs. There are 4 cogs per package that are made up of high-quality plastic. This part comes in white/beige.
Fixes these symptoms
  • Does not dispense fabric softener or detergent
  • Marks left on clothes
  • Not cleaning dishes properly
  • See more...
Installation Instructions
mike from Kent, WA
washer wouldn't agitate
First pry off the cap of the agitator. Then using a socket remove the bolt that holds the plastic cup in place. Remove this cup by prying it loose from the two tabs that hold it in place. Once this cup is removed you can get to the broken cogs.
Slip the new cogs into the underside of the cup, and slide the cup back down in the agitator housing using the slots on the side for a guide. (You may want to remove the entire agitator and assemble everything upside down, then flip it all back over to mount, so the cogs don't fall out).
Tighten the bolt, snap the cap back in place on top of the agitator and your'e done. Easy repair.
Read more...
20% OFF
Your Price
$20.89
$26.11
   In Stock
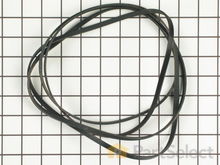
Washer Dryer Combo Multi Rib Belt
★★★★★
★★★★★
55 Reviews
PartSelect Number PS382430
Manufacturer Part Number 661570
The Drive Belt is a 93 1/2" belt which wraps around the dryer drum to allow tension and movement. If broken the dryer will not turn properly, or there may be loud noises. The part is rated as "medium" difficulty to install. Refer to your model number and user manual to ensure this part is correct for you. To complete this repair you will need a Phillips screwdriver, 1/4 inch nut driver, a putty knife, and a pair of needle nose pliers. Ensure you disconnect your power to the dryer before beginning this repair, which should take between 30 and 60 minutes maximum to complete.
Fixes these symptoms
Installation Instructions
Lucas from Nuevo, CA
Need it a new pulley and belt
I did the repair all by my self and just payed for the parts. Read more...
Your Price
$20.47
   In Stock
Washer Dryer Combo Latch
★★★★★
★★★★★
12 Reviews
PartSelect Number PS11766033
Manufacturer Part Number 5304505088
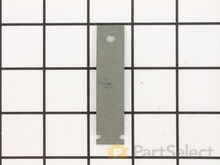
This is a door latch, also known as a door strike, for some models of washing machine. This part secures to the door of the washer and secures the door when it is shut, to ensure the inside drum of the washer does not leak. If your washer does not start properly and/or shut all the way, this latch is likely causing the issues you are experiencing and needs to be replaced. This latch is made of a brushed metal material and features two holes to secure it with screws. To replace this latch, simply unthread the screws of the old latch to remove it, and secure the new latch with the existing screws. This latch is not sold with any other parts or accessories, so any securing screws are sold separately.
Fixes these symptoms
  • Door won’t close
  • Lid or door won’t close
  • Locking Issues
  • See more...
Installation Instructions
Kim from LAFAYETTE, CA
latch broke, door wouldn't shut, washer wouldn't run - no fun
I googled the problem, read the recommendation found the part and read that it was an easy fix. Took the broken part off the door and noticed the broke off piece was in the latch on the machine. Ordered the two parts, paid the $30 2-day delivery. Parts arrived and the machine was up and runnning in under 5 minutes Read more...
Your Price
$13.12
   In Stock
Washer Dryer Combo Dryer Bearing Slide 2pk
★★★★★
★★★★★
9 Reviews
PartSelect Number PS17137207
Manufacturer Part Number WE03X37319
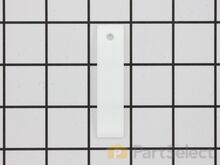
This drum glide bearing is an authentic OEM replacement part that is compatible with dryers. It is white in color and made of highly durable plastic. The bearing allows the drum to rotate smoothly and dry your clothes thoroughly and evenly. It keeps the drum stable and protects it from excessive friction damage. Over time, the bearing may wear down or break due to normal aging or wear from repeated use. If the bearing is no longer able to support the drum, you will likely notice unusually loud grinding or squeaking noises from the dryer. You may also notice increased drying times due to poor drum rotation. Inspect all the bearings on your dryer, as they tend to wear down at the same time. Each drum glide bearing is sold individually.
Fixes these symptoms
  • Drum Not Spinning
  • Marks left on clothes
  • Noisy
  • See more...
Installation Instructions
mike from SUMMERVILLE, SC
Dryer was making increasingly loud "thumping" sound.
Parts were shipped quickly, packaged correctly, and were in original GM packages - very reassuring. BTW, your customer service is excellent.
Reviewed YouTube videos.
Patience is required, take your time, take photos of the wires and also make a written wiring chart. This was the flaw in my planning. Reference the schematics from PartsSelect to number the controls. Do NOT use masking tape to identify the wires as they will have all stuck together by the time you go to reinstall them.
Most difficult process was removing and identifying the numerous wires to the back panel. They have push connectors, but some were very difficult to remove. The people doing the "how to" videos no doubt had them partially released and that made it look easy. Examine the connectors before removing to identify how they are captured by the connector. A paper clip "tool" I made enabled me to release some of the capture lugs, but some were so tight, I had to use small needle-nose pliers to open up the lug to release the wire on the connector.
When reinstalling, re-tighten those connectors.
Replacing the parts was much easier than the wiring disconnect/reconnect process. I'm happy to report that replacing the rear bearing and the front 2 green and 2 white shim/bearings immediately and completely solved my problem. For about $150, I restored my dryer to "like-new" functionality and got a lot of satisfaction from doing it. The project took about 4 hours, which could have been reduced to 2 hours had I know about the clip release and wiring identification process. Also, make sure you thoroughly vacuum out your unit while it is disassembled. Good luck!!!
Read more...
Your Price
$9.77
   In Stock
Washer Dryer Combo Roller Shaft
★★★★★
★★★★★
4 Reviews
PartSelect Number PS11743031
Manufacturer Part Number WP6-3129480
This roller shaft is also known as a support roller shaft or a drum roller axle, and is a part for your dryer. The function of this piece is to act as the axle for the drum roller; it provides a place for the roller to spin. The tools required for this repair are a stubby Phillips screwdriver, a 5/16 nut driver, a pair of snap ring pliers, and a 9/16 wrench. The first step before replacing this part should be to disconnect your dryer from the power source.
Fixes these symptoms
  • Drum Not Spinning
  • Marks left on clothes
  • Noisy
  • See more...
Installation Instructions
gerald from park city, MT
dryer squeeking
removed front panel,lifted top, removed drum and drive belt,remove old rollers and acc and instlled new and reinstalled dryer parts. Read more...
Your Price
$22.89
   In Stock
Washer Dryer Combo Idler Pulley
★★★★★
★★★★★
132 Reviews
PartSelect Number PS334244
Manufacturer Part Number 279640
This Idler Pulley includes the tri-ring and gasket and everything included here is manufacturer-certified. This part maintains correct tension on the drive belt in order to spin the drum properly. If damaged or broken the dryer will not dry properly, will not tumble properly, or may not even start. Installation is rated as "Medium" difficulty. This part is located on the dryer drum, around the tension pulley. Refer to your user manual and model number for repair instructions and to ensure this part is right for you. For this repair project, the tools needed are a Phillips screwdriver, 1/4 inch nut driver, putty knife, small flat blade screw driver, and needle nose pliers.
Fixes these symptoms
Installation Instructions
eric from Boulder, CO
Belt Wheel was broken at axle. Terrible noise.
Removed the top and back of dryer with screw socket. It was quite easy. Then, I removed the broken wheel by releasing the tension spring. I replaced the wheel. The toughest part was re-threading the belt. But, even that was simple. The dryer runs smoothly and quietly again! Read more...
Your Price
$18.89
   In Stock
Washer Dryer Combo Direct Drive Motor Coupling
★★★★★
★★★★★
167 Reviews
PartSelect Number PS1485646
Manufacturer Part Number 285753A
This direct drive motor coupling (Direct Drive Washer Motor Coupling, Motor Coupling, Washer Motor Coupling, Coupling Kit) provides a cushioned connection between the transmission and the motor shaft. It attaches to the direct-drive transmission and the motor shaft. If this part is defective it will affect the agitator in your washer because of its direct connection with the motor. Your washer may not agitate, spin slowly, or not spin at all. The coupling must be replaced when there is no longer a consistent connection between the transmission and the motor shaft. The coupling can wear over time because of its location between two major parts of the dryer. It is subject to material fatigue over time from normal use, or breakage caused by frequent overloading. The part measures approximately 2 inches in diameter, and is constructed of plastic and metal. This model comes in black/white.
Fixes these symptoms
Installation Instructions
Jeff from Wayne, NJ
No movement from Basket & agitator
The job looked intimidating but turned out to be very easy.
First take off the water pump by removing the two clips that hold it in place. Place a shallow pan under the pump to catch the water that is in the pump and hoses. Open the hose clamps with a pair of pliers or channel locks (better) and slide the hoses off of the water pump.
The motor comes off next. Unplug the electrical connector from the motor and two wires from the capacitor. Remove the two screws holding the clamps in place and then pop off the two clamps. You will need to hold up the motor with one hand while you remove the clamps or it will fall to the floor once the clamps are removed.
One piece of the coupling assemble will be attached to the motor and the other will be attached to the gearcase drive shaft. If you want to clean up the mess created by the shredded rubber center piece of the coupling assembly you will have to take off the motor mounting plate. It is held on by two bolts and removing it makes installing the coupling easier but probably not necessary.
Push the back half of the coupling on to the gearcase drive shaft until the shaft is flush with the face of the coupling. Install the new rubber center piece on to the coupling then re-install the motor mounting plate. Install the other half of the coupling on to the motor shaft and lift the motor up to the coupling. You have to rotate the motor shaft by spinning the fan blades until the coupling lines up so you can slide it into the other half of the coupling. Then just reattach the motor, connectors and water pump in the reverse order of disassembly.
Read more...

Washer Dryer Combo Brands

Related Washer Dryer Combo Parts

Popular Washer Dryer Combo Models

Below are the most popular Washer Dryer Combo models we have. Enter your model number in the search box to find your model.