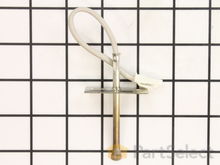
Oven Parts

Popular Oven Parts

Your Price
$8.87
   In Stock
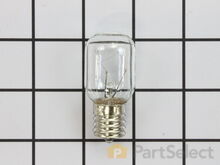
Oven Light Bulb - 40W
★★★★★
★★★★★
156 Reviews
PartSelect Number PS2376034
Manufacturer Part Number 8206232A
This 40w light bulb is a replacement bulb constructed of glass and metal. It is an easy-to-install electrical part which produces 40w of light. If the bulb won't light up then it may be broken and should be replaced. The bulb attaches directly to an appropriate light socket and has a small screw-in base. To access the exterior light bulb, you will need to remove the panel on the bottom of the microwave using a Phillips screwdriver. If your exterior light bulb has not been changed before, it is probably held in place with some silicone. You will need to cut away this silicone to remove the old bulb. If you cannot access the silicone with a utility knife, it can be removed using dental floss. Once the silicone is removed, simply unscrew the old bulb, and replace it with the new one. Be sure to disconnect the power to the microwave before you begin this repair. This light bulb measures about 1 1/8 inches. We do not recommend using a higher-wattage bulb for this appliance, and can only recommend this specific bulb. If fixing the bulb does not solve your microwave light issue, it's possibly a problem with the socket, which means the socket and/or board will need to be replaced. This can be a more dangerous repair, so consult your user manual or a technician before attempting.
Installation Instructions
Chris from Cedar Hill, TX
Burned out light under microwave and Filters needed changing
I just removed the multiple screws which held the hood cover on. I then attempted to remove the light bulbs from the socket. This proved impossible because the bulbs were so fragile from the heat and grease build up. To make this task much easier and probably safer, just replace the bulb housing and light bulb. The bulb housing unplugs very easily. Just replace it then screw your new bulb in. P.S. Be sure to unplug appliance before you start.

The filters are very easy to replace. No tools needed.

Hope this helps.
Read more...
Your Price
$11.73
   In Stock
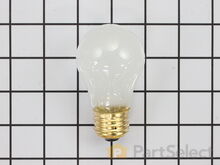
Oven Light Bulb - 40W
★★★★★
★★★★★
66 Reviews
PartSelect Number PS884734
Manufacturer Part Number 8009
This an authentic OEM 40-Watt replacement light bulb, used in a number of household appliances. It is specially designed to withstand extreme temperatures, which is why these replacement bulbs are most often used to light the inside of refrigerators and ranges. It features a standard socket base, which means you simply unscrew the burnt-out bulb and screw in the replacement. Depending on the appliance you may require a screwdriver or nut driver to access the light bulb. We recommend you wear work gloves while handling this replacement part. It is constructed of glass and metal and is sold individually. Depending on the appliance and location of the bulb within it, you may want to consider disconnecting power and using a flashlight for easier access to unscrewing and re-screwing in your bulb during this repair.
Installation Instructions
judie from mays landing, NJ
interior drawers were off their rollers
pulled the washer out and replaces the top roller system on both sides and the replaced the weels and brackets on the bottom drwaer. however i had trouble putting the dish washer back correctly and had to call a repairman to adjust the dishwasher and alighn it to open and close properly. but i did do good inside. i feel it was easy and a success. thank you for having the supplies for us to attempt to repair it on our own. Read more...
Your Price
$16.24
   In Stock
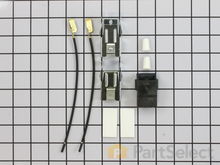
Oven Terminal Block Kit
★★★★★
★★★★★
37 Reviews
PartSelect Number PS470125
Manufacturer Part Number 5303935058
This part connects the wire harness to the surface element and is used for ranges. The kit includes interchangeable mounting brackets, ceramic wire nuts, heat shrink protective tubing, and wires. If your range/oven is having symptoms such as burner not heating, heating elements not working, burning smell, or if the oven is making a buzzing noise then this could be the solution. The tools needed to replace the kit are wire strippers, a heat gun or hair dryer, and #1 square heard screw driver. Refer to the installation/instructional video for further guidance to accurately replace the element.
Fixes these symptoms
  • Element will not heat
  • Oven not heating evenly
  • Will Not Start
  • See more...
Installation Instructions
Steven from Taylors, SC
rental property stove only had 2 working burners and bottom drawer off track
first i took out burners then i took out the screws of the termnal block bracket. i then raised the lid on the stoveand clipped the wires on all 4 of the terminal block kits.i then slipped the shrink wrap on wires and used the wire nuts to connect wires together then heated the shrink wrap. I then put screws back in terminal block brackets. I then put the burners on while looking under lid so i would know they were making good connections as this is a bad design from factory. if you pull out burners to clean them and they are not put back in right you dont have a good connection and that causes the terminal blocks to get hot and melt. thats what happened in my case.
As far as the drawer glides they just snap into place
Read more...
Your Price
$17.64
   In Stock
Oven Idler Pulley Assembly
★★★★★
★★★★★
22 Reviews
PartSelect Number PS11743765
Manufacturer Part Number WP691366
This part provides the tension required for a multi-ribbed belt. It also helps the belt rotate the drum and attaches to the idler pulley wheel. If your dryer will not start or tumble, takes too long to dry, or is noisy during operation, you may need to replace the idler pulley assembly. Make sure to disconnect power before installing this part, and wear work gloves to protect your hands. While the dryer is disassembled for this repair, consider replacing the drive belt as well. You will need a putty knife, a Phillips screwdriver, and a 5/16 nut driver for this repair.
Fixes these symptoms
Installation Instructions
Ray from Denton, TX
Dryer tub belt broke
Removed the two screws that attatch the lent channel to the top of the dryer, then lifted the top of the dryer by pushing in on the two locking tabs located at the front , left and right , corners of the dryer top with a small flat head screw driver. The top of the dryer will fold back out of the way. At this point I removed the two 1/4 inch screws that are located on the inside of the dryer front left and right corners that hold the front panel/door to the two side panels. Now I was able to lift the front panel up and set it to the side. The bottom of the front panel that contains the dryer door that I just removed was held on the bottom by two clips that slide into slots on the front panel and did not require any removal to disconnect the bottom of the front panel, just pull up on the front panel. Since the tub was held in place by floating on a seal at the back of the dryer and a seal on the front panel , which I just removed the tub is now free floating except for the two alignment roller wheels at the bottom of the tub. It is easier if you lay the dryer on its back at this point with front of the tub pointing up. I pulled the tub out and cleaned the years of built up lent and removed all the pieces of the old , destroyed, belt. Note, the belt tentioner is located at the front of the motor which on the bottom right hand side. If your belt is broke like mine the tensioner may/will fall to the back of the dryer when you tilt it back, but do not worry. Once the dryer was cleaned up I put the tub back in place , still on its back and made sure the two alignment rollers were in place and rolled freely when the tub was turned by hand. Another note, my original belt tensioner did not have a rolling wheel that the belt rode on , but was a semi-circle smooth surface that the belt remained in constant friction with when the dyer was running, so I made sure the replacement tensioner I ordered with my new belt did have a rolling wheel that the belt would ride on, which I believe will reduce wear and extend the belt life. The new belt came with a diagram of the belt and tensioner routing which was helpful. Note: do not take the tensioner wheel off/apart when trying to route the belt. Follow the instructions routing diagram. The tensioner is held in palce by inserting the bottom back half into the slot in the bottom floor of the dryer making sure it is aligned with the belt pully on the shaft of the dryer motor. The dryer is still on its back side. Now, it was easier for me to route the belt around the center of the tub, following the marks from the original belt, and hold in in place in a few spots with masking tape and then route it thru the tensioner and onto the front pully of the motor. Make sure you have the grooves of the belt against the tub and the grooves are aligned with the pully on the motor. Now you can remove the masking tape that was holding the belt around the tub and spin the tub by hand watching the belt making sure it is not in a bind and is traveling around the motor pully , tensioner and tub freely. Make sure the tub is still sealed on the back side wall. As you turn the tub by hand you can adjust the belt by hand so that is following the original marks around the tub left by the orignal belt. Also double check the two alingment rollers and make sure they are spinning and on track. Now put the front panel with the door on by sliding it onto the two clips that are one the bottom at each side and put the two screws in that hold the front panel to the two side panels. Now stand the dryer back up and spin the tub by hand again making sure it has a good seal on the back side and on the front panel. Pull the top back down and put the two screws in that hold the lent channle to the top. I am not sure when the belt started failing on my dryer, but was amazed at how quiet it runs now. Guess I was use to the extra noise made by a dryer that was about to die. This was a cheap and easy repair and glad I did it myself. Read more...
Your Price
$66.52
   In Stock
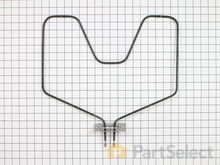
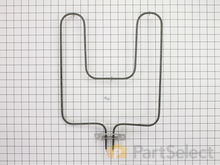
Oven Bake Element - 220V 2300W
★★★★★
★★★★★
90 Reviews
PartSelect Number PS249466
Manufacturer Part Number WB44X5082
This bake element goes in the bottom of your range and is 220 volts and 2300 watts. This closed hinged style element with screw-in terminals measures at 15-1/4 inches long and 18-1/4 inches wide. The bottom bake element provides heat for baking. Tools you will need for this repair include pliers, screwdrivers, and an adjustable wrench. Before you begin this installation, remember to shut off the house circuit breaker or unplug your range. For safety purposes we also recommend wearing work gloves.
Fixes these symptoms
  • Element will not heat
  • Little to no heat when baking
  • Little to no heat when broiling
  • See more...
Installation Instructions
Wilbur from Taylorville, IL
element quit working
Unhooked electrical wiring from unit and rehooked new unit to electrical wiring. Read more...
Your Price
$45.72
   In Stock
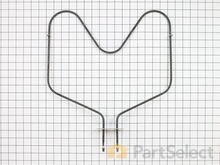
Oven Bake Element - 240V
★★★★★
★★★★★
113 Reviews
PartSelect Number PS249424
Manufacturer Part Number WB44X200
This is a 240 volt bake element for your oven or range. The kit comes with two installation screws and the element. The element functions by supplying heat from the bottom of the oven to bake or cook your food. You may need to replace the bake element if your oven is not heating properly. This is a black metal part (Width 13 inches, length 16.5 inches, depth 1-1/2 inches ) which can be installed onto your range with a screwdriver. Installation is rated as "medium" difficulty. This element is the part that heats to allow cooking, and if broken or missing you'll be unable to cook. This part attaches to the lower section of the range. Refer to your model number and user manual to ensure this part is right for you. Each screw gets screwed into each wire terminal with a Phillips screw driver. Hold the wires forward to make sure the wires do not fall back through the rear of the oven. Unplug your appliance or shut off your circuit breaker to the appliance before installing the new part.
Fixes these symptoms
  • Element will not heat
  • Little to no heat when baking
  • Little to no heat when broiling
  • See more...
Installation Instructions
Beth from Matthews, NC
Replacment of the bake unit
The hardest part was removing the old nuthead screws off the old bake burner. Once those were off installing the new bake element was simple. One screw in each wire terminal, two hex head screws to hold the unit in place. Works like a charm! Read more...
Your Price
$11.02
   In Stock
Oven Light Bulb - 40W
★★★★★
★★★★★
7 Reviews
PartSelect Number PS217532
Manufacturer Part Number 40A15
This 40-Watt light bulb is sold individually and is a genuine OEM replacement option for your home appliances. It is specially designed to withstand extreme temperatures, so this bulb is compatible with a variety of appliance types including refrigerators, ranges, microwaves, and dryers. It features a frosted glass bulb with a standard metal socket base, which allows you to easily unscrew the burnt-out light and twist the new bulb into place. Depending on your appliance, there may be a guard or cover protecting the lightbulb, in which case you may require additional tools to remove the cover. We recommend disconnecting the power supply to your appliance before changing the lightbulb.
Installation Instructions
J. Douglas from Grass Valley, CA
Broken plastic parts
Cleaned the refrigerator as the old parts were removed. Installed new parts as the old parts were removed so as to easily identify the replacement parts. Very easy and wife was extremely happy after old plastic parts self destructed over a period of months and refrigerator was essentially unusable on the bottom two drawers. Read more...
Your Price
$12.25
   In Stock
Oven FILTER,GREASE
★★★★★
★★★★★
29 Reviews
PartSelect Number PS12713651
Manufacturer Part Number 5230W1A012E
This is a single grease filter manufactured for a microwave. The microwave grease filter filters the exhaust air and traps any grease flowing out of the appliance. It is important to keep the filter clean and intact by cleaning it regularly and replacing it when needed. A clogged air filter can cause your appliance to run inefficiently and possibly alter the taste and smell of your food. This filter is approximately 7.5 inches wide and 5 inches deep. This part is sold separately. No tools are required for this repair, the filter simply slides in and out using the easy-pull tab on the filter.
Installation Instructions
David from Smithfield, VA
Grill Vent Broken Tabs
Piece of cake. Grill arrived quickly, was easily installed with a Phillips head screwdriver, needed for the two upper screws which most folks don't think about - Hence the need for this part, since the charcoal filter is behind the grill and most people don't think about replacing this. Easy installation of all filters. Thanks! Read more...
Your Price
$72.96
   In Stock
Oven Bake Element - 2600W 240V
★★★★★
★★★★★
86 Reviews
PartSelect Number PS11740695
Manufacturer Part Number WP308180
The bake element in your oven is the part that provides heat when cooking. If your oven is too hot, or not hot enough, or does not heat evenly, you may need to replace the bake element. This part is 2600 Watts and 240 Volts. It is a closed hinged style bake element which is 15-3/4 inches long and 16-5/8 inches wide. The terminal depth is three inches and they are 1-3/4 inches apart. This part is made of metal and is black in color. Be sure to disconnect power to the oven before completing this repair.
Fixes these symptoms
  • Element will not heat
  • Little to no heat when baking
  • Oven is too hot
  • See more...
Installation Instructions
Joe from Greeley, CO
oven wouldn't heat
First I removed the two screws that hold the element in place. I then pulled the element out about 3 inches and disconnected the two wires, then removed element and replaced with new
.
Read more...
Your Price
$38.48
   In Stock
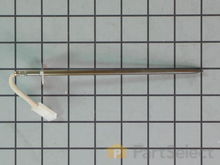
Oven Temperature Sensor
★★★★★
★★★★★
48 Reviews
PartSelect Number PS10059162
Manufacturer Part Number WB21X22134
The temperature sensor, also known as the oven temperature sensor assembly is usually found in the back of the oven. The function of the oven temperature sensor assembly is to measure the temperature inside your oven while it is on and send the temperature back up to the electronic control, which adjusts as necessary. If your oven is having difficulty achieving warmer temperatures and/or keeping warmer temperatures up, you may want to test your temperature sensor. Before you make this repair remember to unplug your range from the power source, and turn off the gas shut off valve.
Fixes these symptoms
  • Element will not heat
  • Little to no heat when baking
  • Little to no heat when broiling
  • See more...
Installation Instructions
Peter from stamford, CT
Oven would go in to a F2 Error
Removed six 1/4" hex nuts on rear of oven. Then through front/inside removed a single 1/4" hex nut to actually remove sensor. Unplug sensor connector, remove. Reversed steps, push oven back in place and plugged in. Tested oven function. Read more...

Oven Brands

Popular Oven Models

Below are the most popular Oven models we have. Enter your model number in the search box to find your model.