Roper Oven Parts
Find your part
Enter your model number or a part number and click "Search"
Popular Roper Oven Parts
Your Price
$7.44
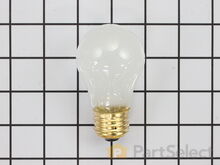
Light Bulb - 40W
PartSelect Number PS884734
Manufacturer Part Number 8009
This an authentic OEM 40-Watt replacement light bulb, used in a number of household appliances. It is specially designed to withstand extreme temperatures, which is why these replacement bulbs are most often used to light the inside of refrigerators and ranges. It features a standard socket base, which means you simply unscrew the burnt-out bulb and screw in the replacement. Depending on the appliance you may require a screwdriver or nut driver to access the light bulb. We recommend you wear work gloves while handling this replacement part. It is constructed of glass and metal and is sold individually. Depending on the appliance and location of the bulb within it, you may want to consider disconnecting power and using a flashlight for easier access to unscrewing and re-screwing in your bulb during this repair.
Installation Instructions
judie from mays landing, NJ
interior drawers were off their rollers
pulled the washer out and replaces the top roller system on both sides and the replaced the weels and brackets on the bottom drwaer. however i had trouble putting the dish washer back correctly and had to call a repairman to adjust the dishwasher and alighn it to open and close properly. but i did do good inside. i feel it was easy and a success. thank you for having the supplies for us to attempt to repair it on our own.
Read more...
Your Price
$83.57
Broil Element - 240V
PartSelect Number PS11743368
Manufacturer Part Number WP660579
This broil element is found on the roof of the oven and has push-on terminals.
Fixes these symptoms
- Element will not heat
- Little to no heat when baking
- Little to no heat when broiling
- See more...
Installation Instructions
Robert from Baton Rouge, LA
Bake Element Burned Out
Replacement was relatively easy. Oven door was pulled off hinges after removing 2 mounting screws nearest the hinges. After shutting off power at the breaker, screws (2 each) holding elements were removed. Elements were pulled into oven ~ 4 inches exposing wiring and clips. The clips pulled free with just a little wiggling by hand and were easily pushed back on by hand. Then reverse to finish.
Read more...
Your Price
$36.00
2 Piece Broiler Pan
shipment & arrival of new parts unbelievably fast....thanks Read more...
PartSelect Number PS971245
Manufacturer Part Number 4396923
This is cookware designed for use in your range or oven. It is a two-piece dish that is used to grill or cook food while the broil function is on, meaning it can withstand high temperatures. This set includes both the pan and the grid. The grid is the top part. The slotted design allows grease to easily drip into to the pan below. Not only does it catch all of the drippings, it also prevents splatter and smoke while cooking. The pan can also be used separately for baking and roasting. This cookware features a durable porcelain finish, which means it is incredibly easy to clean, and is dishwasher safe. It is roughly 1.5 inches deep, and measures approximately 16.5 inches by 12.5 inches. If your two-piece broil plan is lost, rusted, or damaged this is the replacement you need.
Installation Instructions
Lois from Elmer, NJ
Bought house & stove was missing rack & broiler
slid in grooveshipment & arrival of new parts unbelievably fast....thanks Read more...
Your Price
$17.04
Idler Pulley Assembly
PartSelect Number PS11743765
Manufacturer Part Number WP691366
This part provides the tension required for a multi-ribbed belt. It also helps the belt rotate the drum and attaches to the idler pulley wheel. If your dryer will not start or tumble, takes too long to dry, or is noisy during operation, you may need to replace the idler pulley assembly. Make sure to disconnect power before installing this part, and wear work gloves to protect your hands. While the dryer is disassembled for this repair, consider replacing the drive belt as well. You will need a putty knife, a Phillips screwdriver, and a 5/16 nut driver for this repair.
Fixes these symptoms
- Noisy
- Takes too long to dry
- Will Not Start
- See more...
Installation Instructions
Ray from Denton, TX
Dryer tub belt broke
Removed the two screws that attatch the lent channel to the top of the dryer, then lifted the top of the dryer by pushing in on the two locking tabs located at the front , left and right , corners of the dryer top with a small flat head screw driver. The top of the dryer will fold back out of the way. At this point I removed the two 1/4 inch screws that are located on the inside of the dryer front left and right corners that hold the front panel/door to the two side panels. Now I was able to lift the front panel up and set it to the side. The bottom of the front panel that contains the dryer door that I just removed was held on the bottom by two clips that slide into slots on the front panel and did not require any removal to disconnect the bottom of the front panel, just pull up on the front panel. Since the tub was held in place by floating on a seal at the back of the dryer and a seal on the front panel , which I just removed the tub is now free floating except for the two alignment roller wheels at the bottom of the tub. It is easier if you lay the dryer on its back at this point with front of the tub pointing up. I pulled the tub out and cleaned the years of built up lent and removed all the pieces of the old , destroyed, belt. Note, the belt tentioner is located at the front of the motor which on the bottom right hand side. If your belt is broke like mine the tensioner may/will fall to the back of the dryer when you tilt it back, but do not worry. Once the dryer was cleaned up I put the tub back in place , still on its back and made sure the two alignment rollers were in place and rolled freely when the tub was turned by hand. Another note, my original belt tensioner did not have a rolling wheel that the belt rode on , but was a semi-circle smooth surface that the belt remained in constant friction with when the dyer was running, so I made sure the replacement tensioner I ordered with my new belt did have a rolling wheel that the belt would ride on, which I believe will reduce wear and extend the belt life. The new belt came with a diagram of the belt and tensioner routing which was helpful. Note: do not take the tensioner wheel off/apart when trying to route the belt. Follow the instructions routing diagram. The tensioner is held in palce by inserting the bottom back half into the slot in the bottom floor of the dryer making sure it is aligned with the belt pully on the shaft of the dryer motor. The dryer is still on its back side. Now, it was easier for me to route the belt around the center of the tub, following the marks from the original belt, and hold in in place in a few spots with masking tape and then route it thru the tensioner and onto the front pully of the motor. Make sure you have the grooves of the belt against the tub and the grooves are aligned with the pully on the motor. Now you can remove the masking tape that was holding the belt around the tub and spin the tub by hand watching the belt making sure it is not in a bind and is traveling around the motor pully , tensioner and tub freely. Make sure the tub is still sealed on the back side wall. As you turn the tub by hand you can adjust the belt by hand so that is following the original marks around the tub left by the orignal belt. Also double check the two alingment rollers and make sure they are spinning and on track. Now put the front panel with the door on by sliding it onto the two clips that are one the bottom at each side and put the two screws in that hold the front panel to the two side panels. Now stand the dryer back up and spin the tub by hand again making sure it has a good seal on the back side and on the front panel. Pull the top back down and put the two screws in that hold the lent channle to the top. I am not sure when the belt started failing on my dryer, but was amazed at how quiet it runs now. Guess I was use to the extra noise made by a dryer that was about to die. This was a cheap and easy repair and glad I did it myself.
Read more...
Your Price
$7.76
Hex Nut
I turned on power at the service panel and used my digital multimeter to test the AC voltage of the receptacle to make sure it fell within the correct limits.
When the new mounting block and power cord arrived, I removed the screw that held the broken mounting block to the back of the range. Then, I used a screwdriver to remove the leads that attached the old power cord to the broken mounting block and range wiring terminals. The screw and nuts which held the old black lead and range wiring terminal to the block were welded together. This was the most difficult part of the repair. I was able to back them off a little bit, but not enough to remove the range wiring terminal. While holding one end of the screw in the pliers, my Dad used the heavy duty cut off wheel on my Dremel tool to cut the screw in half and free the terminal.
Then, we reversed the process to attach the new wiring block to the back of the range, incoming power cord to wiring terminals and range wiring. We plugged it back in and had it working before my dinner party. Read more...
PartSelect Number PS11738304
Manufacturer Part Number WP112432
This 10-32-inch hex nut works with multiple appliances in your home as a fastener. This specific model is sold individually. Hex nuts usually have 6 even sides and together they are used with bolts and screws in order to hold items firmly together. This piece is a fastener that attaches one item to another. This part has several advantages, the main one being that it is universal and can be used with most pieces and appliances in your home. This hex nut is an original equipment manufacturer part, meaning it is directly sourced from the manufacturer.
Installation Instructions
Heather from Pittsburgh, PA
Incoming power hot lead broke loose from mounting block and short-circuited
First I turned off power at the service panel. Then, I pulled out the range and tried to remove the access panel. The screw which held the black lead from the incoming power to the range wiring terminal had broken loose from the mounting block. It had welded itself to the panel, so I had to pry it loose. I tried to reattach it to the mounting block, but the block was cracked.I turned on power at the service panel and used my digital multimeter to test the AC voltage of the receptacle to make sure it fell within the correct limits.
When the new mounting block and power cord arrived, I removed the screw that held the broken mounting block to the back of the range. Then, I used a screwdriver to remove the leads that attached the old power cord to the broken mounting block and range wiring terminals. The screw and nuts which held the old black lead and range wiring terminal to the block were welded together. This was the most difficult part of the repair. I was able to back them off a little bit, but not enough to remove the range wiring terminal. While holding one end of the screw in the pliers, my Dad used the heavy duty cut off wheel on my Dremel tool to cut the screw in half and free the terminal.
Then, we reversed the process to attach the new wiring block to the back of the range, incoming power cord to wiring terminals and range wiring. We plugged it back in and had it working before my dinner party. Read more...
Your Price
$13.48
Blower Wheel Clamp
Thanks, Read more...
PartSelect Number PS11740752
Manufacturer Part Number WP312967
This blower wheel clamp, used in a clothes dryer, is a clamp that holds the blower wheel to the motor shaft. This part helps hold the blower wheel in place to function easily and properly. If your clothes dryer has any of the following symptoms then replacing the clamp can be a solution: making loud noises, not producing enough heat or no heat at all, and/or clothes are taking too long to dry. Make sure to unplug thedryer from power source before installing this part and refer to the installation instructions provided by the manufacturer for further guidance.
Fixes these symptoms
- No heat or not enough heat
- Noisy
- Takes too long to dry
- See more...
Installation Instructions
Tim from Jacobus, PA
Dryer was making horrible noise,
First I removed the 2 screws behind the door just below the slot for the lint trap(t-15 torx screws). I then popped the top of the dryer off using a flat tipped screw driver and using a 8mm. socket and extension I removed the 2 sheet metal screws from inside of the top corners of the front panel which attach it to the side panels. After that I could lean the front panel away from the unit and unplug the door switch being careful to mark the wires so I wouldn't have to take it apart again in the instance that I hooked them up wrong. I then leaned the front panel out a little more and lifted it off of the pins that lock the bottom of the front panel in. After that, I removed the sheet metal screws(8 mm.) that secure the fan housing cover and removed the old fan which was easy as it had spun the center out of itself and basically fell off, this is what was making all the racket. I removed the c-clip which rides in the groove at the end of the shaft with a flat tip and a pair of pliers, slid the new fan blade over the shaft, gave it a few light taps with the end of a hammer handle to seat it properly and installed the tension clamp with some pliers and popped the c-clip back on. I reversed the tear down procedures and reassembled the drier. Thanks to a little no-how, mechanical inclination, and the right parts, I was able to restore my drier to like new, virtually silent operation for about $40 as opposed to buying a new unit or paying a repairman $80 to $100 per hour plus parts to do the job. PartSelect.com made specifying and ordering the correct parts the first time a breeze and their prices are a bargain to boot.Thanks, Read more...
Your Price
$53.00
Heating Element
PartSelect Number PS11742505
Manufacturer Part Number WP4391960
This element carries 5200W and 240V.
Note: This element no longer includes two terminals and two adapter leads. They must be ordered separately.
Fixes these symptoms
- No heat or not enough heat
- Takes too long to dry
- See more...
Installation Instructions
Bill from Morristown, TN
Dryer quit heating. Suspected heating element was open
Unplugged the 220 volt source. Disconnected the vent line from the back of the drier. Removed the six screws holding the back panel with a 1/4 inch nut driver. Tipped the drier up at a 45 degree angle against the wall to give better access to the inside. Removed the screws holding the two thermostats to the side of the heater box and laid them aside. Disconnected the two red power lines to the heater element. Removed the large screw at the top of the heater box and removed the flexible bracket holding the heater box, then lifted the heater box up and away from the drier. Removed the one screw holding the heater element inside the heater box and pulled out the old heating element. The old element was open as found using an ohmeter on the two main terminals. Threw away the old element. Removed the new heating element from the box and slid it into the heater box making sure to align the terminal bracket with the hole in the heater box for the reinstallation of the mounting screw. Tightened this screw. Remounted the heater box to the two mounting slots and reinstalled the flexible mounting bracket to the top of the heater box and installed and tightened the large screw holding this bracket. Cut off and removed the old electrical push-on terminals from the two red power wires for the heater element. These were discolored and oxidated from the conducted heat over the years of operation. Using the supplied short red leads with push-on terminals already installed, I wire tied these new leads to the existing red power leads and pushed them onto the heater element terminals. Rechecked the soundness of the twisted wire connections to make sure they were tight. Replaced the back panel and reinstalled the six 1/4" screws with the 1/4' nut driever. Reinstalled the driver vent line and tightened its holding ring. Slid the drier back into position on the floor. Checked the level and readjusted the leveling legs for a steady floor stance. Reinstalled the 220 volt power connecter and set the controlls for a drying cycle. Let the drier run for aproximately 1 minute and then checked the air temperature inside the drier. IT WAS NOW PRODUCING HOT AIR. Project completed successfully and I was now a HERO in my wifes eyes. Absolutely no technical problems encountered. Just remember, unplug the drier before starting ANY repairs. To forget this COULD RUIN YOUR DAY.
Read more...
Your Price
$22.88
Lid Switch
PartSelect Number PS11723153
Manufacturer Part Number W10820036
This 3 prong lid switch is used for washing machines that do not have a tub light.
Fixes these symptoms
- Will not agitate
- Will not drain
- Will not shut off
- See more...
Installation Instructions
Peter from Westbury, NY
washer would not start
To see if the lid switch was the problem I first jumped it out and tried to start the washer. That was the problem. I removed the main controll so I could get to the lid switch. I made the mistake of removing the screws all the way out and the metal clip fell into the body of the washer, no problem since I was changing the drive beld anyway. I realized that you do not remove the screws all the way out, you just have to loosen them and then slide out the lid switch & then replace it.
Read more...
Your Price
$36.06
Surface Burner Knob
PartSelect Number PS11741145
Manufacturer Part Number WP330190
This part is sold individually. The surface burner knob is black and chrome in color. It measures approximately 1-1/2 inches in diameter. The surface burner knob is for ranges and allows you to control the temperature of the surface burner. If your knob has broken or gone missing it will need to be replaced. This repair requires no tools to complete. You simply remove the old knob by pulling it off and press the new knob into place by lining it up with the shaft. This is an OEM genuine part.
Installation Instructions
Mark from Albuquerque, NM
My stove top is 30 years old. I was down to one knob. I looked up the part by brand and age. the pictures were accurate and the size dimensions were perfect.
Pulled off the one remaining knob, installed the new ones. One minute and the stove works perfectly.
Read more...
Your Price
$10.68
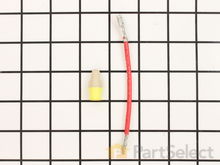
Heating Element Connection Wire Kit
PartSelect Number PS334206
Manufacturer Part Number 279457
This kit is used for electric clothes dryers, and it comes with a yellow wire nut.
Fixes these symptoms
- No heat or not enough heat
- Takes too long to dry
- See more...
Installation Instructions
Christopher from dublin, OH
no heat
took a couple differant parts to fix the dryer. i ordered one part at a time. i was expecting to wait the 5 days for shipping but i got home from work the next day of odering parts and they were there waiting for me on my doorstep. all three times i ordered. this website is the best site to order parts. i wont go to another website or store if i need to order parts for appliances. u guys have my business for life. thumbs up.
Read more...
Appliance Type
Popular Roper Oven Models
Below are the most popular Roper Oven models we have. Enter your model number in the search box to find your model.
- B8758X1 Gas 24", Built-in
- B9607X0 Electric
- B9907X0 Electric
- B9307X0 Electric
- B9757X0 Electric
- B9608B4 Electric
- B9458B0 Built-in, Electric
- B9308B3
- B9758B3 Electric
- B8758B1 Range (gas)*
- B9457X0 Electric
- B9908B3 Electric
- B9758B0 Electric
- B9608B3
- RGE3010W
- B9608W4
- B9908B0 Electric
- B9308W4 Electric
- B9608W3 Electric
- B9308B0