KitchenAid Oven Parts

Popular KitchenAid Oven Parts

Your Price
$64.52
   In Stock
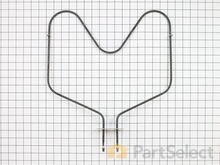
KitchenAid Oven Bake Element - 2600W 240V
★★★★★
★★★★★
88 Reviews
PartSelect Number PS11740695
Manufacturer Part Number WP308180
The bake element in your oven is the part that provides heat when cooking. If your oven is too hot, or not hot enough, or does not heat evenly, you may need to replace the bake element. This part is 2600 Watts and 240 Volts. It is a closed hinged style bake element which is 15-3/4 inches long and 16-5/8 inches wide. The terminal depth is three inches and they are 1-3/4 inches apart. This part is made of metal and is black in color. Be sure to disconnect power to the oven before completing this repair.
Fixes these symptoms
  • Element will not heat
  • Little to no heat when baking
  • Oven is too hot
  • See more...
Installation Instructions
Joe from Greeley, CO
oven wouldn't heat
First I removed the two screws that hold the element in place. I then pulled the element out about 3 inches and disconnected the two wires, then removed element and replaced with new
.
Read more...
Your Price
$70.31
   In Stock
KitchenAid Oven Bake Element
★★★★★
★★★★★
53 Reviews
PartSelect Number PS11750369
Manufacturer Part Number WPW10207397
The bake element is located at the bottom of the oven and gives off heat in order to bake evenly. If you notice that the element is not heating up or is not cooking evenly, it could be because it is broken or burnt out. All you need for this simple repair is a small screwdriver. To complete this repair, you will need to first turn the oven off (or shut off the house circuit breaker), remove the two screws that are holding the old element in place, remove the two wires from the old part, and then connect them to the new part and screw back into place.
Fixes these symptoms
  • Element will not heat
  • Little to no heat when baking
  • Oven not heating evenly
  • See more...
Installation Instructions
Daniel from Cheraw, SC
I broke the Bake Element while cleaning the oven.
I removed the two screws that held the bake element in place. Next I removed the Bake Element. I had to unscrew the oven to go behind it because when one piece off of the element broke, it slide back behind the oven. I pushed the wire back thru the piece holes, connected the Element, and pushed the element with the wires back through the holes. I rescrewed the element in place and the oven. PartSelect helped me to save this year's Christmas. Read more...
Your Price
$112.15
   In Stock
KitchenAid Oven Inner Door Glass
★★★★★
★★★★★
81 Reviews
PartSelect Number PS11742543
Manufacturer Part Number WP4449259
This inner door glass is a heat resistant part that fits into a stove, oven, wall oven, cooktop, or range as the inner glass panel of the appliance door. The glass panel allows you to see the items being cooked or heated in the appliance. Handle with caution and be sure to use gloves, as the door is heavy and the glass is breakable. Do not replace the glass until the appliance is cool to the touch. This genuine manufacturer part is approximately 20 inches by 10 inches. The inner glass door is sold individually and contains the glass panel only.
Installation Instructions
Robert from Wildwood, MO
Broke the glass panel inside the oven door -- dropped a baking dish on the glass!
Easily removed the door from the oven by releasing clips attached to the door hinge -- very nicely engineered. Removed about 6 philips head screws to allow the door assembly to be taken apart for access to the glass. Lifted out the broken glass, cleaned the inside of the door, installed the new glass, reassembled the door (a two minute project), and reattached the door to the oven. Cleaning the inside of the door took longer than the actual repair! Read more...
Your Price
$34.05
   In Stock
KitchenAid Oven Terminal Block
★★★★★
★★★★★
17 Reviews
PartSelect Number PS11750972
Manufacturer Part Number WPW10245259
This part is for oven ranges, it connects individual wires and protects the device from electrical surges, voltages, and current. With this part, the house power is connected to the range wire harness. Some symptoms replacing the terminal block could be a solution for are little to no heat when baking, element will not heat and/or it will not start. This part will prevent loosening and will reduce damage caused by corrosion (by two different metals). Refer to the instructional diagram for further replacement guidance and exact placement. You must unplug the appliance before installing this part and wear gloves to protect your hands.
Fixes these symptoms
  • Element will not heat
  • Little to no heat when baking
  • Touchpad does not respond
  • See more...
Installation Instructions
Joseph from Decatur, GA
Burned terminal block and filter board
Removed and replaced above named parts, rewired.Be sure to tighten all nuts that secure wires. I believe this is what caused the problem. Read more...
Your Price
$32.51
   In Stock
KitchenAid Oven Thermal Fuse
★★★★★
★★★★★
28 Reviews
PartSelect Number PS11756138
Manufacturer Part Number WPW10545255
This thermal fuse is a manufacturer-approved replacement part for your oven. It is common for the oven to lose power after completing a self-cleaning cycle, and the thermal fuse is often at fault. Replacing the blown fuse is a fairly easy repair, and involved removing the top of the oven to swap out the fuse. Make sure to turn off the power source to the oven before beginning this repair.
Fixes these symptoms
  • Door won’t open after self cleaning cycle
  • Touchpad does not respond
  • Will Not Start
  • See more...
Installation Instructions
JAMES P from UPATOI, GA
After running oven in BROIL for lengthy period, entire oven shut off, thermal fuse blown
USE 2 PEOPLE FOR SAFETY! SWITCH OFF OVEN POWER BREAKER!! Remove screws attaching oven to wall opening, slide out entire oven just far enough to get to 2 screws on either side of controls, remove those screws (may need stubby screwdriver), lift control front, opens forward, have 2nd person hold control panel cover while removing centered thermal fuse (plugs on both ends, may need needle-nose pliers to grip plug on fuse.) Remove old fuse, plug in new one. Close control panel, replace side screws, TEST POWER BEFORE pushing oven back into wall, replace wall-holding screws. Less than 30 minutes. EXTRA PERSON MAKES EASY! Read more...
Your Price
$89.89
   In Stock
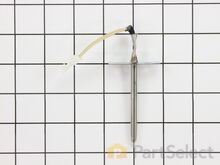
KitchenAid Oven Temperature Sensor
★★★★★
★★★★★
7 Reviews
PartSelect Number PS11748765
Manufacturer Part Number WPW10131825
The temperature sensor measures the temperature inside the oven. If your oven is too hot, not heating evenly, is not heating enough when baking, or simply will not start, you could have a faulty temperature sensor. A faulty temperature sensor can be a fire risk. If your sensor is not working properly, you should look to replace it straight away. A failed oven sensor is most often responsible for F3 or F4 error messages on electronically-controlled ovens. Make sure you disconnect the power to your range before you start your repair.
Fixes these symptoms
  • Element will not heat
  • Little to no heat when baking
  • Oven is too hot
  • See more...
Installation Instructions
Nicholas from OWENS X RDS, AL
Over heating oven and uneven baking. Oven thought it was in self cleaning mode.
Sensor replacement was removing 2 screws and gently pulling on old sensor until the clip comes out. Secured the other end of the wires so that it did not fall back inside. Then connected the new sensor clip to the oven wire, then gently returning wire into oven, and then screwing the sensor into place.
The baking element was easier than the sensor. Removed the 2 screws holding the element into the back bottom of the oven, and pulled the element forward to disconnect from clamps. Inserted new element into clamps and screwed it in. ***NOTE that there will be a smell from the new element. This smell is normal. If the smell continues after a couple minutes stop the oven and wait an hour before reattempting.
Read more...
Your Price
$105.11
   In Stock
KitchenAid Oven Interior Door Glass
★★★★★
★★★★★
34 Reviews
PartSelect Number PS11742541
Manufacturer Part Number WP4449253
The interior oven door glass panel is the innermost piece of glass that faces the inside of your oven when the door is closed. This inner oven door glass is meant to be resistant to high heat and can be accessed when the oven door is open. To complete this repair, you will need a number two Phillips screwdriver and a flat blade screwdriver. The most difficult part of this repair will be removing the oven door, so make sure when installing this part, you have a sufficient amount of work space.
Installation Instructions
Evan from Albuquerque, NM
Inner window glass cracked
The first thing I did was to remove the oven door by releasing the two latches on the hinges (by hand). I then raised the door toward the vertical position and lifted up. The hinges slide out of the oven housing. I laid the door, inside face up on my island counter top. This ensures that none of the parts will fall when disassembling the door. Next I unscrewed the screws 4 top and bottom and four on the inside face. This releases the frame from the front housing. Lift the frame off the door, exposing the glass pieces. Lift off the broken inside glass and place the new piece in the glass retaining housing. Replace the outside frame and replace all screws. Take door back over to oven and slide hinge bottoms back into slots on oven. Rotate to horizontal position and flip latches back to locked position. Total time was about 10 minutes mainly because I was curious how the door was constructed and I poked around while it was disassembled. Read more...
13% OFF
Your Price
$150.16
$172.68
   In Stock
KitchenAid Oven Element, Broil
★★★★★
★★★★★
25 Reviews
PartSelect Number PS11747304
Manufacturer Part Number WP9760774
This broil element is found on the roof of the oven. The broil element is at the top of the oven and supplies the heat to broiling. 14" x 15" with 1-3/8" inserts. This part works with the following brands: Whirlpool, Roper, Admiral, Maytag, Hardwick, Jenn-Air, Estate, Magic Chef, Crosley, Inglis, Norge, Modern Maid, Amana, Kenmore, KitchenAid, Caloric.
Fixes these symptoms
  • Element will not heat
  • Little to no heat when baking
  • Little to no heat when broiling
  • See more...
Installation Instructions
David from Catonsville, MD
The broiler element in my wall oven burned out
This was easy and I'm glad I didn't go to the trouble and expense of hiring an appliance repair person. I'm reasonably handy, but I really have no experience in this kind of repair. I'd like to mention that the part I ordered arrived in just two days and it was exactly the right part, so I was very pleased in that regard.

After turning off the circuit to the wall oven and confirming that the power was off, I had to remove the oven from the wall in order to access the wires and connections in the back. Normally, this wouldn't have been necessary because usually the broiler element can be disconnected from the clasps that connect it to the electric source by simply unscrewing the defective element from the roof of the oven, pulling gently on the connection ends from inside the oven cavity in order to "pull out" an inch or two of the electric source wires and the metal clasps that accept the "male" connecting ends of the broiler element. Once the a bit of the wire and the metal connecting clasps are exposed and able to be held with pliers, the element can be disconnected from the connector clasps by simply pulling on the prongs of the element (hard).

But in my case, one of the metal connecting clasp for one of the wires had melted, presumably when the element burned out, and that clasp could only be accessed and replaced from the back of the oven. Also, I would imagine that the wires and clasps could "slip" back behind the unit when they're disconnected if that's not done carefully. However, removing the wall oven was pretty easy for me -- even as a one-person job. I just put a tall table in front of it and slid it out so that it rested on the table.

If you have to replace a metal connector clasp, they're inexpensive and available in the electrical departments of hardware/home stores.

In my case, there's a metal panel at the back of the oven that had to be unscrewed and removed so that I could access the areas where the electrical source wires connect through the back wall of the oven to the broiler element. This was just a matter of removing a few screws and then removing the metal panel.

Once the metal panel at the back of the oven was removed, I was able to replace the melted connection clasp by using a wire cutter/stripper and then pliers to secure the clasp on the end of the exposed wired by deforming the clamp with the pliers. Once that was done, I simply removed the screws that held the broiler element to the top of the oven cavity, disconnected the remaining three clasps that connect the element to the source wires (the fourth clasp was the one that had melted and that I'd replaced), removed the defective element, inserted the four "male" prongs of the broiler into the four clasps that connect them to the source wires, replaced the metal panel at the back of the oven, screwed the new element back into the top of the oven, slid the oven back into the wall cavity, turned the circuit back on, crossed my fingers, and everything worked like a charm.

I saved a money, but more importantly (for me) I saved a lot of time that I would have had to have spent waiting around for a repair person.
Read more...
Your Price
$31.61
   In Stock
KitchenAid Oven GASKET-CAVITY, 30, BLK
★★★★★
★★★★★
12 Reviews
PartSelect Number PS17216131
Manufacturer Part Number W11675844
This part is the replacement door gasket for your oven. It is made of gray rubber and is sold individually. The door gasket runs along the circumference of the oven door and creates a seal that insulates the oven and keeps heat in. If your oven will not heat up properly, or if you notice that the door gasket has become loose or worn, it may need to be replaced. To replace the door gasket, you will need to remove the retaining bracket at the bottom of the oven door, then carefully pull the gasket away from the front of the oven cavity. Then, push the new gasket inside the groove on the outside of the oven cavity, securing it with the arrowhead fasteners that are built in to the oven cavity. This is an OEM part from the manufacturer.
Fixes these symptoms
  • Door won’t close
  • Oven not heating evenly
  • See more...
Installation Instructions
Ralph from Green Bay, WI
Original oven gasket had discolored and deteriated, mainly due to use of oven cleaner.
I removed the bottom gasket retainer , single screw, with a screwdriver. The old gasket just pulls away. I cleaned the area under the old gasket with soap and water. I installed the new gasket whcih easily slips in place with the already installed retainer wires into the pre drilled holes.

Viola. Lokks like new.
Read more...
Your Price
$84.80
   In Stock
KitchenAid Oven Rack
★★★★★
★★★★★
17 Reviews
PartSelect Number PS11749669
Manufacturer Part Number WPW10179152
This oven rack is chrome in color and is approximately 24.76 inches wide by 15.78 inches deep. If your old oven rack is damaged, you should consider replacing it. Many of our customers have determined this repair to be very easy. You will not require any tools to complete it. To replace the oven rack, simply pull the old rack out, and replace it with the new one. Make sure to put the new rack back in the oven with the beveled edge in first. To keep your oven racks clean, we recommend that you pull them out before using the self-cleaning function on your oven.
Installation Instructions
Kevin from Joliet, IL
Replaced our oven racks, becasue I (the husband) forgot to remove them before the "Self-Clean" process and they turned colors just as the instruction manual said they would !!
Easy, pulled out the old dis-colored racks and slid the new ones in. I was VERY happy with the quick receipt of my order. If I ever need parts again,this is where I will go Read more...

KitchenAid Oven Appliance Types

Popular KitchenAid Oven Models

Below are the most popular KitchenAid Oven models we have. Enter your model number in the search box to find your model.