Maytag Oven Parts

Maytag Appliance Parts
Shop By Appliance Type

Popular Maytag Oven Parts

Your Price
$7.44
  In Stock
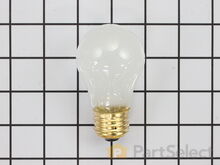
Light Bulb - 40W
★★★★★
★★★★★
63 Reviews
PartSelect Number PS884734
Manufacturer Part Number 8009
This an authentic OEM 40-Watt replacement light bulb, used in a number of household appliances. It is specially designed to withstand extreme temperatures, which is why these replacement bulbs are most often used to light the inside of refrigerators and ranges. It features a standard socket base, which means you simply unscrew the burnt-out bulb and screw in the replacement. Depending on the appliance you may require a screwdriver or nut driver to access the light bulb. We recommend you wear work gloves while handling this replacement part. It is constructed of glass and metal and is sold individually. Depending on the appliance and location of the bulb within it, you may want to consider disconnecting power and using a flashlight for easier access to unscrewing and re-screwing in your bulb during this repair.
Installation Instructions
judie from mays landing, NJ
interior drawers were off their rollers
pulled the washer out and replaces the top roller system on both sides and the replaced the weels and brackets on the bottom drwaer. however i had trouble putting the dish washer back correctly and had to call a repairman to adjust the dishwasher and alighn it to open and close properly. but i did do good inside. i feel it was easy and a success. thank you for having the supplies for us to attempt to repair it on our own. Read more...
Your Price
$33.56
  In Stock
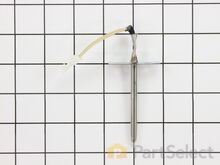
Long Oven Sensor
★★★★★
★★★★★
29 Reviews
PartSelect Number PS1570174
Manufacturer Part Number 12001656
This long oven sensor is also commonly known as a temperature sensor. It is designed for use with ovens and ranges. It is similar to a thermostat; it measures and regulates the internal temperature of your oven cavity. There is an adapter at one end, a probe at the other, and they are connected by an insulated wire. The probe is approximately 7 inches long. You can test the sensor with a multi-meter for functionality. You need to check the model-specific manual to determine what the proper resistance is for your specific appliance. This oven sensor comes with two wire harness adapters and a set of instructions.
Fixes these symptoms
  • Door won’t open after self cleaning cycle
  • Element will not heat
  • Little to no heat when baking
  • See more...
Installation Instructions
David from Westford, MA
Oven not holding 350 F, when cooling the coils did not reheat
Removed the oven door by opening slightly, then pic door up to remove. Remove 2 screws holding oven sensor in place, gently pull on sensor to remove, had to remove about 8 inches to get at plastic connector. Unplug connector, had to use an adapter cable supplied with the PartSelect kit to install new sensor, push cable back into opening, reinstall 2 screws. The oven works fine! Note that due to thermal lag the temperature overshoots to 370 degrees and undershoots to 340 degrees, this appears to be normal oven operation. Putting door back in place was easy. Read more...
Your Price
$32.93
  In Stock
Terminal Block
★★★★★
★★★★★
17 Reviews
PartSelect Number PS11750972
Manufacturer Part Number WPW10245259
This part is for oven ranges, it connects individual wires and protects the device from electrical surges, voltages, and current. With this part, the house power is connected to the range wire harness. Some symptoms replacing the terminal block could be a solution for are little to no heat when baking, element will not heat and/or it will not start. This part will prevent loosening and will reduce damage caused by corrosion (by two different metals). Refer to the instructional diagram for further replacement guidance and exact placement. You must unplug the appliance before installing this part and wear gloves to protect your hands.
Fixes these symptoms
  • Element will not heat
  • Little to no heat when baking
  • Touchpad does not respond
  • See more...
Installation Instructions
Joseph from Decatur, GA
Burned terminal block and filter board
Removed and replaced above named parts, rewired.Be sure to tighten all nuts that secure wires. I believe this is what caused the problem. Read more...
Your Price
$6.04
  In Stock
Touch-Up Paint - White
★★★★★
★★★★★
1 Review
PartSelect Number PS385132
Manufacturer Part Number 72017
This touch-up paint can be used on a wide variety of household appliances. It is most often used on washers, dryer, refrigerators, dishwashers, ranges, freezers, trash compactors, or microwaves. It is an 18 ml, or.6 fluid ounces, bottle of touch-up paint. It also features a brush for easy application. This quick-drying, long-lasting paint is perfect for fixing any nicks, scratches, or chips on the exterior of your appliance. This paint is white in color, and provides a durable finish.
Installation Instructions
Michelle from Richardson, TX
Scratches in Surface
This product comes in a bottle with a brush like Liquid Paper. It goes on incredibly easy. A second coat might be needed. I wanted to prevent rust from setting in so I covered the scratches and dings. The paint is a little brighter since my washer is 10 years old but it still looks great. Read more...
Your Price
$36.00
  In Stock
2 Piece Broiler Pan
★★★★★
★★★★★
4 Reviews
PartSelect Number PS971245
Manufacturer Part Number 4396923
This is cookware designed for use in your range or oven. It is a two-piece dish that is used to grill or cook food while the broil function is on, meaning it can withstand high temperatures. This set includes both the pan and the grid. The grid is the top part. The slotted design allows grease to easily drip into to the pan below. Not only does it catch all of the drippings, it also prevents splatter and smoke while cooking. The pan can also be used separately for baking and roasting. This cookware features a durable porcelain finish, which means it is incredibly easy to clean, and is dishwasher safe. It is roughly 1.5 inches deep, and measures approximately 16.5 inches by 12.5 inches. If your two-piece broil plan is lost, rusted, or damaged this is the replacement you need.
Installation Instructions
Lois from Elmer, NJ
Bought house & stove was missing rack & broiler
slid in groove

shipment & arrival of new parts unbelievably fast....thanks
Read more...
Your Price
$31.44
  In Stock
Thermal Fuse
★★★★★
★★★★★
26 Reviews
PartSelect Number PS11756138
Manufacturer Part Number WPW10545255
This thermal fuse is a manufacturer-approved replacement part for your oven. It is common for the oven to lose power after completing a self-cleaning cycle, and the thermal fuse is often at fault. Replacing the blown fuse is a fairly easy repair, and involved removing the top of the oven to swap out the fuse. Make sure to turn off the power source to the oven before beginning this repair.
Fixes these symptoms
  • Door won’t open after self cleaning cycle
  • Touchpad does not respond
  • Will Not Start
  • See more...
Installation Instructions
JAMES P from UPATOI, GA
After running oven in BROIL for lengthy period, entire oven shut off, thermal fuse blown
USE 2 PEOPLE FOR SAFETY! SWITCH OFF OVEN POWER BREAKER!! Remove screws attaching oven to wall opening, slide out entire oven just far enough to get to 2 screws on either side of controls, remove those screws (may need stubby screwdriver), lift control front, opens forward, have 2nd person hold control panel cover while removing centered thermal fuse (plugs on both ends, may need needle-nose pliers to grip plug on fuse.) Remove old fuse, plug in new one. Close control panel, replace side screws, TEST POWER BEFORE pushing oven back into wall, replace wall-holding screws. Less than 30 minutes. EXTRA PERSON MAKES EASY! Read more...
Your Price
$89.15
  In Stock
Door Hinge
★★★★★
★★★★★
19 Reviews
PartSelect Number PS11744215
Manufacturer Part Number WP74008014
The hinges control the rate that the oven door opens and closes, and allows the door to stay open at an angle. This hinge can be used on either the left or right hand side of your oven, and is approximately 20 1/2 inches long. If your oven door will not open or close easily, you may need to replace this part. It may be a good idea to replace both hinges at the same time. If a spring has become loose on one hinge, the other hinge is likely to have the same issue. The repair is simple and only requires a Phillips screwdriver and a small bent nail. For a full step-by-step guide, check out the video below.
Fixes these symptoms
Installation Instructions
William from Statesville, NC
Oven door wouldn't close completely
Parts arrived in three days and it was an easy swap of the hinges but the same problem still existed: the oven door wouldn't close completely, so the oven light stayed on and the convection wouldn't work either unless the door closed all the way. The replacement hinge's springs apparently aren't strong enough to close it and the springs aren't adjustable - which is a design flaw. I did correct the problem though, by using three dollars worth of 1" round magnets, which I placed inside the door: they stay put and are strong enough to pull the door tight. Read more...
Your Price
$64.54
  In Stock
Range Bake Element
★★★★★
★★★★★
53 Reviews
PartSelect Number PS11757472
Manufacturer Part Number WPY04000066
The bake element is the heating element that is found at the bottom of the oven and is responsible for 90 percent of the bake heating. This spade style bake element is 16 inches wide, and connects with push-on wire terminals. It has a terminal depth of three inches and a total element length of nineteen inches. You may need to replace the heating element if your oven produces little to no heat, the oven will not heat evenly, or the element will not heat at all. This element comes with an instructions sheet and is intended for use with electric ovens. To see if this part will fit your oven, please check the list of compatible brands below.
Fixes these symptoms
  • Element will not heat
  • Little to no heat when baking
  • Oven is too hot
  • See more...
Installation Instructions
DENISE from GERMANTOWN, TN
bottom heating element in oven disintegrated
First I removed the two screws that hold the element in place. I then pulled the element out about 3 inches and disconnected the two wires. I threw away the old pieces.

Then I connected the two wires on the new element. I pushed the wires back in the insulation in the wall of the cabinet. Then I inserted the two screws and tightened them in.

SUPER EASY!!!!!

This $40 part saved me $1500 on a new double wall oven.
Read more...
Your Price
$32.01
  In Stock
Light Bulb
★★★★★
★★★★★
2 Reviews
PartSelect Number PS11754413
Manufacturer Part Number WPW10412711
Your Price
$55.82
  In Stock
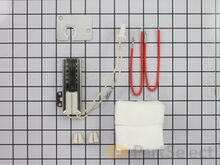
Flat Style Oven Igniter Kit
★★★★★
★★★★★
51 Reviews
PartSelect Number PS1573892
Manufacturer Part Number 12400035
The flat style oven igniter kit is used in gas ovens and ranges. It is what provides the heat needed to open the gas valve, and it ignites fuel for the burner assembly. This part can be used for both bake and broil elements, and it can replace both short and long igniters. However, it cannot replace round style oven igniters. If your igniter glows for 90 seconds or more without igniting the burner, this means it is too weak to open the valve. The element in your igniter may have shorted it and it might not glow at all, or it might only glow orange or red. It needs to glow white hot; if it cannot get hot enough the gas will not be released from the safety valve and it will be impossible to light the burner in your oven. This kit includes the igniter, ceramic wire nuts, an insulation pad, a metal bracket, a variety of plug ends, and an instruction sheet. The body length is 3 3/4 inches, and the element inside is approximately 1 1/2 inches. This replacement part has an amperage range of 3.3 to 3.6. The element inside this igniter is extremely fragile, do not touch it. Before you start repairing your oven or range, make sure you have unplugged it and shut off the gas supply.
Fixes these symptoms
  • Element will not heat
  • Gas igniter glows, but will not light
  • Gas smell
  • See more...
Installation Instructions
James from Ferndale, MI
Oven would not work but the Broiler did
The oven had been working intermittently for a while and after repeated threats of starvation from my spouse I finally took a look even though it was summer and the grill was working fine. The Igniter would glow red when the oven was turned on but the gas would not flow to it no matter what the temperature setting. I searched online and found this site that explained it was possible for the igniter to glow but if it was not drawing the correct amperage (because its resistance was too high) then the main brain would not allow the gas valve to open. So I took a look at the broiler and it had the same igniter. I measure the resistance of both of them and the oven igniters resistance was higher (don't rememeber the reading) then I moved the Igniter from the broiler to the oven and the oven worked from there it was just a matter of ordering the part. End of story except for I am still doing all the cooking on the barbecue outside. Read more...

Appliance Type

Popular Maytag Oven Models

Below are the most popular Maytag Oven models we have. Enter your model number in the search box to find your model.