















GMR05BLHCSCA General Electric Washer - Instructions
Keep searches simple. Use keywords, e.g. "leaking", "pump", "broken" or "fit".
Water leaking in the floor occasionally with no obvious leaks anywhere
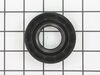
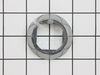
ORDER Spanner wrench for GE tub nut. Impossible to remove hub nut on a washer with age without it. Purchase 1 11/16 in spanner wrench, tub seal, hub nut , split nut
and washer under
agitator all at one time or you will struggle with this repair. The few cents you save is not worth it, the video they provide does a good job but theirs washer
is new hope this helps
and washer under
agitator all at one time or you will struggle with this repair. The few cents you save is not worth it, the video they provide does a good job but theirs washer
is new hope this helps
Parts Used:

-
Greg from Shannon, GA
-
Difficulty Level:Difficult
-
Total Repair Time:1- 2 hours
-
Tools:Nutdriver, Pliers, Screw drivers, Wrench (Adjustable)
5 of 5 people
found this instruction helpful.
Was this instruction helpful to you?
Thank you for voting!
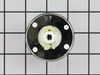
Broken knob on my Mom's washing machine
Folks,
Thanks to your great web site and help video I got this fixed in less than a minute. Literally less time than it took me to watch your helpful video. Don't know how to thank you - keep up the good work!
Thanks to your great web site and help video I got this fixed in less than a minute. Literally less time than it took me to watch your helpful video. Don't know how to thank you - keep up the good work!
Parts Used:
-
Edward from New York, NY
-
Difficulty Level:Really Easy
-
Total Repair Time:Less than 15 mins
-
Tools:Pliers
5 of 5 people
found this instruction helpful.
Was this instruction helpful to you?
Thank you for voting!
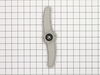
Upper Spray Arm broke in half from hitting something in the upper rack.
Had to remove the rubber gasket on the new spray arm to install the device, as it was hard to push into the above slot that fits the arm..
Parts Used:
-
Howard from PORT TOWNSEND, WA
-
Difficulty Level:A Bit Difficult
-
Total Repair Time:30 - 60 mins
-
Tools:Screw drivers
5 of 5 people
found this instruction helpful.
Was this instruction helpful to you?
Thank you for voting!
Dishwasher would not start Would run if you added 2 qt. water manually
Unplugged power.
Shut off water supply.
Remove the kick panel.
Unscrewed dishwasher from under cabinet and side screws. lower feet to reduce tension.
As you slide the dishwasher out, be sure all lines (Drain, water supply, electric are free to move with dishwasher.
I was able to hold the dishwasher at an angle to easily get to the valve. After removing the the valve, i screwed the new valve back into place. I removed the Line between the valve and Dishwasher. Putting the line on the new valve. I removed the water supply line from the old valve and installed it on the new valve.
Placed the dishwater back in place and screed it back in. I ran the cycles. everything works!
I replace the kickpaner a couple of hours later. Check to make sure there were now leaks.
Shut off water supply.
Remove the kick panel.
Unscrewed dishwasher from under cabinet and side screws. lower feet to reduce tension.
As you slide the dishwasher out, be sure all lines (Drain, water supply, electric are free to move with dishwasher.
I was able to hold the dishwasher at an angle to easily get to the valve. After removing the the valve, i screwed the new valve back into place. I removed the Line between the valve and Dishwasher. Putting the line on the new valve. I removed the water supply line from the old valve and installed it on the new valve.
Placed the dishwater back in place and screed it back in. I ran the cycles. everything works!
I replace the kickpaner a couple of hours later. Check to make sure there were now leaks.
Parts Used:

-
Mark from FAIRFAX, VA
-
Difficulty Level:Easy
-
Total Repair Time:15 - 30 mins
-
Tools:Nutdriver, Pliers, Screw drivers
5 of 5 people
found this instruction helpful.
Was this instruction helpful to you?
Thank you for voting!
Dishwasher not heat or drying dishes
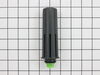
Turned off pier at breaker. Removed dishwasher from under counter after disconnecting water line from dishwasher and drain tube from under sink. You might get a little residual water but not much. Removed old flood switch took about 2 minutes. Replaced with new flood switch. Then tilted dishwasher back to get to plastic nuts that hold down heating element. Set unit back down and removed old heating element then replace it with new one. Replace plastic nuts that hold element. Exact parts makes job easy. Them put water hose back on an put washer back in place hooked drain hose back up. Turned water and power back on. Tested unit worked perfectly. Hardest part of job was putting the dishwasher back into counter and getting the Instalation back on top.
Parts replacement time was about 10 minutes.
Disconnecting and reconnecting and replacing dishwasher 40 minutes. But I wouldn’t pay anyone to do this because it’s really not difficult.
Parts replacement time was about 10 minutes.
Disconnecting and reconnecting and replacing dishwasher 40 minutes. But I wouldn’t pay anyone to do this because it’s really not difficult.
Parts Used:

-
Mike from FRESNO, CA
-
Difficulty Level:Really Easy
-
Total Repair Time:30 - 60 mins
-
Tools:Nutdriver, Screw drivers, Wrench (Adjustable)
5 of 5 people
found this instruction helpful.
Was this instruction helpful to you?
Thank you for voting!
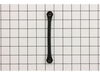
Tub straps broken caused excessive wabbling
Popped off the front panel and removed two screws that help top down. Then pulled the top of the washer up and leaned back out of way.Then each strap had a screw on each end and a clip that holds straps just remove the old and replace with new and put back together.
Parts Used:
-
Drew from Apopka, FL
-
Difficulty Level:Easy
-
Total Repair Time:30 - 60 mins
-
Tools:Nutdriver, Screw drivers
6 of 8 people
found this instruction helpful.
Was this instruction helpful to you?
Thank you for voting!
Dishwasher wasn't heating water
So after noticing some horrid food waste build up in my 9 year old dishwasher, I determined it wasn't heating the water during the wash cycle. I came on here to check how to replace the heating element and was surprised when the flood switch was instead strongly recommended as the first repair step.
I ordered the part, and prepped the dishwasher for the repair (Pro-tip: Clothes pin attached to the bottom of the flood switch wiring harness ensures it doesn't slip down below the opening during the part swap!). The part swap and reassembly only took 5-10 mins or so after prep and dishwasher is now heating water and running great again. Many thanks to partselect.com for the detailed installation guides/videos and the parts recommendations!
I ordered the part, and prepped the dishwasher for the repair (Pro-tip: Clothes pin attached to the bottom of the flood switch wiring harness ensures it doesn't slip down below the opening during the part swap!). The part swap and reassembly only took 5-10 mins or so after prep and dishwasher is now heating water and running great again. Many thanks to partselect.com for the detailed installation guides/videos and the parts recommendations!
Parts Used:
-
Daniel from CONCORD, NC
-
Difficulty Level:Easy
-
Total Repair Time:15 - 30 mins
-
Tools:Nutdriver, Pliers, Screw drivers
5 of 5 people
found this instruction helpful.
Was this instruction helpful to you?
Thank you for voting!
Noisy while spinning
I dissasembled the machine and it took about 30 minutes. Orderd the parts recommended for noisy spinning. Reinstalled the new parts / changed all drum straps. Cleaned the drain drum and spin drum and after complete reassembly the washer is still noisy in agitation and spin cycle. The motor,transmission,counter weight,and drum look ok but there is still a reason why the machine is still noisy. Spent 120.00 dollars on parts so far but the drum and motor,transmission and counterweight are very expensive to replace. I am just going to keep using the machine until the washer fails to work anymore. I'm not going to put any more money in the washer. I will just buy a new one. It's not hard to dissasembled and reassemble the washer. I purchased the parts that was recommended to fix the washer but they were not the ones.The new parts did help like the tub seal but the bottom line is that the washer is still noisy. I watched your videos to work on the washer and there were no special instructions on disassembly and reassembly. Like always there must be more than i know to repair this washer. Thanks
Parts Used:

-
Thomas from SELAH, WA
-
Difficulty Level:A Bit Difficult
-
Total Repair Time:More than 2 hours
-
Tools:Nutdriver, Pliers, Screw drivers, Socket set, Wrench (Adjustable), Wrench set
6 of 8 people
found this instruction helpful.
Was this instruction helpful to you?
Thank you for voting!
Dishwasher won't start.
Nightmare!!! The Striker latch did not pop out with a screwdriver as it was supposed to. The whole dishwasher needs to be disconnected and pulled out, then front door removed and totally disassembled to remove the screw to replace the striker latch. lots of work to replace a striker latch. Bad design!
Parts Used:
-
John from CROSSVILLE, TN
-
Difficulty Level:Very Difficult
-
Total Repair Time:More than 2 hours
-
Tools:Nutdriver, Pliers, Screw drivers, Socket set, Wrench (Adjustable), Wrench set
7 of 10 people
found this instruction helpful.
Was this instruction helpful to you?
Thank you for voting!
drain hose cracked, leaking water, when in use
It was easy, I just removed the old drain hose clip with a screwdriver. Next, removed the old, cracked hose, inserted the new one, and screwed the new clip in.
The best part about this story is the incredible service I was given, by this company. I bought the machine at Sears, so I assumed I could find the hose their. No, they instructed me to go to Orchard Supply(their sister store), I purchased a drain hose, the clerk told me to buy, but the water was still leaking. So, I went on-line and found the right hose, and now I will continue to purchase what I ned for my machine from your company. REALLY Fast Service. Thanks
The best part about this story is the incredible service I was given, by this company. I bought the machine at Sears, so I assumed I could find the hose their. No, they instructed me to go to Orchard Supply(their sister store), I purchased a drain hose, the clerk told me to buy, but the water was still leaking. So, I went on-line and found the right hose, and now I will continue to purchase what I ned for my machine from your company. REALLY Fast Service. Thanks
Parts Used:

-
patricia from Merced, CA
-
Difficulty Level:Really Easy
-
Total Repair Time:Less than 15 mins
-
Tools:Screw drivers, Wrench (Adjustable)
5 of 6 people
found this instruction helpful.
Was this instruction helpful to you?
Thank you for voting!
Broken Turn On Knob

-
Sherri Ann from Rockwall, TX
-
Difficulty Level:Really Easy
-
Total Repair Time:Less than 15 mins
5 of 6 people
found this instruction helpful.
Was this instruction helpful to you?
Thank you for voting!
broken latch
My son did the repair, I ordered both latch and striker, only needed the latch...only took him a few minutes to remove the old and install the new and works just fine
Parts Used:
-
PeggyAnn from EAST DUBLIN, GA
-
Difficulty Level:Really Easy
-
Total Repair Time:Less than 15 mins
-
Tools:Screw drivers
5 of 6 people
found this instruction helpful.
Was this instruction helpful to you?
Thank you for voting!
Very noisy in spin mode
a) remove front panel by depressing the 2 clips at the top in line with the lid b) remove the lid switch and 2 screws holding top on and remove top by tilting up SLIGHTLY and sliding to left. c) Remove agitator and by pulling straight up on it and remove adapter underneath d)remove 4 bolts holding 4 rubber straps to top of tub assembly, readily visible when top is removed. e) unplug motor wiring and disconnect pump and bleach hoses from tub f)while lifting up on tub, push down on each of the 4 suspension rods and disconnect them at bottom of tub ( this is the most difficult part, and to make it easier disconnect the rear rods first) g) tilt tub forward and remove tub assembly h) NOW, for the big nut that holds the spin basket in-- #1, it is LEFT HAND THREAD, so you will turn it to the right to remove it. #2, it is VERY TIGHT and requires a 1&11/16" spanner wrench (which I did not have) for removal. Instead, I used a 1&11/16 socket, an extension and an air impact wrench to remove and replace the nut. Assembly is reverse of removal and remember, that nut is ALUMINUM so be careful with that impact wrench when tightening it back up!I replaced the nut and split ring and cleaned the whole area thoroughly, and it greatly reduced the noise in spin mode. I did not replace the metal housing on the bottom of the spin basket, because it was $50 bucks. this probably would have eliminated all the noise, but my repair only cost $19 in parts, including shipping ,and the parts arrived in 1 day.
Parts Used:
-
James from Colora, MD
-
Difficulty Level:Really Easy
-
Total Repair Time:More than 2 hours
-
Tools:Screw drivers, Socket set, Wrench set
6 of 9 people
found this instruction helpful.
Was this instruction helpful to you?
Thank you for voting!
3 Plastic rollers on bottom of dish basket came off and melted by the heating coil in dishwasher,
Simply pick the basket up to slide wheels onto axles and push in until they lock in place.
Parts Used:

-
BENJAMIN from ONALASKA, TX
-
Difficulty Level:Very Easy
-
Total Repair Time:Less than 15 mins
5 of 6 people
found this instruction helpful.
Was this instruction helpful to you?
Thank you for voting!
Control knob was striped / cannot rotate dial
Remove control knob and replace it with new part.
One retaining clip to remove and replace part.
One retaining clip to remove and replace part.
Parts Used:

-
Osvaldo from Madison, AL
-
Difficulty Level:Really Easy
-
Total Repair Time:Less than 15 mins
-
Tools:Pliers
5 of 6 people
found this instruction helpful.
Was this instruction helpful to you?
Thank you for voting!