















405062 General Electric Dishwasher - Instructions
Keep searches simple. Use keywords, e.g. "leaking", "pump", "broken" or "fit".
End Cap and Wheel axle were worn or broken
This repair was a snap. The parts, though not identical to the original, fit perfectly. I was able to snap both the Rack Slide Cap and the new wheel axle to the existing washer cage and the machine works great now.
Thanks for the quick delivery and great website!
Thanks for the quick delivery and great website!
Parts Used:
-
Michael from Fitchburg, WI
-
Difficulty Level:Really Easy
-
Total Repair Time:Less than 15 mins
-
Tools:Pliers
2 of 2 people
found this instruction helpful.
Was this instruction helpful to you?
Thank you for voting!
Rollers and axles were worn out
Removed the stops at the end of the upper rack, removed the old rollers. Replaced with new rollers and installed the stops back in place. Very easy, finished in less than 15 minutes. Replacement rollers very much improved with design from the original rollers.
Parts Used:
-
Wayne from PALMER, MA
-
Difficulty Level:Really Easy
-
Total Repair Time:Less than 15 mins
-
Tools:Screw drivers
2 of 2 people
found this instruction helpful.
Was this instruction helpful to you?
Thank you for voting!
Lower wheels kept falling off

-
helmut from EAST KINGSTON, NH
-
Difficulty Level:Really Easy
-
Total Repair Time:Less than 15 mins
3 of 5 people
found this instruction helpful.
Was this instruction helpful to you?
Thank you for voting!
Old parts showing wear
Watched a YouTube video on disassembly, parts replacement, and reassembly.
Parts Used:
-
Suzanne from CHEYENNE, WY
-
Difficulty Level:Really Easy
-
Total Repair Time:Less than 15 mins
2 of 2 people
found this instruction helpful.
Was this instruction helpful to you?
Thank you for voting!
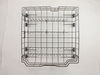
Bottom dishwasher rack rusted out
Simple install- just roll it in. Fit perfect. Better design than OEM part. Perfect.
Parts Used:
-
John C from SPRINGFIELD, VA
-
Difficulty Level:Very Easy
-
Total Repair Time:Less than 15 mins
2 of 2 people
found this instruction helpful.
Was this instruction helpful to you?
Thank you for voting!
leg fell off of bottom rack.
Slid it in. Very easy and the replacement part is built better than the original part.
Parts Used:
-
Jonni from VACAVILLE, CA
-
Difficulty Level:Very Easy
-
Total Repair Time:Less than 15 mins
2 of 2 people
found this instruction helpful.
Was this instruction helpful to you?
Thank you for voting!
missing cap

-
Jean from White Plains, NY
-
Difficulty Level:Really Easy
-
Total Repair Time:Less than 15 mins
3 of 5 people
found this instruction helpful.
Was this instruction helpful to you?
Thank you for voting!
Rack was rusted and broken.
It was a very simple replacement. I took the old one out and rolled the new one in. It took less than 5 minutes!
Parts Used:
-
Amelia from PEORIA, IL
-
Difficulty Level:Very Easy
-
Total Repair Time:Less than 15 mins
2 of 2 people
found this instruction helpful.
Was this instruction helpful to you?
Thank you for voting!
NONE
UNPACKED WHEELS AND CLIP. USING NEEDLE NOSE PLIERS SQUEEZED WHEEL TIP TO INSERT IN WHEEL. REMOVED OLD WHEELS AND RETAINER BY HAND. INSTALLED NEW WHEELS INSTALLED AND NEW RETAINERS
Parts Used:
-
Edward from GRAND BLANC, MI
-
Difficulty Level:Very Easy
-
Total Repair Time:Less than 15 mins
-
Tools:Pliers
3 of 5 people
found this instruction helpful.
Was this instruction helpful to you?
Thank you for voting!
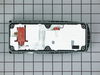
Detergent cap would not stay closed
After removing the screws, the front of the dishwasher easily came off. I put 2 screws back in to hold the control panel in place. I did not want that to dangle while replacing the part. The part came off easily after removing the screws. Everything went together easy.
Parts Used:
-
Michelle from Carlisle, PA
-
Difficulty Level:Easy
-
Total Repair Time:Less than 15 mins
-
Tools:Screw drivers
2 of 3 people
found this instruction helpful.
Was this instruction helpful to you?
Thank you for voting!
the lower rack wheels had fallen off and melted
The best money I've spent on a repair. Easy. The lower rack now rolls in and out smoothly.
Parts Used:
-
Alfred from Mashpee, MA
-
Difficulty Level:Really Easy
-
Total Repair Time:Less than 15 mins
2 of 3 people
found this instruction helpful.
Was this instruction helpful to you?
Thank you for voting!
one wheel was missing, others kept on falling off
Just snapped studs and wheels together and put them into place.
Parts Used:
-
ILONA from AUSTIN, TX
-
Difficulty Level:Really Easy
-
Total Repair Time:Less than 15 mins
2 of 3 people
found this instruction helpful.
Was this instruction helpful to you?
Thank you for voting!
Old rack was rusted out and missing most of the wheels.
Easiest repair ever. My new rack arrived in three days, opened the box and slid it in. Better quality than the original. Excellent service!
Parts Used:
-
Jim from Palatka, FL
-
Difficulty Level:Really Easy
-
Total Repair Time:Less than 15 mins
2 of 3 people
found this instruction helpful.
Was this instruction helpful to you?
Thank you for voting!
The detergent dispenser latch was broken
The repair was easy. Removed all the screws from the inside door panel, approx. 11. Watch out for that last screw as there isn't anything else holding the outside panel, inside panel and control panel together other than those screws. I then unplugged the old dispenser backed out another 6 screws and replaced the old dispenser with the new one. Put it all back together within about a half hour.
Parts Used:
-
KEVIN from MACKINAW, IL
-
Difficulty Level:Really Easy
-
Total Repair Time:15 - 30 mins
-
Tools:Screw drivers
2 of 3 people
found this instruction helpful.
Was this instruction helpful to you?
Thank you for voting!
dishes where not clean after washing
change the nozzles and filter
Parts Used:
-
Daniel from Maurice, LA
-
Difficulty Level:Really Easy
-
Total Repair Time:15 - 30 mins
-
Tools:Nutdriver
7 of 18 people
found this instruction helpful.
Was this instruction helpful to you?
Thank you for voting!