















WBSR3140DW General Electric Washer - Instructions
Keep searches simple. Use keywords, e.g. "leaking", "pump", "broken" or "fit".
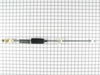
Washer tub fell sideways
Only took 2 days to ship. Took the screws out of the bottom rear panel to gain access to bottom of tub. Next pushed the two hidden tabs with flat screwdriver in the front to gain access to the top of tub, they are located straight inline with each side of the washer lid in seam between the top panel and the front side panel of washer. Then installed the new suspension rod and reassembled. You can find online videos that show how to disassemble appliances if you're not sure how to get them apart for repair. My first appliance repair was easy to do and saved a lot of $$$ vs paying for repair or purchasing a new unit.
Parts Used:
-
Chris from Tampa, FL
-
Difficulty Level:Easy
-
Total Repair Time:30 - 60 mins
-
Tools:Screw drivers
12 of 17 people
found this instruction helpful.
Was this instruction helpful to you?
Thank you for voting!
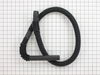
Purchased used washin machine w/o drain hose
After realizing I had purchased a used washing machine without a drain hose I thought I would never find one, but then I found partselect.com. After easily locating the part on the web site from the detailed diagrams and model number I then ordered it. Receiving the part quickly I used a socket to remove the plastic connector that prevents the hose from disconnecting once the washer is turned on. I fed the hose through the plastic connector and into the drain hole without any issues. I then used my one small socket to secruely fasten it back together. There was no additional tools or items needed to successfully attach the washer drain hose.
Parts Used:
-
Daniel from Oxford, GA
-
Difficulty Level:Really Easy
-
Total Repair Time:Less than 15 mins
-
Tools:Socket set
10 of 11 people
found this instruction helpful.
Was this instruction helpful to you?
Thank you for voting!
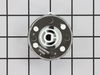
The Old Knob Broke.
-
RUSSELL from NORWALK, CT
-
Difficulty Level:Really Easy
-
Total Repair Time:Less than 15 mins
19 of 38 people
found this instruction helpful.
Was this instruction helpful to you?
Thank you for voting!
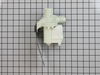
Pump went bad, machine had very little use would not buy another GE washer
Drain tub. remove 2 hose clamps and hoses. R&R 2 screws that hold pump.
Parts Used:
-
William from Old Lyme, CT
-
Difficulty Level:Really Easy
-
Total Repair Time:30 - 60 mins
-
Tools:Nutdriver, Pliers
9 of 9 people
found this instruction helpful.
Was this instruction helpful to you?
Thank you for voting!
Washer tub was making loud noises.
Basically, I just followed the instructions in the video that is posted on this sight. It went off without a hitch. Removed the screws from the control panel, lifted it up and out of the way. Then I used the putty knife to release the clips that hold the front panel in place and then removed the top of the washer. Pretty easy from there to swap out the dampening straps and reassemble the washer. Saved a lot of money doing it myself.
Parts Used:
-
Mary from Roslyn, PA
-
Difficulty Level:Easy
-
Total Repair Time:30 - 60 mins
-
Tools:Socket set
10 of 12 people
found this instruction helpful.
Was this instruction helpful to you?
Thank you for voting!
broken belt
It was very easy, just one screw to get the belt on, then it was just putting in place and putting it back together took the longest.
Parts Used:
-
Mary from Timberon, NM
-
Difficulty Level:Really Easy
-
Total Repair Time:30 - 60 mins
-
Tools:Nutdriver
9 of 10 people
found this instruction helpful.
Was this instruction helpful to you?
Thank you for voting!
Washer won't drain water
Took front panel off the washer and found the pump working but no water drained from the tub. Took the motor off the washer by removing the two 10mm screws and attaching hoses. Decided to take the motor apart and found the propeller shaft has broken off inside the pump. Ordered new motor from Partselect and replaced it. Washer is working fine now.
Parts Used:
-
Ben from Lake Forest, CA
-
Difficulty Level:Easy
-
Total Repair Time:15 - 30 mins
-
Tools:Pliers, Socket set, Wrench (Adjustable)
10 of 13 people
found this instruction helpful.
Was this instruction helpful to you?
Thank you for voting!
There was no fabric softener dispenser
The cap just removed by tapping a few times with a screw driver and hammer. then pulling upward it came off and I placed the new dispenser on. a couple minutes saved me from running up and down to add softener and it was very inexpensive.Thanks alot PARTS SELECT.
Parts Used:

-
Gigi from Monroeville, PA
-
Difficulty Level:Really Easy
-
Total Repair Time:Less than 15 mins
-
Tools:Screw drivers
10 of 13 people
found this instruction helpful.
Was this instruction helpful to you?
Thank you for voting!
The zinc drive hub that connects the transmission to the tub had corroded away.
It was almost a complete tear down. Most difficult part was discivering how to remove the front panel. Slip a putty knife between the top and front covers. push and depress the spring tab on each side. The left hand nut on the hub was difficult. I had to get a neighbor to hold a large pair of pliers while I put a pipe wrench on the nut and hit it with a 2 lb. hammer in order to break it loose. Puting it back together do not forget to reconnect the level sensing hose to the level selector, I did. Machine will not perform without it. You can do it! I did.
Parts Used:
-
James from Lapeer, MI
-
Difficulty Level:A Bit Difficult
-
Total Repair Time:More than 2 hours
-
Tools:Pliers, Screw drivers, Socket set, Wrench (Adjustable), Wrench set
10 of 13 people
found this instruction helpful.
Was this instruction helpful to you?
Thank you for voting!
Water leaks on floor in front of machine.
Worse machine ever made. Installed all parts per videos .they helped a lot. Inner tub went on crooked and first wash ruined inner/outer tubs top piece. Took to dump.
Parts Used:


-
Kenneth from MESA, AZ
-
Difficulty Level:Very Difficult
-
Total Repair Time:More than 2 hours
10 of 14 people
found this instruction helpful.
Was this instruction helpful to you?
Thank you for voting!
Washer would not spin
Removed the front panel with a stiff putty knife, removed the worn belt. Placed the new belt on the front pully and than the rear pully, turning clockwise. After checking the spin cycle I put the front panel back on and I was done.
Parts Used:
-
Rick from Ephrata, PA
-
Difficulty Level:Really Easy
-
Total Repair Time:Less than 15 mins
9 of 11 people
found this instruction helpful.
Was this instruction helpful to you?
Thank you for voting!
Water everywhere - overflowing washer
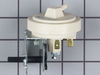
We pulled up diagrams online and read a lot about the repairs. Four screws on top took off the electrical panel. Two clips hidden under the front of the top panel released the front panel. We followed the clear tube up to the water level pressure switch. We disconnected the previous switch, and connected the new one, one wire at a time. We tested and found that the water now stopped filling. Put the washer back together - done! Cost - $30 and 1/2 a hour total vs. calling a repair person.
Parts Used:
-
Sarah from Pylesville, MD
-
Difficulty Level:Really Easy
-
Total Repair Time:Less than 15 mins
-
Tools:Screw drivers
10 of 14 people
found this instruction helpful.
Was this instruction helpful to you?
Thank you for voting!
No cold water in any cycle.
Remove four screws which held the front cover of the washer. Dropped the cover down to expose the temp. switch. Turned the switch 1/8 turn counterclockwise which removed the switch from the cover. Pulled of the four pigtail wire leads and then installed the new switch in reverse order. Very easy!!
Parts Used:
-
Raymond from Henderson, NV
-
Difficulty Level:Really Easy
-
Total Repair Time:Less than 15 mins
-
Tools:Screw drivers
9 of 11 people
found this instruction helpful.
Was this instruction helpful to you?
Thank you for voting!
Capacitor failed (cracked, split, and melted a little), washer would not spin and laundry room filled up with smoke
Went to PartSelect website, troubleshot the problem I was having for the model washer I have. Ordered part, once it arrived, I had it installed and all back together in less than 30 minutes. Washer has been running with no problems since the repair. PartSelect is awesome!
Parts Used:
-
William from KELLER, TX
-
Difficulty Level:Really Easy
-
Total Repair Time:15 - 30 mins
-
Tools:Pliers
8 of 8 people
found this instruction helpful.
Was this instruction helpful to you?
Thank you for voting!
Water would not drain from tub.
First I pulled off the front panel using a flat blade screwdriver to get it started. Then I could watch what happening as I tried starting the washer. When I put the dial to the Rinse Cycle and pulled the dial to start the washer, it would start to run for about 5 seconds and then stop. I tried this several times and the same thing happened. I noticed the water pump located in the front lower right hand corner was not running. It would only hum. I drained the tub by holding the wash machine drain hose into a bucket. If I held the hose down toward the floor, the water would flow freely out of the hose and into my bucket. As the bucket filled up I just raised the hose, emptied the bucket and repeated the process until the tub was empty. Sure saved time over trying to empty the tub by bailing the water out with a can. After the tub was drained I removed the two hoses from the pump and then the two mounting bolts and the pump was out. I bench checked the pump with an electric cord and it stilled just hummed. I knew for sure then the pump was bad.
I then ordered a new pump from PartsSelect.com. I entered my wash machine model number and PartsSelect gave me a picture of the replacement pump. I was a little worried that it did not look the same as my old pump but I ordered it any how. The night I got the pump I installed it in about 30 minutes. No problems, it just worked like a charm. Thank you PartsSelect.com I will definitely use you for all my appliance repairs in the future. I know there will be more.
I then ordered a new pump from PartsSelect.com. I entered my wash machine model number and PartsSelect gave me a picture of the replacement pump. I was a little worried that it did not look the same as my old pump but I ordered it any how. The night I got the pump I installed it in about 30 minutes. No problems, it just worked like a charm. Thank you PartsSelect.com I will definitely use you for all my appliance repairs in the future. I know there will be more.
Parts Used:
-
James from Strafford, NH
-
Difficulty Level:Easy
-
Total Repair Time:30 - 60 mins
-
Tools:Nutdriver, Screw drivers, Wrench (Adjustable)
8 of 9 people
found this instruction helpful.
Was this instruction helpful to you?
Thank you for voting!