















57731H2WW General Electric Washer - Instructions
Keep searches simple. Use keywords, e.g. "leaking", "pump", "broken" or "fit".
all straps were broke due to over loadiing washer
Took front of washer off,found that all of the straps were broke ,removed two small bolts from each strap pulled plastic support from from broken strap and put it in new strap,put plastic supported end of strap in first put bolt in and mounted other end to drum,easy job just about any one with common since could do it.Got to go laundry to wash :-)
Parts Used:
-
Danny from north kansas city, MO
-
Difficulty Level:Really Easy
-
Total Repair Time:1- 2 hours
-
Tools:Screw drivers, Socket set
8 of 10 people
found this instruction helpful.
Was this instruction helpful to you?
Thank you for voting!
Huge Banging, Uneven Spin, Metal Fragments in Tub
After reading all the repair info and reviewing the diagram for my wash machine on this website I was ready to tear into my washer. I removed the front panel and lid to access the tub, pulled out the plastic agitator and revealed the broken inner base hub. The base hub was cracked half way around causing the inner tub to drop down and drag on the outer tub, making the washer sound like it was coming through the wall on a spin cycle. I then unbolted the plastic cap and removed it revealing the hub nut. The most valuable piece of advice in the repair info was abouthe hub nut being a laft hand thread (clockwise to loosen)and that it was on really tight and hard to remove. I put a short 8" pipe wrench on it, because of the lack of clearance in the tub, and hit it with the handle of a all steel hammer to break it loose. Unbolted the balancing straps (4) on the plastic top rim cap that holds the tub in place, unsnapped and removed it, then carefully pulled out the tub. I also had to unscrew the the control panel to reveal and remove the 4 screws holding the fill tube brace so I could push it back to remove the tub. I then took the inner tub outside and took it apart, 3 parts. The top plastic rim, the tub, and the broken base hub that are held together with torx screws. Then it was cleanup time, very dirty on the inside, used a garden hose, scrub brush, sponge, and soap. Cleaned up the hub nut threads with a wire brush and then the outer tub withe a sponge and shop vac. When the base hub broke it caused the inner tub and outer tub to rub together making a groove and plastic shards on the bottom of the outer tub that I had to scrape and sand smooth. A shop vac an absolute necessity in getting all the grime and plastic crumbs out of the outer tub so they don't get in and clog the pump. I received the replacement parts in 2 days! Reassembled in reverse order and everything worked great! Not a bad project at all when you know what to expect, thanks to Part Select.com.
Parts Used:

-
Daren from Bloomington, IN
-
Difficulty Level:A Bit Difficult
-
Total Repair Time:1- 2 hours
-
Tools:Nutdriver, Pliers, Screw drivers, Socket set
9 of 13 people
found this instruction helpful.
Was this instruction helpful to you?
Thank you for voting!
washer was leaking (noticed during spin cycle)
Took complete tub assembly out of washer and inspected it. Did not find an obvious cause of leak but all 8 screws on inner tub hub were loose. As both tub nut and split ring were corroded, replaced them and the outer tub seal. Did a lot of cleaning!! As I was putting the trans assy back on the outer tub, I noticed a crack around the drain spout. At 1st, it looked like it belonged there but a closer look proved it didn't. I ordered a new outer tub (which came in 2 days) and I put the whole thing back together. Reassembly was far easier than disassembly was and I learned a whole lot about washers. YouTube is a great source of information.
Parts Used:
-
John from Shady Point, OK
-
Difficulty Level:A Bit Difficult
-
Total Repair Time:More than 2 hours
-
Tools:Nutdriver, Screw drivers, Socket set, Wrench set
8 of 10 people
found this instruction helpful.
Was this instruction helpful to you?
Thank you for voting!
Fin Broke off the Agitator
My wife washed a washable mop head and somehow it managed to break one of the fins off the agitator. I ordered a new agitator, fabric softener dispenser, agitator coupling, and bolt. I figured since I had to replace the agitator I would replace everything. This was super simple and easy. I watched a few videos on getting the agitator off, some people said you may need to run some rope under it to get it off. Luckily mine popped right off. I grabbed both sides and gave it a good solid jerk straight up and it came right off. I used a 3/8 drive socket wrench and a 7/16 socket to remove the bolt from the agitator coupling. I installed the new coupling with a new bolt, lined up the agitator and snapped it right on. Popped in the new fabric softener dispenser and that was it. I may have spent a total of 10 minutes counting unpacking the new parts and carting the old ones out to the trash can replacing this. If you can operate a socket wrench or a new smart phone this is really a piece of cake.
Parts Used:


-
Keith from STATESVILLE, NC
-
Difficulty Level:Very Easy
-
Total Repair Time:Less than 15 mins
-
Tools:Socket set
7 of 7 people
found this instruction helpful.
Was this instruction helpful to you?
Thank you for voting!
Replaced drain pump on washer
Took about 10 Minutes to have my washer up and running again. So easy, and I almost bought a new washer! Fixed it before my husband got home from work. Thank you PartSelect!
Parts Used:
-
John from Tompkinsville, KY
-
Difficulty Level:Really Easy
-
Total Repair Time:Less than 15 mins
-
Tools:Pliers, Screw drivers, Wrench (Adjustable)
8 of 11 people
found this instruction helpful.
Was this instruction helpful to you?
Thank you for voting!
I had a bad tub bearing and tub seal.
I had no difficulty dismantling the washer until I got to the hub nut. It was frozen to the cone shaped fitting it was resting in. I had to take a drill and a 3/16" drill bit and drill the flange of the hub nut and then take a chisel and break it off piece by piece. Once that was off, I lifted the tub out and tried to pry off the split ring under the tub and it too was corroded and broke when I tried to pull it off. So I would advise you to buy a hub nut and a split ring if you are replacing the tub bearing, just to be safe. I went to an appliance parts store here in town and bought them. When reassembling the tub, I couldn't get a wrench or pliers on the hub nut to get enough torque to tighten it securely. And since I didn't want to spend $43 to buy a spanner wrench for a one time repair, I went to Harbor Freight and bought a $15 dollar adjustable wrench and cut 3 1/2" off the handle so it would lay flat to the tub and used a hammer to tap on the handle to tighten it securely. If you do not find some way to tighten the tub securely, it will come loose in the spin cycle like it did on me twice before I purchased the adjustable wrench and modified it to work. Plus I still have a useable adjustable wrench. Additionally, I took the washer cabinet, the tub and the tub sleeve and power washed it to get years of grime off of it. The washer now operates like new, saving me hundreds of dollars.
Parts Used:

-
Troy from N CHESTERFLD, VA
-
Difficulty Level:A Bit Difficult
-
Total Repair Time:More than 2 hours
-
Tools:Nutdriver, Pliers, Screw drivers, Socket set, Wrench (Adjustable)
7 of 8 people
found this instruction helpful.
Was this instruction helpful to you?
Thank you for voting!
Broken tub strap, hub, an cracked outter tub
Repair went good, only wish i had bought a new tub seal, washer, an split ring....but i managed to save the original ones an it seems to be working like new again! thanks Partselect!!!!
Parts Used:
-
Drew from Queen Creek, AZ
-
Difficulty Level:A Bit Difficult
-
Total Repair Time:30 - 60 mins
-
Tools:Nutdriver, Pliers, Screw drivers, Socket set, Wrench (Adjustable)
7 of 8 people
found this instruction helpful.
Was this instruction helpful to you?
Thank you for voting!
Tub made banging noise when stopping from spin cycle
I notice a strange noise when ever the tub would shut down from a spin cycle. When I would load clothes it seemed that the basket had to much lateral movement. I looked between the top of the frame & basket & found 2 of the dampening straps had broken. Ordered 4 of them to replace all the straps.
Replacement was easy. I popped the front cover of the machine off. Remove 2 screws which held the top down which gave easy access to the straps. The straps are held in place by 2 screws so it was a simple process of removing the screws, removing the straps from their anchors & reinstalling the screws with the new straps. Job done. Reinstall the top & front of the machine & put the wife back to work.
Replacement was easy. I popped the front cover of the machine off. Remove 2 screws which held the top down which gave easy access to the straps. The straps are held in place by 2 screws so it was a simple process of removing the screws, removing the straps from their anchors & reinstalling the screws with the new straps. Job done. Reinstall the top & front of the machine & put the wife back to work.
Parts Used:
-
Timothy from Broken Arrow, OK
-
Difficulty Level:Really Easy
-
Total Repair Time:30 - 60 mins
-
Tools:Nutdriver
6 of 6 people
found this instruction helpful.
Was this instruction helpful to you?
Thank you for voting!
water wouldn't stop pouring into the machine, would not spin water out
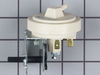
unplug machine and turn off water at the valve. the pressure switch is located behind the water level control knob. remove the knobs from the panel, then remove the panel on the top back of the machine and remove the wires from the pressure switch. unplug switch. attach wires to new switch and plug into place. replace panel and replace all the knobs.turn on the water valve and plug into outlet.
Parts Used:
-
Lynne from Southbury, CT
-
Difficulty Level:Easy
-
Total Repair Time:15 - 30 mins
-
Tools:Pliers, Wrench (Adjustable)
8 of 12 people
found this instruction helpful.
Was this instruction helpful to you?
Thank you for voting!
washer would not agitate or spin
First I removed the front panel using the screw driver. I removed the old belt which was in the bottom of the washer. I placed the new belt on the motor and adjusted the pullies. I replaced the front panel. The washer spins much better now than it had for the past year.
Parts Used:

-
Kathleen from E. Stroudsburg, PA
-
Difficulty Level:Really Easy
-
Total Repair Time:Less than 15 mins
-
Tools:Pliers, Screw drivers
7 of 9 people
found this instruction helpful.
Was this instruction helpful to you?
Thank you for voting!
Dampening straps were broken
Originally my water level sensor was broken. When I was repairing that, I noticed that the dampening straps were broken. Replacing them was easy. The hardest part was remembering how to open the top. I just searched the internet until I found the answer. I can't remember it all right now, but the key was to slide a putty knife in between the top and the front to pop open the body.
Parts Used:
-
Marc from Cambridge, MA
-
Difficulty Level:Easy
-
Total Repair Time:Less than 15 mins
-
Tools:Screw drivers, Socket set
7 of 9 people
found this instruction helpful.
Was this instruction helpful to you?
Thank you for voting!
washer had heavy wet clothes left after spin cycle
The trick is to pull the front cover off by using a putty knife .slide it under the cover at both front corners.it will click on each corner.then pull front cover off .lift off the bottom catch hooks.look for the pump on the bottom right side.unplug the wite connector .take 2-5/16 bolts out holding the bracket.then grab a pliers .squeeze the hose clamps and pull the 2 hoses off.assemble new pump.
Parts Used:

-
Richard from Garden City, NY
-
Difficulty Level:Easy
-
Total Repair Time:Less than 15 mins
-
Tools:Pliers, Socket set
8 of 12 people
found this instruction helpful.
Was this instruction helpful to you?
Thank you for voting!
The setting knob was broken and wouldn't engage
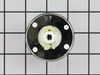
There is nothing to tell really. Took the setting knob off, put the new knob on. That was it, took all of five minutes.
Parts Used:

-
Joy from Pipe Creek, TX
-
Difficulty Level:Really Easy
-
Total Repair Time:Less than 15 mins
-
Tools:Pliers
6 of 7 people
found this instruction helpful.
Was this instruction helpful to you?
Thank you for voting!
Agitator kept coming off
Removed the bolt holding the agitator coupler on, replaced it and the bolt then slid the agitator on the coupler and the fabric softener dispenser on top of that.... so easy!!
Parts Used:
-
Jay from Wickliffe, KY
-
Difficulty Level:Really Easy
-
Total Repair Time:Less than 15 mins
-
Tools:Socket set
9 of 16 people
found this instruction helpful.
Was this instruction helpful to you?
Thank you for voting!
Washer kept filling with water after it started agitating
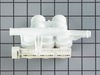
There is a metal plate on back of the top of the washer held on by 3 screws. Removed them and that gave you access to the water valve. Water valve was fastened with 2 screws. Removed them and the hose that was connected with a clamp. Reversed the order on the installation and done. Whole job took 20 min. Now I know where to get parts. This site was awesome. Ordered the part on Tuesday, UPS delivered Thursday.
Parts Used:
-
PETER from READING, PA
-
Difficulty Level:Really Easy
-
Total Repair Time:15 - 30 mins
-
Tools:Nutdriver, Pliers, Screw drivers
6 of 7 people
found this instruction helpful.
Was this instruction helpful to you?
Thank you for voting!