















DW960B-CAN Jenn-Air Dishwasher - Instructions
Keep searches simple. Use keywords, e.g. "leaking", "pump", "broken" or "fit".
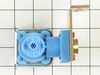
The inlet valve on hte dishwasher was bad
I simply connected the two hoses to the valve plugged in the two wires and it was working!
Parts Used:
-
Scott from menan, ID
-
Difficulty Level:Really Easy
-
Total Repair Time:Less than 15 mins
-
Tools:Screw drivers
6 of 12 people
found this instruction helpful.
Was this instruction helpful to you?
Thank you for voting!
Tjhe nylon piece that attaches the spring to the door broke.
Attaching the part to the door only took a few minutes but getting the dishwasher out over the hardwood floor that was installed after the appliance was put in was a pain. I had to remove a piece of the hardwood floor and use some technique to get it out of the opening so that the springs were visable. There is no problem after that. I would recommend using work gloves to stretch the spring over the retaining notch on the door so that you don't pinch your hand.
Parts Used:
-
Herbert from Mechanicsville, MD
-
Difficulty Level:Very Difficult
-
Total Repair Time:More than 2 hours
-
Tools:Pliers, Screw drivers, Wrench (Adjustable)
3 of 3 people
found this instruction helpful.
Was this instruction helpful to you?
Thank you for voting!
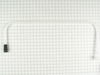
A sudden puddle of water under the dishwasher
I first removed the bottom access panel and 2 upper screws holding the dishwasher to the counter. Be sure to remove the standing water in the bottom tray. I pulled the chassis far enough forward to reach where the top shower hose attaches ( the supply line and wire had enough slack to move the chassis ). Not knowing how the rotating shower arm attached, I unscrewed the ribbed retaining ring above it, and found the whole assembly came loose - freeing the upper end of the shower hose. Put a shallow tray under the lower end of the shower hose to catch the remaining water and loosen the hose clamp to free the remaining end of the hose. Transfer the rubber washer at the top end and the hose clamp at the bottom, to the new hose and install. A quick repair, but one that shouldn't be needed on a 4 year old dishwasher.
Parts Used:
-
George from Asheville, NC
-
Difficulty Level:Easy
-
Total Repair Time:15 - 30 mins
-
Tools:Nutdriver, Screw drivers
3 of 3 people
found this instruction helpful.
Was this instruction helpful to you?
Thank you for voting!
Rinse dispenser won't work
Unscrewed the inside door panel. Removed the reservoir assembly. Disconnected the wax motor. Replaced it with the new motor. Replaced the new o-ring. Done. The hardest part was finding out why it was not working and how to fix it. Google for a long time in order to find some idea what to do. Then took the door apart to see the reservoir and the wax motor. After that, it was pretty easy. HTH
Parts Used:

-
gary from San Antonio, TX
-
Difficulty Level:Easy
-
Total Repair Time:Less than 15 mins
-
Tools:Screw drivers
4 of 6 people
found this instruction helpful.
Was this instruction helpful to you?
Thank you for voting!
no water going into the dishwasher jet,I could hear the valve hum,but no water through the valve
I first removed both lower front shields,(4 screws)
I then shut off water supply to inlet valve from hot water supply. I removed the water hose from inlet valve,two electrical terminals,( I put tape on right side terminal and lettered with an R as not to mix up the two terminals)removed the hose clamp,removed valve from frame.I reinstalled in reverse procedure.I turned the water back on and checked for leaks.I started the normal cycle and water flowed into the dishwasher as designed.
I then shut off water supply to inlet valve from hot water supply. I removed the water hose from inlet valve,two electrical terminals,( I put tape on right side terminal and lettered with an R as not to mix up the two terminals)removed the hose clamp,removed valve from frame.I reinstalled in reverse procedure.I turned the water back on and checked for leaks.I started the normal cycle and water flowed into the dishwasher as designed.
Parts Used:
-
william from defiance, OH
-
Difficulty Level:Easy
-
Total Repair Time:15 - 30 mins
-
Tools:Pliers, Screw drivers, Wrench (Adjustable)
3 of 3 people
found this instruction helpful.
Was this instruction helpful to you?
Thank you for voting!
A leak around the motor shaft.
Everything is straight forward with the following two exceptions; The threads that hold the motor fan to the impeller are left hand, and it takes a special tool to remove the top rotating assembly. It took about 4 hours to figure out what to do, and make the tool . I put it back together in about 20 minutes.
Parts Used:
-
Donald from Windsor, CO
-
Difficulty Level:Difficult
-
Total Repair Time:More than 2 hours
-
Tools:Screw drivers, Socket set, Wrench set
3 of 3 people
found this instruction helpful.
Was this instruction helpful to you?
Thank you for voting!
nothing held the door up
first I turned off the water to the dishwasher, and turned the power off for the dishwasher.
removed the 4 screws from bottom panel
then removed the 2 screws from the bottom of the counter,
at this point I could pull the dishwasher out. then figured out where the part went and attached.
pushed the dishwasher back and lined up the holes under the counter, put those in first, the put the bottom panel back on, turned the water back on, and flipped the breaker switch.
Reading the other stories really did help me get some idea of what needed to be done
removed the 4 screws from bottom panel
then removed the 2 screws from the bottom of the counter,
at this point I could pull the dishwasher out. then figured out where the part went and attached.
pushed the dishwasher back and lined up the holes under the counter, put those in first, the put the bottom panel back on, turned the water back on, and flipped the breaker switch.
Reading the other stories really did help me get some idea of what needed to be done
Parts Used:
-
kathy from grayslake, IL
-
Difficulty Level:Easy
-
Total Repair Time:30 - 60 mins
-
Tools:Screw drivers
3 of 3 people
found this instruction helpful.
Was this instruction helpful to you?
Thank you for voting!
Leak under dishwasher wash and rince
The problem was the rubber end on the upper shower head pipe at the pump. Not to hard . Slide dishwaser half way ouy the ptpe is on the right side.The bottom end is is just a clamp the top drops in from the top, inside there is a nut above the upper shower head. You can unsrew the nut with your fingers, it is right above the upper shower head.There it a washer at the top of the pipe that should be replaced that doesnot come with the pipe
Parts Used:

-
Richard from Edison, NJ
-
Difficulty Level:Easy
-
Total Repair Time:1- 2 hours
-
Tools:Nutdriver, Screw drivers, Socket set, Wrench (Adjustable), Wrench set
3 of 3 people
found this instruction helpful.
Was this instruction helpful to you?
Thank you for voting!
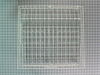
corroded rack and broken basket
Although the (top) dishrack assembly included the nylon wheeles, it was easier to replace the old one by disengaging it from its wheels and installing the new rack on the old wheels kept in the slider track. The snap hook that held each wheel to the old rack was popped loose (finger pressure) and the old rack removed. The new rack was held in place and each of the four wheels snapped to it. Each wheel fits into a wire post on the basket and the plastic hook snaps onto the wire frame. The most difficult part of the 'repair' was removal of the handle from the old silver ware basket. I used screwdrivers to simultaneously pry the four tabs of the halde out of the slots on the basket and pulled (hard!) the handle off. It snapped easily into place on the new basket.
Parts Used:

-
William from Mundelein, IL
-
Difficulty Level:Really Easy
-
Total Repair Time:Less than 15 mins
-
Tools:Screw drivers
3 of 3 people
found this instruction helpful.
Was this instruction helpful to you?
Thank you for voting!
No Water Into The Dishwasher
Turned off water at valve, removed float switch, removed water inlet vlv. Replaced and reassembled. Still not water going into the machine. I have no voltage to the valve or float switch. I then took the door apart to find there were burnt wires as well as a burn mark on the control panel. Upon closer inspection, it looks like the door seal has failed and water got into the door. Had to replace dishwasher with a new one.
Parts Used:
-
RICHARD from RAMSEY, NJ
-
Difficulty Level:Really Easy
-
Total Repair Time:Less than 15 mins
-
Tools:Pliers, Wrench (Adjustable)
3 of 3 people
found this instruction helpful.
Was this instruction helpful to you?
Thank you for voting!
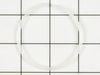
Lower wash arm would not spin freely
The problem is a worn seal ring. That ring is inside the lower spray arm's spray nozzle support assembly. The wash arm spins on that assembly.
I unscrewed the lower spray nozzle popup, from the wash arm support. That part, from which the extending spray nozzle rotator pops out, simply unscrews, by hand, from the wash arm support. Then I could lift off the wash arm itself to get it out of the way for the next step.
With the wash arm removed, I could then gently pry off the flat filter cover which was underneath the wash arm (the filter cover is simply clipped on. Use a screwdriver).
Now, reaching inside where the that popup spray nozzle was screwed on, you can see and/or feel a tall skinny plastic piece in the center of it, which actually screws that wash arm support onto, well, the rest of the dishwasher.
With that "screw" removed by hand, I removed the wash arm support.
Inside that wash arm support the old ring seal can be removed and the new one inserted.
Simply reverse the process to re-assemble.
Note that it's hard to determine where, exactly, to put that ring seal, inside the wash arm support. But it seemed to me it didn't really matter as long as it was just in there.
I unscrewed the lower spray nozzle popup, from the wash arm support. That part, from which the extending spray nozzle rotator pops out, simply unscrews, by hand, from the wash arm support. Then I could lift off the wash arm itself to get it out of the way for the next step.
With the wash arm removed, I could then gently pry off the flat filter cover which was underneath the wash arm (the filter cover is simply clipped on. Use a screwdriver).
Now, reaching inside where the that popup spray nozzle was screwed on, you can see and/or feel a tall skinny plastic piece in the center of it, which actually screws that wash arm support onto, well, the rest of the dishwasher.
With that "screw" removed by hand, I removed the wash arm support.
Inside that wash arm support the old ring seal can be removed and the new one inserted.
Simply reverse the process to re-assemble.
Note that it's hard to determine where, exactly, to put that ring seal, inside the wash arm support. But it seemed to me it didn't really matter as long as it was just in there.
Parts Used:
-
Joel from Point Roberts, WA
-
Difficulty Level:Easy
-
Total Repair Time:Less than 15 mins
-
Tools:Screw drivers
3 of 4 people
found this instruction helpful.
Was this instruction helpful to you?
Thank you for voting!
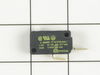
No water would enter in dishwasher
Removed covers on the bottom of dishwasher so I could get access to area. Measured no voltage on water inlet pump. removed to wires from foat switch, one screw to remove float switch. When I pressed the float switch button to activate the switch would not move. Ordered and replaced the switch. 30 minutes tops
Parts Used:
-
Rick from Laingsburg, MI
-
Difficulty Level:Really Easy
-
Total Repair Time:15 - 30 mins
-
Tools:Screw drivers
5 of 10 people
found this instruction helpful.
Was this instruction helpful to you?
Thank you for voting!
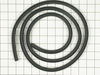
Door leaked from lower right corner
First I replaced the soap door grommet -- door still leaked. Then I went for the really expensive part ($40) -- the door gasket. The old one came right out and the new one went right in -- 15 minutes tops -- and the door no longer leaked.
Thanks to all the previous posters for their hints.
Thanks to all the previous posters for their hints.
Parts Used:
-
jerry from wilton, CT
-
Difficulty Level:Easy
-
Total Repair Time:15 - 30 mins
-
Tools:Pliers
3 of 4 people
found this instruction helpful.
Was this instruction helpful to you?
Thank you for voting!
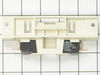
dishwasher would not turn on
Once I removed the inside panel from the door replacing the switch was pretty simple. completed the job in less than twenty minutes.
This was the third appliance I have repaired with the help of Parts Select in the last three months.
This was the third appliance I have repaired with the help of Parts Select in the last three months.
Parts Used:
-
serafino from oakland, MI
-
Difficulty Level:Really Easy
-
Total Repair Time:15 - 30 mins
-
Tools:Screw drivers
3 of 4 people
found this instruction helpful.
Was this instruction helpful to you?
Thank you for voting!
Leaking water at bottom left of dishwasher door
Initially thought this issue was the dishwasher door gasket, but after reading post on this site about door latch grommet, removed 7 "hex screws" pulled inside of dishwasher door away and traced water from leak back to soap dispenser latch/grommet area so instead of ordering door gasket ordered door latch and grommet. Replaced grommet only (in addition to 7 "hex screws" had to remove 2 additional screws to get to it) which took some maneuvering. Re-aligned grommet and latch, inserted and tightened all screws that had been removed. Works great - no more water leaking!
Parts Used:
-
Ted from portland, OR
-
Difficulty Level:Easy
-
Total Repair Time:15 - 30 mins
-
Tools:Nutdriver, Screw drivers
3 of 4 people
found this instruction helpful.
Was this instruction helpful to you?
Thank you for voting!