















DW960B-CAN Jenn-Air Dishwasher - Instructions
Keep searches simple. Use keywords, e.g. "leaking", "pump", "broken" or "fit".
Unit would only stay on if one was pushing the door
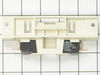
First I removed power to the dishwasher. The inside panel of the dishwasher door is held on with several screws with Phillips heads. Remove those and the panel comes off. There is a silver metal guard that you have to pull off being careful not to tear the insulation that is on the other side. Then there is one hex head screw to take off the handle latch assembly. You remove this assembly and take off the wires to the two switches on each side of the assembly. The replacement part doesn't come with the black plunger that pushes on the switch buttons so you have to remove it from the old assembly. This was the only difficult part, I essentially destroyed the old plastic assembly getting it out. But putting it in the new assembly was easy. Then I attached the wires to the switches in the new part and reassembled everything. Works like a charm now.
Parts Used:
-
Randall from Tulsa, OK
-
Difficulty Level:Really Easy
-
Total Repair Time:15 - 30 mins
-
Tools:Screw drivers, Socket set
3 of 5 people
found this instruction helpful.
Was this instruction helpful to you?
Thank you for voting!
old silverware basket broke
Basket Replacement very simple just remove old and set new basket in place
Parts Used:

-
Joe from DELAWARE, OH
-
Difficulty Level:Really Easy
-
Total Repair Time:30 - 60 mins
2 of 2 people
found this instruction helpful.
Was this instruction helpful to you?
Thank you for voting!
Water leaking from impeller shaft/motor seal
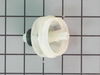
Remove the motor and impeller housing assembly from the unit by disconnecting the motor wiring plug, green ground wire, removing the drain and transfer hose, wash arm assembly and three screws for the filter assembly. A plastic locking ring secures the housing assembly into the unit and is removed by rotating aft about an eighth turn. The impeller is removed from the motor shaft by unscrewing the left hand threads on the fan that attaches to the end of the impeller. The impeller has longitudinal splines that engage the motor shaft, so it has to be removed by pulling straight off of the motor shaft. My impeller was stuck on the motor shaft, so I used a dremel tool with a cut off wheel and sliced through the impeller to loosen it. Installed a new motor shaft oring, and then slid the new integrated seal/impeller onto the motor shaft and secured with the fan (remember left hand threads). Reassembled unit and no leaks...
Parts Used:
-
Christopher from Wichita, KS
-
Difficulty Level:A Bit Difficult
-
Total Repair Time:1- 2 hours
-
Tools:Pliers, Screw drivers, Socket set, Wrench set
3 of 5 people
found this instruction helpful.
Was this instruction helpful to you?
Thank you for voting!
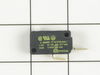
After 22 years of virtually trouble -free service, I could tell by the sound that something was wrong. Water fill ran too long. Float not stuck. Checked and found float switch stuck.
Very simple. Remove bottom panels. Remove one screw holding old switch in place. Move wire connections from old switch to new one. Cleaned and lubed the switch actuator. Mounted new switch. Checked that float and actuator worked freely. Left bottom panels off till I ran a load - just to be sure all was OK. Remount bottom panels...Done! P.S. Don't forget to turn power off to dishwasher any time you work on it!!
Parts Used:
-
Marc from GLENDALE, NY
-
Difficulty Level:Very Easy
-
Total Repair Time:15 - 30 mins
-
Tools:Screw drivers
2 of 2 people
found this instruction helpful.
Was this instruction helpful to you?
Thank you for voting!
Slight leak out the door onto floor
Removed the inside door panel. Removed the 2 mounting screws to release the latch retainer assembly. Used needle nose pliers to squeeze the posts to release the rinse aid actuator. THIS was the most difficult part since they are made of plastic (didn't want to break it). Removed the spring. Mine did not have a "pivot" to remove since it was a older model, but this would be removed next. Removed old gasket around soap door latch. Pulled tabs hugging the square wax motor actuator and remove. Removed the clear plastic slider. Pulled out the old door latch. Reversed process to put back together. Make sure the gasket around the door latch is pushed all the way down onto the slot of the latch. As a precaution, I also replaced the reservoir O-ring for the rinse aid tank which was quite worn as well. When it's all apart take the cap off the rinse aid reservoir and the reservoir container drops out super easy. That is where the O-ring is. Very glad they had the parts I needed!!
Parts Used:


-
Shannon from PARKERS PR, MN
-
Difficulty Level:Easy
-
Total Repair Time:1- 2 hours
-
Tools:Nutdriver, Pliers
2 of 2 people
found this instruction helpful.
Was this instruction helpful to you?
Thank you for voting!
Dishwasher would not start/run
Followed the instruction video provided by this site ! 15 minute repair?..Super Simple!!! I Love this company!!! Saved me a bunc of money!!
Parts Used:
-
Stacy from DEPEW, NY
-
Difficulty Level:Really Easy
-
Total Repair Time:15 - 30 mins
-
Tools:Nutdriver, Pliers, Screw drivers
2 of 2 people
found this instruction helpful.
Was this instruction helpful to you?
Thank you for voting!
Dishwasher leaked from lower right side of the door
First i bought inner door seal and that didnt work,so i read some of the other repair reviews and found that it was the soap cup latch gasket.When i removed the cover from the door you could see where the water and soap was getting in and running down to the lower right side of the door.Once i looked at the door latch gasket it was easy to see it was torn and worn out.I did replace all four gasket's just for assurance down the road.
Parts Used:

-
larry from NILES, MI
-
Difficulty Level:Easy
-
Total Repair Time:15 - 30 mins
-
Tools:Screw drivers
2 of 2 people
found this instruction helpful.
Was this instruction helpful to you?
Thank you for voting!
broken float assembly
I went to take the bottom front panel off and ended up dropping the screw down behind the baseboard and then found that I did not need to take the panel off. The broken end of the float was not obstructing and I was able to just drop the new float in place. I spent more time looking for a replacement screw than any thing else. Ran it and it works fine.
Parts Used:
-
Ruth from Cresco, IA
-
Difficulty Level:Really Easy
-
Total Repair Time:15 - 30 mins
-
Tools:Screw drivers, Socket set
3 of 5 people
found this instruction helpful.
Was this instruction helpful to you?
Thank you for voting!
washing machine leaked at right lower corner
removed old deteriorated gasket - just pulled out
cleaned soap particles from door seal area
pressd in new gasket - note orientation
done.
still leaks - will investigate further
cleaned soap particles from door seal area
pressd in new gasket - note orientation
done.
still leaks - will investigate further
Parts Used:

-
joseph from goffstown, NH
-
Difficulty Level:Really Easy
-
Total Repair Time:Less than 15 mins
2 of 2 people
found this instruction helpful.
Was this instruction helpful to you?
Thank you for voting!
Leaky door
-
George from Whitinsville, MA
-
Difficulty Level:Really Easy
-
Total Repair Time:Less than 15 mins
-
Tools:Screw drivers
2 of 2 people
found this instruction helpful.
Was this instruction helpful to you?
Thank you for voting!
My dishwasher was leaking from the bottom right hand corner.
I removed the original gasket, wiped down the area, and installed the new gasket the same way the old one was installed. It was very easy.
Parts Used:
-
Teresa from Terre Haute, IN
-
Difficulty Level:Really Easy
-
Total Repair Time:Less than 15 mins
2 of 2 people
found this instruction helpful.
Was this instruction helpful to you?
Thank you for voting!
My old silverware basket was wearing through on the bottom and silverware was sticking through
Replaced with the new basket. However, the part had been replaced, and I do not like the new setup. One basket has been replace with 2 that are hooked together. Each basket has a cover, but it covers the whole side, not just a part. In my old basket, I had a part of the basket with a cover that could hold plastic lids and measuring spoons that can easily wash out of the basket and hit the heating element on the bottom. My "fix" was to remove both lids and use the lid from the old basket to cover one part of the new basket. It's not very satisfactory, as it is not hinged and had to be removed and tucked in each time!
Parts Used:
-
Bonnie from OREGON, OH
-
Difficulty Level:Really Easy
-
Total Repair Time:Less than 15 mins
2 of 2 people
found this instruction helpful.
Was this instruction helpful to you?
Thank you for voting!
When I would run my dishwasher, water would pool on the right side front of the washer. It was even dripping down into the basement. When I figured out it might be the the front door gasket, I ordered the part.
The repair was very easy! I simply pulled out the old gasket from around the front part of the dishwasher. I cleaned the area with a damp rag from any residue that was left on. I bent the long gasket in half and and pushed it in starting at the center of the dishwasher and went down one side at a time until the whole gasket was in. I then ran a short cycle on the dishwasher to make sure it was properly in place and the problem was fixed. NO MORE WATER ON THE FLOOR! I was so very happy to know my problem was fixed and I didn't need to buy a new dishwasher! It's been running great! :) ~ Elizabeth ~
Parts Used:
-
Elizabeth from CHEEKTOWAGA, NY
-
Difficulty Level:Very Easy
-
Total Repair Time:Less than 15 mins
2 of 2 people
found this instruction helpful.
Was this instruction helpful to you?
Thank you for voting!
Dishwasher leaking.
Remove screws holding the inside of the door. Set lid aside. Pull out the old foam insulation. Clean the area. Replace with new foam insulation. Put door back together.
Parts Used:
-
Chris from SPRINGFIELD, VA
-
Difficulty Level:Very Easy
-
Total Repair Time:Less than 15 mins
2 of 3 people
found this instruction helpful.
Was this instruction helpful to you?
Thank you for voting!
spray arm support broken
romoved 3 screws, removed spray arm support nut. pulled off spray arm support, replaced new spray arm support and spray arm support nut
Parts Used:

-
Ann from Kingsdton, OK
-
Difficulty Level:Really Easy
-
Total Repair Time:Less than 15 mins
-
Tools:Screw drivers
3 of 6 people
found this instruction helpful.
Was this instruction helpful to you?
Thank you for voting!