















DW960B-CAN Jenn-Air Dishwasher - Instructions
Keep searches simple. Use keywords, e.g. "leaking", "pump", "broken" or "fit".
Dishwater cold
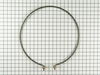
I removed lower cover panel. Removed two wires. (one on each end of the element. Removed two nuts on the element. Took out old part. Put new part in and reversed procedure. Works fine now.
Parts Used:
-
James from West Union, OH
-
Difficulty Level:Really Easy
-
Total Repair Time:15 - 30 mins
-
Tools:Pliers, Screw drivers
3 of 4 people
found this instruction helpful.
Was this instruction helpful to you?
Thank you for voting!
leaking door
easy repair. The foam has to go over some wires but if you stretch it alittle as you place it all goes well
Parts Used:

-
Paul from ROCHESTER, MA
-
Difficulty Level:Really Easy
-
Total Repair Time:15 - 30 mins
-
Tools:Screw drivers
3 of 4 people
found this instruction helpful.
Was this instruction helpful to you?
Thank you for voting!
Dishwasher door was slamming down, heavy to close
Unscrewed bottom panel. I could see right spring in proper position, left spring lying on floor, and broken linkage. Ordered part from partselect.com. To install, had to unscrew dishwasher attachment to counter, loosen leveling legs, pull it out a bit, then could replace linkage and reattach spring, retighten leveling legs, then push back in and replace screws and bottom panel.
Parts Used:
-
David from Philadelphia, PA
-
Difficulty Level:A Bit Difficult
-
Total Repair Time:30 - 60 mins
-
Tools:Screw drivers
3 of 4 people
found this instruction helpful.
Was this instruction helpful to you?
Thank you for voting!
bottom of silverware basket broke
received new basket without a basket handle; had to remove handle from old basket & attach it to new basket; took 2 separate tries to remove old handle & each try took about an hour; used screwdriver & pliers but had to be careful not to break handle; eventually used dimes to pry open & hold the attached sections of the handle open in order to free the handle from the old basket; we sure hope the new basket lasts a lot longer than the 2 years that the old basket lasted before it broke.
Parts Used:

-
Nora from Wilmington, DE
-
Difficulty Level:Difficult
-
Total Repair Time:1- 2 hours
-
Tools:Pliers, Screw drivers
3 of 4 people
found this instruction helpful.
Was this instruction helpful to you?
Thank you for voting!
Broken Piece
Read the Diagram on Parts Select Site and it only took me about 15 Minutes to disassamble and install the New Parts. Very Easy once I read the Schematic on the site.
Parts Used:

-
Lawrence from Tioga, PA
-
Difficulty Level:Really Easy
-
Total Repair Time:Less than 15 mins
-
Tools:Screw drivers
3 of 4 people
found this instruction helpful.
Was this instruction helpful to you?
Thank you for voting!
Dishwasher would not fill with water
Remove the lower panel by taking out the 2 screws on top and 2 at the bottom of the panel. To diagnose the problem, verify that there is water supplied from the valve under the sink to the water supply valve under the DW. This can be done by turning off the valve under the sink, disconnecting the copper supply line under the DW then turning on the valve under the sink to see if water passes through the line.
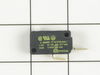
The float switch is located on the left front (as you face the DW). This is activated by the float in the tub. Check to be certain that the float is not restricted. The contact point on the switch is a spring loaded plunger. It should depress as the float rises and pop back out as the float returns to its low point.
Turn off the circuit breaker for the DW. To remove the switch, pull off the two electric leads from the switch. Mark the top lead with a piece of tape. Then remove the one philips screw. Replace the switch by reversing the procedure. Note that you have aligned the float contact point with the float.
The float switch is located on the left front (as you face the DW). This is activated by the float in the tub. Check to be certain that the float is not restricted. The contact point on the switch is a spring loaded plunger. It should depress as the float rises and pop back out as the float returns to its low point.
Turn off the circuit breaker for the DW. To remove the switch, pull off the two electric leads from the switch. Mark the top lead with a piece of tape. Then remove the one philips screw. Replace the switch by reversing the procedure. Note that you have aligned the float contact point with the float.
Parts Used:
-
Clifford from Palm Harbor, FL
-
Difficulty Level:Easy
-
Total Repair Time:Less than 15 mins
-
Tools:Nutdriver, Screw drivers
11 of 28 people
found this instruction helpful.
Was this instruction helpful to you?
Thank you for voting!
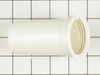
The lower spray arm broke off
It was simple. My wife unscrewed the spray arm support nut and then, replaced it with the new parts. It was very simple. My wife was able to do it all by her self.
Parts Used:
-
Barry from Joshua, TX
-
Difficulty Level:Really Easy
-
Total Repair Time:Less than 15 mins
-
Tools:Nutdriver
3 of 4 people
found this instruction helpful.
Was this instruction helpful to you?
Thank you for voting!
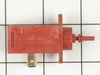
Dispenser door would not open
Attempted repair was quick & simple. Removed 7 torx screws, and then pulled the wax motor out of its holder. Pulled 2 wires off, and replaced old motor with new motor. Reattached wires, & reassembled.
Only problem was this did not fix the problem, so back to square one, but worth a shot.
Only problem was this did not fix the problem, so back to square one, but worth a shot.
Parts Used:
-
Brad from York, ME
-
Difficulty Level:Really Easy
-
Total Repair Time:Less than 15 mins
-
Tools:Screw drivers
3 of 4 people
found this instruction helpful.
Was this instruction helpful to you?
Thank you for voting!
Lower left corner of the door was leaking every so often.
I first made sure the new gasket was long enough and it matched the original. Next I used the tip of a screwdriver to pick out a corner of the old gasket and then pulled the entire thing out. I noticed the old one stopped at the bottom of the gasket well. The new one was much longer and I thought I might have to cut it to length. Well I'm glad I didn't. If you start on the right side and work your way up and around with a 2 in. piece longer then what the old one was. I carefully tucked it in the bottom and closed the door. Glad I didn't cut the new one. Instructions would have been nice. Overall an easy fix. I'm very mechanically inclined so I knew better.
Parts Used:

-
Frank from Ridgefield, CT
-
Difficulty Level:Easy
-
Total Repair Time:15 - 30 mins
-
Tools:Screw drivers
2 of 2 people
found this instruction helpful.
Was this instruction helpful to you?
Thank you for voting!
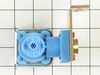
no water entering the dishwasher
Shut off the water and electric then removed the cover at the bottom then removed the water inlet valve and replaced it with the new one. Turned on water and electric. Replaced cover at bottom. Very easy and the part was shipped quickly. No problems and the dishwaser works great now!!
Parts Used:
-
frank from mountain home, AR
-
Difficulty Level:Easy
-
Total Repair Time:Less than 15 mins
-
Tools:Screw drivers, Wrench (Adjustable)
3 of 5 people
found this instruction helpful.
Was this instruction helpful to you?
Thank you for voting!
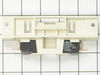
Dishwasher wouldn't start, no power on any setting
Removed door interior, confirmed with tester that power was reaching door cut-off switch, but not power on other side of switch when engaged. Noticed that little switch button frozen in shut position, assumed switch had burned out. Installer new door cut-off switch with new (dual) switch units in place, plugged in unit and it ran perfectly.
Parts Used:
-
Raymond G. from Whittier, CA
-
Difficulty Level:Really Easy
-
Total Repair Time:30 - 60 mins
-
Tools:Nutdriver, Pliers, Screw drivers
3 of 5 people
found this instruction helpful.
Was this instruction helpful to you?
Thank you for voting!
leak at bottom left and right side
pulled out the old gasket, cleaned the area before pressing in the new gasket with my fingers ,I made sure to put it in the same way as the old one. You have no idea how happy I am that this solved the problem.
Parts Used:
-
Bernadette from Glen Cove, NY
-
Difficulty Level:Really Easy
-
Total Repair Time:Less than 15 mins
2 of 2 people
found this instruction helpful.
Was this instruction helpful to you?
Thank you for voting!
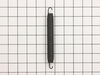
Both door springs corroded and broke. Linkage connectors broke also.
After pulling dishwasher out both springs easily installed using plastic connectors on the bottom left and right sides. Pliars were used to stretch the springs. It took fifteen minutes at most.
Parts Used:
-
Samuel from St. Johns, FL
-
Difficulty Level:Easy
-
Total Repair Time:15 - 30 mins
-
Tools:Pliers
2 of 2 people
found this instruction helpful.
Was this instruction helpful to you?
Thank you for voting!
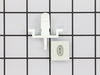
water was leaking in the floor
I removed the inside door cover, unpluged the accuator, removed the two screws holding the dispenser latch in place. Replaced both the latch and rubber groumet. returned the door to normal operation and verified no leaks was present.
Parts Used:
-
Richard from Ooltewah, TN
-
Difficulty Level:Easy
-
Total Repair Time:15 - 30 mins
-
Tools:Nutdriver, Screw drivers
2 of 2 people
found this instruction helpful.
Was this instruction helpful to you?
Thank you for voting!
Leaks onto floor from lower section
First I replaced the door gasket as every one else. This cut drips about 30%. I then discoverd that the Rinse Aid circular dispenser cap was opened about half way. I turned the cap tightly clockwise to close and cut drips to 90% total. I czn live with the other 10%,
Parts Used:
-
Bernice from New Vernon, NJ
-
Difficulty Level:Really Easy
-
Total Repair Time:15 - 30 mins
2 of 2 people
found this instruction helpful.
Was this instruction helpful to you?
Thank you for voting!