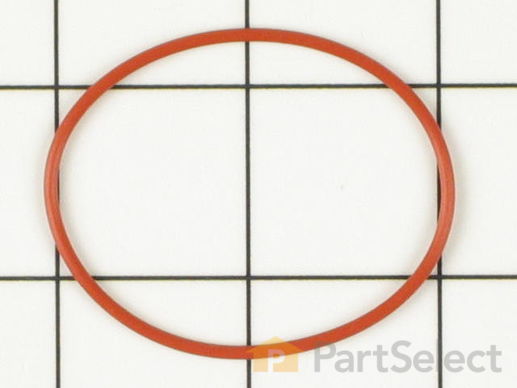
Part Location Diagram of WP99002003 Whirlpool Reservoir          O-Ring
See part 11 in the diagram
( Grid squares measure 1x1 inch )
Customer Service Representative

Get in touch, we're here to help!

Daily 8am - 9pm EST

customerservice@partselect.com

Reservoir O-Ring WP99002003

Rated by 11 customers 

Easy 

15 - 30 mins 

Ratings submitted by customers like you who bought this part.

$ 7.62
  In Stock
Get FREE EconoShip on orders over $100! T&C apply

Get this part fast! Average delivery time for in-stock parts via standard shipping: 1.8 days.

PartSelect Number PS11747635
Manufacturer Part Number WP99002003
Manufactured by Whirlpool
Product Description

Reservoir O-Ring Specifications

This reservoir o-ring is almost two inches in diameter.
How Buying OEM Parts Can Save You Time and Money

How Buying OEM Parts Can Save You Time and Money

Troubleshooting
This part fixes the following symptoms:
Leaking
This part works with the following products:
Dishwasher.
This part works with the following products:
Maytag, Jenn-Air, Magic Chef, Amana.
Part# WP99002003 replaces these:
9-13061, 913061, 99002003, Y913061
Back to Top
Customer Repair Stories
 Average Repair Rating: 3.8 / 5.0, 11 reviews. What's this?
Sort by:
  • 1
  • 2
Sorry, we couldn't find any existing installation instruction that matched.
leaking
My husband did the repair and had it done before I got home from work, he wasn't swearing so I have to say that it went very well. No more leaks and we are in business again. Thank you .
Other Parts Used:
Reservoir O-Ring Dispenser Door Latch Grommet
  • Denise from RICHMOND, NH
  • Difficulty Level:
    Really Easy
  • Total Repair Time:
    15 - 30 mins
  • Tools:
    Socket set
1 person found this instruction helpful.
Was this instruction helpful to you?
Thank you for voting!
Dishwasher leaked from lower right side of the door
First i bought inner door seal and that didnt work,so i read some of the other repair reviews and found that it was the soap cup latch gasket.When i removed the cover from the door you could see where the water and soap was getting in and running down to the lower right side of the door.Once i looked at the door latch gasket it was easy to see it was torn and worn out.I did replace all four gasket's just for assurance down the road.
Other Parts Used:
Inner Door Foam Insulation Strip Reservoir O-Ring Soap Cup Door Latch and Gasket
  • larry from NILES, MI
  • Difficulty Level:
    Easy
  • Total Repair Time:
    15 - 30 mins
  • Tools:
    Screw drivers
2 of 2 people found this instruction helpful.
Was this instruction helpful to you?
Thank you for voting!
Slight leak out the door onto floor
Removed the inside door panel. Removed the 2 mounting screws to release the latch retainer assembly. Used needle nose pliers to squeeze the posts to release the rinse aid actuator. THIS was the most difficult part since they are made of plastic (didn't want to break it). Removed the spring. Mine did not have a "pivot" to remove since it was a older model, but this would be removed next. Removed old gasket around soap door latch. Pulled tabs hugging the square wax motor actuator and remove. Removed the clear plastic slider. Pulled out the old door latch. Reversed process to put back together. Make sure the gasket around the door latch is pushed all the way down onto the slot of the latch. As a precaution, I also replaced the reservoir O-ring for the rinse aid tank which was quite worn as well. When it's all apart take the cap off the rinse aid reservoir and the reservoir container drops out super easy. That is where the O-ring is. Very glad they had the parts I needed!!
Other Parts Used:
Rinse Aid Nut Reservoir O-Ring Soap Cup Door Latch and Gasket
  • Shannon from PARKERS PR, MN
  • Difficulty Level:
    Easy
  • Total Repair Time:
    1- 2 hours
  • Tools:
    Nutdriver, Pliers
1 person found this instruction helpful.
Was this instruction helpful to you?
Thank you for voting!
Water leaking from bottom of door during rinse cycle
I agree with others that this was an easy fix. My soap dispenser door latch grommet had almost completely disintegrated and was letting water enter into the door. Since I knew I was going to have the door apart I decided to also replace the rinse aid dispenser o-ring.

I installed the parts and put the door back on only to find it was still leaking! Ends up this was user error. I had not pushed the door latch grommet far enough back onto the latch. Once I did this the problem was solved. The latch has an indented ring in which the grommet seats, make sure to push it all the way on.
Other Parts Used:
Reservoir O-Ring Soap Cup Door Latch and Gasket
  • Stephen from Medford, OR
  • Difficulty Level:
    Easy
  • Total Repair Time:
    30 - 60 mins
  • Tools:
    Nutdriver, Screw drivers
1 of 3 people found this instruction helpful.
Was this instruction helpful to you?
Thank you for voting!
water leaking out of door right and left side
first replaced the black gasket around the door. I don't think it needed it after looking farther down the list that others had, but, too late. It didn't fix the problem, still leaked, so like others, took apart the door with a screwdriver and found gooey soap along the bottom that had been leaking from the soapcup. Ordered the doorlatch gromet which looked stretched out, and just for good measures, replaced the resevoir o-ring. Really simple. Took about 15 mins. Cleaned up the soap residue, put it back and Voila.....has not leaked. Got our parts in record time too. Cudos to Part-Select. Good site. Thanks to all the replies, they REALLY helped.
Other Parts Used:
Reservoir O-Ring Dispenser Door Latch Grommet
  • Susie from Tenino, WA
  • Difficulty Level:
    Really Easy
  • Total Repair Time:
    15 - 30 mins
  • Tools:
    Screw drivers, Socket set
1 of 3 people found this instruction helpful.
Was this instruction helpful to you?
Thank you for voting!
dishwasher leaking
I replaced the reservior o-ring.. pretty easy just unscrew the 4 screws holding the inside cover on , install new o-ring and screw back on.
dishwasher still leaking so I then replaced the the door seal.. easy procedure to take old one off then put new one in .. push in by hand.... The third part was nowhere to be found so I threw it away (cost of $3.00 not worth it to send it back). Anyway I still have a small leak and am still working on where it is leaking from...... Confused....
Other Parts Used:
SEAL- SOUN Reservoir O-Ring Door Gasket
  • warren from duanesburg, NY
  • Difficulty Level:
    Easy
  • Total Repair Time:
    15 - 30 mins
  • Tools:
    Nutdriver, Screw drivers, Socket set
1 of 2 people found this instruction helpful.
Was this instruction helpful to you?
Thank you for voting!
Dishwaser Leaked onto the floor
The repair was very easy. The door gasket was a little short, but I gently streched it to the proper length. I replaced the other parts as a precaution as some others said they were really the source of the original leak. It went very smoothy and NO MORE LEAKS.
Other Parts Used:
Reservoir O-Ring Rinse Aid Actuator Door Gasket Dispenser Door Latch Grommet
  • Paul from Gibsonia, PA
  • Difficulty Level:
    Easy
  • Total Repair Time:
    Less than 15 mins
3 of 4 people found this instruction helpful.
Was this instruction helpful to you?
Thank you for voting!
water leak door
removed inner dor panel . then the soap dispencer replaced seal around the latch .replced panel
Other Parts Used:
Reservoir O-Ring Dispenser Door Latch Grommet
  • Larry from Arcola, MO
  • Difficulty Level:
    Really Easy
  • Total Repair Time:
    Less than 15 mins
  • Tools:
    Screw drivers
1 person found this instruction helpful.
Was this instruction helpful to you?
Thank you for voting!
Dispenser door would not open
My husband thinks I'm the smartest wife ever! He's telling all his friends how I got online to research the problem (thanks to your readers and DIY comments!), diagnosed it, ordered the parts and - voila - clean dishes once again! It's like everyone said, remove inside of the door by removing 7 torx screws, dismantle wiring -remember to note what connects to what - pop out old parts, easily insert new ones (that arrived in record time!), reconnect wiring, replace door and you're done. Replacing the reservoir o-ring also stopped the leaking problem that preceded the door issue. Thanks PartSelect!
Other Parts Used:
Reservoir O-Ring Dispenser Door Latch Grommet Wax Motor for Detergent Cup Actuation
  • Nancy from Bay Minette, AL
  • Difficulty Level:
    Really Easy
  • Total Repair Time:
    15 - 30 mins
  • Tools:
    Screw drivers
3 of 5 people found this instruction helpful.
Was this instruction helpful to you?
Thank you for voting!
Rinse dispenser won't work
Unscrewed the inside door panel. Removed the reservoir assembly. Disconnected the wax motor. Replaced it with the new motor. Replaced the new o-ring. Done. The hardest part was finding out why it was not working and how to fix it. Google for a long time in order to find some idea what to do. Then took the door apart to see the reservoir and the wax motor. After that, it was pretty easy. HTH
Other Parts Used:
Reservoir O-Ring Wax Motor for Detergent Cup Actuation
  • gary from San Antonio, TX
  • Difficulty Level:
    Easy
  • Total Repair Time:
    Less than 15 mins
  • Tools:
    Screw drivers
4 of 6 people found this instruction helpful.
Was this instruction helpful to you?
Thank you for voting!
  • 1
  • 2
Questions and Answers

Be the first to ask our experts a question about this part!

You May Also Need ?
Model Cross Reference
This part works with the following models:
PartSelect Number: PS11747635
Manufacturer Part Number: WP99002003
Brand
Model Number
Description
Amana
ADW662EAB
Dishwasher
Amana
ADW662EAB-PADW662EAB0
Dishwasher - Amana Dishwasher Model ADW662EAB-PADW662EAB0 (ADW662EABPADW662EAB0, ADW662EAB PADW662EAB0) Parts
Amana
ADW662EAC
Dishwasher
Amana
ADW662EAC-PADW662EAC0
Dishwasher - Amana Dishwasher Model ADW662EAC-PADW662EAC0 (ADW662EACPADW662EAC0, ADW662EAC PADW662EAC0) Parts
Amana
ADW662EAS
Dishwasher
Amana
ADW662EAW
Dishwasher
Amana
ADW662EAW-PADW662EAW0
Dishwasher - Amana Dishwasher Model ADW662EAW-PADW662EAW0 (ADW662EAWPADW662EAW0, ADW662EAW PADW662EAW0) Parts
Amana
ADW862EAB
Dishwasher
Amana
ADW862EAC
Dishwasher
Amana
ADW862EAS
Dishwasher
Amana
ADW862EAW
Dishwasher
Magic Chef
CDB6100AWE
Dishwasher
Magic Chef
CDB6100AWN
Dishwasher
Magic Chef
CDB6100AWX
Dishwasher
Crosley
CDC400B
Dishwasher
Crosley
CDC450B
Dishwasher
Crosley
CDC5J
Dishwasher
Crosley
CDC610B
Dishwasher
Crosley
CDU20J
Dishwasher
Crosley
CDU400B
Dishwasher - Undercounter
Crosley
CDU450B
Dishwasher
Crosley
CDU450V
Dishwasher
Crosley
CDU510B
Dishwasher
Crosley
CDU510V
Dishwasher
Crosley
CDU5J
Dishwasher
Crosley
CDU5JV
Dishwasher
Crosley
CDU600B
Dishwasher
Crosley
CDU600V
Dishwasher
Crosley
CDU610B
Dishwasher
Crosley
CDU610N
Dishwasher
Customer Service Representative

Get in touch, we're here to help!

Daily 8am - 9pm EST

Contact Customer Service