















YE226LVC Magic Chef Dryer - Instructions
Keep searches simple. Use keywords, e.g. "leaking", "pump", "broken" or "fit".
Let the kids do it.
I am a teacher and teaching is my game. I have always, with my four children, taught them to do mechanical work themselves. I and most of my children have a PhD, but in having said that, I confess, we come from a very mechanically talented family. It shows and proves to be of great benefit.
OK, so much for the intro.
I gave my daughter the tools and said, "What do you think is wrong with the dryer and where would you start?" She tested it and said, "The motor is running, but the tub is not turning thus I conclude it is the belt because I can hear the motor running eliminating that as a cause.
She then opened the top, looked around and removed two screws from the lint catcher. She looked it over, looked a me, I shrugged my shoulders and she then took a rubber hammer and popped the top off. Don't ask me how she knew that, but I think she saw the rubber pins through the crack between the case and top. She raised the top after removing two screws in back to relieve the simple hinge and also disconnected the wiring clip and sure enough, the broken belt was inside the cabinet. We called you, the best, fastest and most accurate service on the Internet and ordered a replacement. I would like to add, the price is always more than fair and delivery very prompt.
When the part came, my daughter took it up to our laundry room and within twenty minutes, she tested it and everything was fine. She did smell a little burning smell which might be attributed to a new belt or the fact that there was no clothing in the dryer.
Thank you so very much.
Dr Robert E McGinnis
OK, so much for the intro.
I gave my daughter the tools and said, "What do you think is wrong with the dryer and where would you start?" She tested it and said, "The motor is running, but the tub is not turning thus I conclude it is the belt because I can hear the motor running eliminating that as a cause.
She then opened the top, looked around and removed two screws from the lint catcher. She looked it over, looked a me, I shrugged my shoulders and she then took a rubber hammer and popped the top off. Don't ask me how she knew that, but I think she saw the rubber pins through the crack between the case and top. She raised the top after removing two screws in back to relieve the simple hinge and also disconnected the wiring clip and sure enough, the broken belt was inside the cabinet. We called you, the best, fastest and most accurate service on the Internet and ordered a replacement. I would like to add, the price is always more than fair and delivery very prompt.
When the part came, my daughter took it up to our laundry room and within twenty minutes, she tested it and everything was fine. She did smell a little burning smell which might be attributed to a new belt or the fact that there was no clothing in the dryer.
Thank you so very much.
Dr Robert E McGinnis
Parts Used:

-
Robert from Rocky Mount, NC
-
Difficulty Level:Really Easy
-
Total Repair Time:30 - 60 mins
-
Tools:Screw drivers, Socket set
3 of 3 people
found this instruction helpful.
Was this instruction helpful to you?
Thank you for voting!
dryer wouldn't start
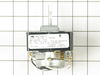
The part didnt line up with the timer markers.
Instructions said where toscrewed it to the machines but didn't match the on and off buttons.
Rotated it and it fit a little better but it still didn't match the minutes or on and/off for every section.
Had to drill a hole in it to screw it in as well cause the ones that came drilled were not lined up right.
Instructions said where toscrewed it to the machines but didn't match the on and off buttons.
Rotated it and it fit a little better but it still didn't match the minutes or on and/off for every section.
Had to drill a hole in it to screw it in as well cause the ones that came drilled were not lined up right.
Parts Used:
-
Ulises from Bellevue, ID
-
Difficulty Level:Very Difficult
-
Total Repair Time:More than 2 hours
-
Tools:Screw drivers
3 of 3 people
found this instruction helpful.
Was this instruction helpful to you?
Thank you for voting!
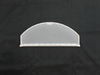
No Problem, Old filter had seen better days.
-
Ruth V from Westminster, CO
-
Difficulty Level:Really Easy
-
Total Repair Time:Less than 15 mins
4 of 6 people
found this instruction helpful.
Was this instruction helpful to you?
Thank you for voting!
Dryer would not heat.
removed screws on back plare and replaced heater element. Thank you very much foe your quick delivery of the part I ordered. I was reall;y schocked to see how fast the part arrived. I will recommend your site to anyone who needs parts like I did,.
Thany you Very Much,
Alan Brooks
Thany you Very Much,
Alan Brooks
Parts Used:

-
Alan from Boerne, TX
-
Difficulty Level:Really Easy
-
Total Repair Time:15 - 30 mins
-
Tools:Nutdriver, Screw drivers, Socket set
4 of 6 people
found this instruction helpful.
Was this instruction helpful to you?
Thank you for voting!
Dryer Drum Belt Broken
I opted to remove front, top and back panels. This is best done with dryer laying on it's back so drum remains in position. Hold panels and pieces in place with masking tape (2") You should block up the dryer so you don't damage the gas pipe. I opted to total shop vac out the piece and lubricate the rollers and tension pulley. I made more in change than the belt cost!
Overall an easy repair. Belt came with diagram for easy threading the belt.
Overall an easy repair. Belt came with diagram for easy threading the belt.
Parts Used:
-
george s from las vegas, NV
-
Difficulty Level:Really Easy
-
Total Repair Time:30 - 60 mins
-
Tools:Nutdriver, Screw drivers
3 of 3 people
found this instruction helpful.
Was this instruction helpful to you?
Thank you for voting!
Drive pulley wore out
Item # PS11740721 motor drive pulley. This has a 3/8-24 reverse thread inner bore. Fit my Maytag model MDE508DAYW dryer made by Whirlpool, with drive motor on the lower right below the counterclockwise rotating drum and exhaust blower at the front of the machine. It might work with a number of brands of dryers made by Whirlpool with that configuration. Check the motor shaft thread and the drive belt which is a 5 rib belt 5/16ths inch or 8 mm wide. For Joe Blow the local appliance repair places only quote replacing the motor and pulley as a unit. At $170.
Parts Used:

-
Tom from FIRTH, NE
-
Difficulty Level:Really Easy
-
Total Repair Time:30 - 60 mins
-
Tools:Nutdriver, Pliers, Screw drivers, Socket set
3 of 3 people
found this instruction helpful.
Was this instruction helpful to you?
Thank you for voting!
Dryer wouldn't shut off in Auto Dry modes
Very simple-remove 3 screws that hold the Control Panel on, remove the two connectors and replace with new part in reverse order. Unfortunately, this did not fix the problem. Will be ordering complete timer assembly.
Parts Used:
-
Gary from Irmo, SC
-
Difficulty Level:Really Easy
-
Total Repair Time:Less than 15 mins
-
Tools:Screw drivers
3 of 4 people
found this instruction helpful.
Was this instruction helpful to you?
Thank you for voting!
dryer not heating
googled"dryer not heating". landed on partsselect.com. checked parts like website said with multimeter. pointed to thermostat. ordered it, replaced it, it works now.
Parts Used:

-
james from callahan, FL
-
Difficulty Level:Really Easy
-
Total Repair Time:Less than 15 mins
-
Tools:Nutdriver
4 of 7 people
found this instruction helpful.
Was this instruction helpful to you?
Thank you for voting!
Dryer drum wouldn't turn and motor would shut off
First I was told by the maytag repair man that the motor was shot and it would be 467 dollars to repair. Since I didn't have that kind of money I decided to take it apart to see if I could replace the motor myself. Once I had it apart I saw the part that held the motor in place was broken off and the motor was out of place causing it too shut itself off. Once I figured it all out it took about 2 minutes to replace the less than 6 dollar part! Thanks partSelect!!!
Parts Used:

-
Cynthia M from Westfield, MA
-
Difficulty Level:Easy
-
Total Repair Time:More than 2 hours
-
Tools:Screw drivers
3 of 4 people
found this instruction helpful.
Was this instruction helpful to you?
Thank you for voting!
noise in dryer
popped front off took blower front off took fan off put new one on replaced cover & front. job done. ordered fan on thursday got it on friday great service.
Parts Used:

-
william from melfa, VA
-
Difficulty Level:Really Easy
-
Total Repair Time:30 - 60 mins
-
Tools:Nutdriver, Pliers
3 of 4 people
found this instruction helpful.
Was this instruction helpful to you?
Thank you for voting!
Broken belt
Opened up every panel EXCEPT the front, then discovered how easy that is. Replacement belt was a snap to install. I noticed some plastic collar thing on the driveshaft appeared to have melted. Did not appear to be critical part, so I put it together and tested it out. Seems to work fine. I think the collar is there to prevent the belt from potentially slipping off the driveshaft.
Parts Used:
-
peter from portland, OR
-
Difficulty Level:Easy
-
Total Repair Time:15 - 30 mins
-
Tools:Nutdriver
3 of 4 people
found this instruction helpful.
Was this instruction helpful to you?
Thank you for voting!
No leveling legs
Ordered the leveling bolts, very fast shipping, parts correct as shown. Purchased a condo by the shore, frige had no levelers, they went in smoothly & was done in no time.
Steve
Steve
Parts Used:

-
stephen from montgomery, NY
-
Difficulty Level:Really Easy
-
Total Repair Time:Less than 15 mins
-
Tools:Wrench (Adjustable)
3 of 4 people
found this instruction helpful.
Was this instruction helpful to you?
Thank you for voting!
Broken Lint Trap - plastic snapped
My part came a day or so after the order was placed. There was really no installation required, but I will definitly make orders from this site again. Thank you very much!
Parts Used:
-
Diane from Mahwah, NJ
-
Difficulty Level:Really Easy
-
Total Repair Time:Less than 15 mins
3 of 4 people
found this instruction helpful.
Was this instruction helpful to you?
Thank you for voting!
Dryer stopped running,not heating,drying clothes.
When online& found website... trouble shot for problem per previous posts on PART SELECT.GREAT SITE for problem ifo.I ordered parts,they arrived 2 days later and within 1/2 an hour I had our dryer repaired and working like new!!THANKS!!!
Parts Used:

-
David430023009864 from Taylor, AR
-
Difficulty Level:Easy
-
Total Repair Time:15 - 30 mins
-
Tools:Nutdriver, Pliers
3 of 4 people
found this instruction helpful.
Was this instruction helpful to you?
Thank you for voting!
Worn wheels, lot of noise
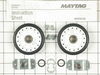
Had to disassemble most of the dryer including pulling dryer drum in order to get to drum support rollers. Not a real difficult repair, just time consumming because of amount of parts needing to be removed inorder to get to rollers.
Parts Used:
-
Jonathan from Meridian, ID
-
Difficulty Level:A Bit Difficult
-
Total Repair Time:1- 2 hours
-
Tools:Nutdriver, Pliers, Screw drivers, Wrench (Adjustable), Wrench set
3 of 4 people
found this instruction helpful.
Was this instruction helpful to you?
Thank you for voting!