















WCSR2090DBWW General Electric Washer - Instructions
Keep searches simple. Use keywords, e.g. "leaking", "pump", "broken" or "fit".
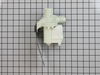
Washer did not drain completely with water on floor, drain pump frozen.
After unplugging the washer, I drained remaining water from washer tub using my Wet/Dry vac. Ordered new pump Sunday night from PartSelect, 'Standard delivery', part arrived Tuesday morning. Removal & installation took less than 20 minutes.
Parts Used:
-
Ray from Ventura, CA
-
Difficulty Level:Easy
-
Total Repair Time:15 - 30 mins
-
Tools:Pliers, Socket set
6 of 7 people
found this instruction helpful.
Was this instruction helpful to you?
Thank you for voting!
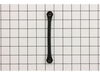
Tub straps broken caused excessive wabbling
Popped off the front panel and removed two screws that help top down. Then pulled the top of the washer up and leaned back out of way.Then each strap had a screw on each end and a clip that holds straps just remove the old and replace with new and put back together.
Parts Used:
-
Drew from Apopka, FL
-
Difficulty Level:Easy
-
Total Repair Time:30 - 60 mins
-
Tools:Nutdriver, Screw drivers
6 of 8 people
found this instruction helpful.
Was this instruction helpful to you?
Thank you for voting!
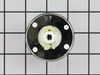
Broken knob on my Mom's washing machine
Folks,
Thanks to your great web site and help video I got this fixed in less than a minute. Literally less time than it took me to watch your helpful video. Don't know how to thank you - keep up the good work!
Thanks to your great web site and help video I got this fixed in less than a minute. Literally less time than it took me to watch your helpful video. Don't know how to thank you - keep up the good work!
Parts Used:
-
Edward from New York, NY
-
Difficulty Level:Really Easy
-
Total Repair Time:Less than 15 mins
-
Tools:Pliers
5 of 5 people
found this instruction helpful.
Was this instruction helpful to you?
Thank you for voting!
Wash basin wobbled excessively
Use paint scraper to release spring tabs holding front cover on.
Removed 2 screws holding lid down, and lifted up but did not remove top cover and control panel.
R/R 2 hex screws holding strap in place. If you are lucky and the broken strap is up front this is a super fast repair. Those of you with a rear strap will want to disconnect the wiring harness to the lid switch and likely remove the top panel (+ <5 mins).
Super easy and super cheap!
Removed 2 screws holding lid down, and lifted up but did not remove top cover and control panel.
R/R 2 hex screws holding strap in place. If you are lucky and the broken strap is up front this is a super fast repair. Those of you with a rear strap will want to disconnect the wiring harness to the lid switch and likely remove the top panel (+ <5 mins).
Super easy and super cheap!
Parts Used:
-
David from Rochester Hills, MI
-
Difficulty Level:Really Easy
-
Total Repair Time:Less than 15 mins
-
Tools:Nutdriver
6 of 8 people
found this instruction helpful.
Was this instruction helpful to you?
Thank you for voting!
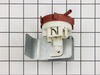
Water wouldn's stop running
First removed the screws on the contraol panel. Then I pulled the tubing from the part. Snapped teh switch preesure out. Put the new one in. Attached the tubing. Put control panel back together.
Parts Used:
-
Amy from Newport, NC
-
Difficulty Level:Really Easy
-
Total Repair Time:Less than 15 mins
-
Tools:Screw drivers
6 of 8 people
found this instruction helpful.
Was this instruction helpful to you?
Thank you for voting!
My washer would not drain the water out.
IT was so easy to replace the pump. I think the hardest part was trying to get the pliers to work right. All I had to do was unscrew two bolts, take off two pipes, get the new pump and replace the pipes and bolts. It was that easy.
Parts Used:
-
jayme from drummonds, TN
-
Difficulty Level:Really Easy
-
Total Repair Time:Less than 15 mins
-
Tools:Pliers, Socket set
6 of 8 people
found this instruction helpful.
Was this instruction helpful to you?
Thank you for voting!
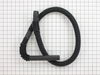
Drain hose had a hole in it
used a socket to unscrew the clip. pulled out the old hose, slid the new hose into the clip and screwed the clip back on. all fixes should be this easy.
Parts Used:
-
kartik from radnor, PA
-
Difficulty Level:Really Easy
-
Total Repair Time:Less than 15 mins
-
Tools:Socket set
5 of 6 people
found this instruction helpful.
Was this instruction helpful to you?
Thank you for voting!
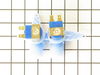
Solinoid chattering when cold water was used
Removed 4 screwes on the top of the washer. Layed down the control panel and there was the inlets. Removed two screws and loosened the hose clamp. removed and installed new part.
It did the trick. No more problems.
It did the trick. No more problems.
Parts Used:
-
Dan from Marco Island, FL
-
Difficulty Level:Really Easy
-
Total Repair Time:15 - 30 mins
-
Tools:Nutdriver, Pliers, Screw drivers
5 of 6 people
found this instruction helpful.
Was this instruction helpful to you?
Thank you for voting!
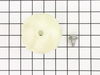
Machine would not agitate.
Remove agitator. Remove coupling. Reinstall new coupling. Reinstall agitator. My only problem was the 7 day delay in getting the part. I expected 2-day delivery.
Parts Used:
-
Butch from WATER VALLEY, MS
-
Difficulty Level:Really Easy
-
Total Repair Time:Less than 15 mins
-
Tools:Wrench set
4 of 4 people
found this instruction helpful.
Was this instruction helpful to you?
Thank you for voting!
Leak
-
Tom from VERMILLION, SD
-
Difficulty Level:Really Easy
-
Total Repair Time:More than 2 hours
-
Tools:Nutdriver, Socket set
4 of 4 people
found this instruction helpful.
Was this instruction helpful to you?
Thank you for voting!
Washer screeching during spin cycle.
Followed video to take washer apart. I used the Shaft & Drive Assembly to tap out bearing as it was stuck. BTW the screeching was because the Shaft & Drive Assembly ball bearing retainer cage was in pieces. Replaced tub bearing and installed new Shaft & Drive Assembly. Washer now runs like new. Get the spanner wrench to remove existing nut and purchase a new nut.
Parts Used:

-
Steven from DURHAM, NC
-
Difficulty Level:A Bit Difficult
-
Total Repair Time:1- 2 hours
-
Tools:Pliers, Screw drivers, Socket set
4 of 4 people
found this instruction helpful.
Was this instruction helpful to you?
Thank you for voting!
some leak
First, remove the old water pump by disconnecting the respective hose, then wipe the area where the pump was, and proceeded to connect the new water pump, of course I did all this with the machine disconnected from the power electric, then proceeded to connect the inlet hoses of hot water and cold water, electricity connected to the machine and did a test with clothes in the washing machine. and now everything is going well, thanks for your valuable help.
sincerely, a satisfied customer
sincerely, a satisfied customer
Parts Used:
-
Roberto from Nokesville, VA
-
Difficulty Level:Really Easy
-
Total Repair Time:30 - 60 mins
-
Tools:Screw drivers, Wrench set
5 of 7 people
found this instruction helpful.
Was this instruction helpful to you?
Thank you for voting!
The water fill level knob broke off and took shaft with it.
Removed the top panel and twisted the old pressure switch off counter clockwise. Then disconnect the electrical plug and the plastic hose attached to it. Do the reverse for putting the new one on. Very easy repair that you only need a screw driver for.
Parts Used:
-
Phoenix Center BHS from Warner Robins, GA
-
Difficulty Level:Really Easy
-
Total Repair Time:Less than 15 mins
-
Tools:Screw drivers
4 of 5 people
found this instruction helpful.
Was this instruction helpful to you?
Thank you for voting!
Broken Shaft
No problem with the replacement. Great company to order parts. Received them as expected.
Parts Used:
-
Daniel from Fennville, MI
-
Difficulty Level:Really Easy
-
Total Repair Time:15 - 30 mins
-
Tools:Nutdriver
4 of 5 people
found this instruction helpful.
Was this instruction helpful to you?
Thank you for voting!
knob wouldn't advance timer
Used this site to find probable problem - stripped teeth on knob - and how to get old knob off using needle nosed pliers to remove clip. So also ordered replacement knob from this site - got it in one day! Took about 2 minutes to put replacement knob on. Most of repair time was figuring out what the problem was.
Parts Used:
-
Stewart from Richmond, KY
-
Difficulty Level:Easy
-
Total Repair Time:15 - 30 mins
-
Tools:Pliers
4 of 5 people
found this instruction helpful.
Was this instruction helpful to you?
Thank you for voting!