















RGB790SEH2SA Hotpoint Range - Instructions
Keep searches simple. Use keywords, e.g. "leaking", "pump", "broken" or "fit".
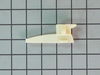
Broken drawer glider
Took off broken part and replaced it with the new part by removing a Phillips head screw, the broken part, replace with new and reinstalling the same screw.
Parts Used:
-
James from RANCHO MIRAGE, CA
-
Difficulty Level:Very Easy
-
Total Repair Time:Less than 15 mins
-
Tools:Screw drivers
2 of 2 people
found this instruction helpful.
Was this instruction helpful to you?
Thank you for voting!
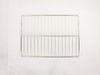
oven racks old and ugly
1. Open oven door
2. insert oven racks (perfect fit)
3. close oven door. Done and finished - man am I tired
2. insert oven racks (perfect fit)
3. close oven door. Done and finished - man am I tired
Parts Used:
-
Claudene from ORCUTT, CA
-
Difficulty Level:Very Easy
-
Total Repair Time:Less than 15 mins
1 person
found this instruction helpful.
Was this instruction helpful to you?
Thank you for voting!
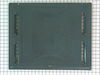
Oven bottom badly marred after 16 years.
Two set screws in rear; removed easily with a screwdriver. Old oven floor lifted out easily; new oven floor dropped in just as easily; set screws re-installed. Done. Pleasantly surprised at how easy this went.
Parts Used:
-
Charlie from NAPLES, FL
-
Difficulty Level:Very Easy
-
Total Repair Time:Less than 15 mins
-
Tools:Screw drivers
1 person
found this instruction helpful.
Was this instruction helpful to you?
Thank you for voting!
some of electrodes not working at times,found were bad,wires had some insulation missing, clips looked burnt,found all new parts replaced
the electrodes on this model have to be removed before you can raise cooktop, once cooktop is raised remove wire from burner bracket, use needle nose pliers to squeeze bottom of clip,remove &replace with new parts.
Parts Used:

-
Dana from LEEDS, AL
-
Difficulty Level:Really Easy
-
Total Repair Time:More than 2 hours
-
Tools:Pliers
1 person
found this instruction helpful.
Was this instruction helpful to you?
Thank you for voting!
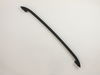
Removal reinstalling
Removal old fashioned oven door handle took time after removing the oven door. New replacement handle was easy to install! Try to reinstall was long and finally got installed after 5 attempts due hinge on right side issue
Parts Used:
-
Thomas from HAMPSTEAD, NH
-
Difficulty Level:A Bit Difficult
-
Total Repair Time:More than 2 hours
-
Tools:Screw drivers, Socket set
1 person
found this instruction helpful.
Was this instruction helpful to you?
Thank you for voting!
BASE OF BULB BROKE OFF & WELDED TO SOCKET
PULL RANGE OUT FROM WALL & ALSO REMOVED OVEN DOOR BY SLIDING UP. WORKING FROM INSIDE OVEN & ALSO BEHIND I REPLACED PART . ALWAYS " UNPLUG " RANGE BEFORE YOU START.
Parts Used:
-
NEIL from ROCKY POINT, NY
-
Difficulty Level:Easy
-
Total Repair Time:30 - 60 mins
-
Tools:Nutdriver, Pliers
1 person
found this instruction helpful.
Was this instruction helpful to you?
Thank you for voting!
Broken button behind overlay
-
Frederick from MAYSVILLE, NC
-
Difficulty Level:Really Easy
-
Total Repair Time:30 - 60 mins
-
Tools:Nutdriver, Pliers, Screw drivers
1 person
found this instruction helpful.
Was this instruction helpful to you?
Thank you for voting!
Light burnt out.
Turned the wire protector to the side. Turned out the old bulb and replaced it with the new. Turned the wire protector back in place and I'm like new.
Parts Used:

-
Roscoe G from ROCHESTER, NY
-
Difficulty Level:Very Easy
-
Total Repair Time:Less than 15 mins
2 of 4 people
found this instruction helpful.
Was this instruction helpful to you?
Thank you for voting!
finish on old oven bottom was damaged
Ordered part from customer friendly Part Select and received the replacement part within a few days, and installed it promptly. Wife is happy and stopped grumbling about oven bottom unsightly defect! Small price to pay for a happy wife! Ernie
Parts Used:
-
ERNEST from MANCHESTER, NJ
-
Difficulty Level:Very Easy
-
Total Repair Time:Less than 15 mins
-
Tools:Screw drivers
1 person
found this instruction helpful.
Was this instruction helpful to you?
Thank you for voting!
The old burners were damaged by the prior owners.
The repair was extremely easy. Just removed the old burners and dropped in the new ones. No tools needed.
Parts Used:
-
Mohammad from BARTLETT, IL
-
Difficulty Level:Very Easy
-
Total Repair Time:Less than 15 mins
1 person
found this instruction helpful.
Was this instruction helpful to you?
Thank you for voting!
Burners wouldn't light
Had two burners on the stove that would not light. Had tried cleaning them but they still did not ignite. Replaced both burner heads. Once replaced. they ignited right away and have worked ever since.
Parts Used:
-
Robert from SOUTH ELGIN, IL
-
Difficulty Level:Very Easy
-
Total Repair Time:Less than 15 mins
1 person
found this instruction helpful.
Was this instruction helpful to you?
Thank you for voting!
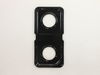
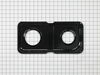
Only A "Cosmetic" Replacement.
No job here. . . . Just sat new parts on to replace old ugly parts.
Parts Used:
-
Jimmy from Bonifay, FL
-
Difficulty Level:Really Easy
-
Total Repair Time:Less than 15 mins
1 person
found this instruction helpful.
Was this instruction helpful to you?
Thank you for voting!
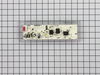
Lightning strike. Ignitors on stove work but display for oven was blank
Remove rear cover. Remove old display. Remove one wire (and place on new board) at a time. Carefully remove faceplate from old board and place on new one. Close everything up and your done. Took 10-15 minutes.
Parts Used:
-
Jeremy from Wilmer, AL
-
Difficulty Level:Really Easy
-
Total Repair Time:Less than 15 mins
-
Tools:Nutdriver, Screw drivers
2 of 4 people
found this instruction helpful.
Was this instruction helpful to you?
Thank you for voting!
Range does not include drip pans as standard equipment.
These new pans fit perfectly.
Parts Used:
-
David from Auburndale, MA
-
Difficulty Level:Really Easy
-
Total Repair Time:Less than 15 mins
1 of 2 people
found this instruction helpful.
Was this instruction helpful to you?
Thank you for voting!
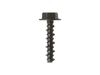
Missing screw to range door handle
The part that was ordered based on the shamanic wasn't the part that was needed for the repair. It was to short. I took the other screw for the other side and that screw was an inch longer than the screw that was ordered thru your company. I then went too a jar that I placed extra screws, nuts and bolts which l keep in my garage . I found a same length screw but a different head and it works perfectly fine. When I ordered the part from your company most of the parts did not have a photo of the part on file, or a description like how long the part is. I still ordered it because it should fit the make and model number that was posted on the shamanic that was showed to me on line.
Parts Used:
-
Stanley from TRENTON, NJ
-
Difficulty Level:Very Easy
-
Total Repair Time:Less than 15 mins
1 of 2 people
found this instruction helpful.
Was this instruction helpful to you?
Thank you for voting!