















MGR6775BDW13 Maytag Range - Instructions
Keep searches simple. Use keywords, e.g. "leaking", "pump", "broken" or "fit".
set oven to self clean and the inner glass broke
I removed the door from the oven and set it on towel on the table, and started the repair of the door. I removed the screws one at a time, and one layer at a time. Becareful you need to take the whole door apart, and remember how it goes bact together. In the end it was worth it. The hardest part was getting the right part. I thought I could order the whole door, and found out after several calls they don't sell the whole door. Part Select both times I put in my order had the parts at my door within 2 to 3 days. I also had to return one of the parts and within 2 to 3 days the part was credited to my account
Parts Used:

-
Garry from Livermore, CA
-
Difficulty Level:Difficult
-
Total Repair Time:More than 2 hours
-
Tools:Screw drivers
9 of 9 people
found this instruction helpful.
Was this instruction helpful to you?
Thank you for voting!
Handle Broke on one end
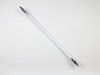
I first removed the drawer from under the oven, then I used 2 strips of packing tape to hold the front glass in place. Next I loosened the 4 screws on the bottom side of the door to the point just before they would fall out. Next I had someone help hold the glass as we removed the tape and slid the glass from under the handle and set it aside. Once the glass was off I removed the 4 screws on top of the door and the 4 screws (2 each side) holding the handle brackets. From that point it was just a couple of screws on the back of the handle to swap the broken part for new and reassembling everything. Could be done in 30 minutes, 40 by yourself. Maytag wants $24 to tell you how to do this, it's not worth the money. Also, PartSelect.com sold me the part for 30% than Sears or Maytag advertise - they've earned a permanent bookmark in my browser!
Parts Used:
-
Robert from Muskegon, MI
-
Difficulty Level:Easy
-
Total Repair Time:30 - 60 mins
-
Tools:Pliers, Screw drivers
9 of 10 people
found this instruction helpful.
Was this instruction helpful to you?
Thank you for voting!
Oven would not preheat and gave 'F1' error
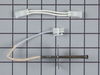
Had to unplug unit, remove back of unit (6 screws), then unscrew oven sensor (2 screws), then unplugged old sensor, replaced it and put back of oven on...Moving the oven out and working in the tight space avaialble was the most difficult. Other than that, super easy job that probably saved me a lot of $$$...
Parts Used:
-
Joshua from Reno, NV
-
Difficulty Level:Really Easy
-
Total Repair Time:15 - 30 mins
-
Tools:Screw drivers
9 of 11 people
found this instruction helpful.
Was this instruction helpful to you?
Thank you for voting!
When the oven was turned on, F2 and F4 came on. Oven wouldn't heat.
After reading some of the repair stories, I was hesitant about doing this task. It was really very simple, I just removed the screws from the back of the stove, and removed the old element. I then replaced it with the new one and replaced the back cover. This whole task from start to finish took 10 minutes. The oven heats perfectly now just like a new oven.
Parts Used:
-
Crystal from Scott City, MO
-
Difficulty Level:Really Easy
-
Total Repair Time:Less than 15 mins
-
Tools:Screw drivers
9 of 11 people
found this instruction helpful.
Was this instruction helpful to you?
Thank you for voting!
F-3 error code
I removed the two screws that attach the sensor to the oven wall. Then removed to more screws in the back of the oven and took off the rear cover, diconnected the sensor connector and installed the new sensor.
Parts Used:
-
Mark from Lake Orion, MI
-
Difficulty Level:Easy
-
Total Repair Time:15 - 30 mins
-
Tools:Screw drivers
8 of 8 people
found this instruction helpful.
Was this instruction helpful to you?
Thank you for voting!
electronic control burned out
I unplugged the power cord,removed the back panel and unplugged all the wiring harnesses.four screws hold the control in place. reverse to install. The instructions were very complete(I do this for a living so it was extra easy)Anyone following the directions could replace this in under 15 min.
Parts Used:

-
Randall from Skowhegan, ME
-
Difficulty Level:Really Easy
-
Total Repair Time:Less than 15 mins
8 of 10 people
found this instruction helpful.
Was this instruction helpful to you?
Thank you for voting!
REPLACING burner head and ignitor
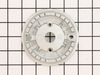
Remove the screw on the front of each side, also there are two screws holding the burner controls. Remove the burner knobs. There are two screws holding the burner head to the top of the burner panel, looking down on the burner head, these will not come out easily. Here's where the drill comes in. Drill the two screws head off, there are two gas line connections that must be removed, be careful not to twist the gas line. Remove the burner head and replace with the new one. When replacing the burner head, screw the gas line to the burner head first, then to the main gas control.
Parts Used:


-
Charles from ATLANTA, GA
-
Difficulty Level:Very Difficult
-
Total Repair Time:1- 2 hours
-
Tools:Pliers, Screw drivers
9 of 13 people
found this instruction helpful.
Was this instruction helpful to you?
Thank you for voting!
The oven and ranges would not heat up and an F9 error was displaying on the Oven Screen.
So, the F9 error indicates a electrical power issue. First I pulled the oven out and verified I had 240 volts at my outlet.
Then I removed the fire panel over the terminal block and the issue was apparent. The nuts on the terminal block were corroded. This had cause the resistance in the connection to raise and burn up the wire to my oven plug at the terminal block.
I removed the whole back panel and everything else seemed OK visually.
1. I go new connectors for the oven plug, stripped the wires, and crimped on the new connectors.
2. The terminal block DOES NOT come with the nuts to connect the wire to the terminal block. Mine were so corroded they had to be replaced. So I went and purchased the correct ones and installed the terminal block and reconnected all the wires.
3. I applied some dielectric grease to the connections through out the process of reinstalling to prevent it from happening in the future.
Then I removed the fire panel over the terminal block and the issue was apparent. The nuts on the terminal block were corroded. This had cause the resistance in the connection to raise and burn up the wire to my oven plug at the terminal block.
I removed the whole back panel and everything else seemed OK visually.
1. I go new connectors for the oven plug, stripped the wires, and crimped on the new connectors.
2. The terminal block DOES NOT come with the nuts to connect the wire to the terminal block. Mine were so corroded they had to be replaced. So I went and purchased the correct ones and installed the terminal block and reconnected all the wires.
3. I applied some dielectric grease to the connections through out the process of reinstalling to prevent it from happening in the future.
Parts Used:

-
Jared from UNION GROVE, AL
-
Difficulty Level:Really Easy
-
Total Repair Time:30 - 60 mins
-
Tools:Pliers, Screw drivers, Socket set
7 of 7 people
found this instruction helpful.
Was this instruction helpful to you?
Thank you for voting!
Oven temperature lower then setpoint.
After shutting the main valve behind stove. Removed all shelves and rear cover from stove. Unplugged the plug to the sensor. Removed the two mounting screws and pulled the old sensor out. Installed new sensor and plugged it in again. After reinstalling the rear cover and shelves, replugged in power, openned the gas valve behind the stove and tested with soapy water to make sure there wasn't ant developed leaks. Turned on oven with a test thermometer in it. Monitored operation and now oven temperature is roughly 10 to 20 degrees to the setpoint.
Parts Used:
-
Robert from Massapequa, NY
-
Difficulty Level:Easy
-
Total Repair Time:15 - 30 mins
-
Tools:Nutdriver, Screw drivers
7 of 8 people
found this instruction helpful.
Was this instruction helpful to you?
Thank you for voting!
Oven not reaching proper temperature
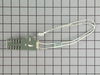
Removed old ingniter with screwdriver. Installed new igniter, but had to remove connector in order to electrically connect using twist on connectors.
Parts Used:
-
Michael from Minneapolis, MN
-
Difficulty Level:A Bit Difficult
-
Total Repair Time:15 - 30 mins
10 of 17 people
found this instruction helpful.
Was this instruction helpful to you?
Thank you for voting!
oven temperature not reaching setting/temp. up and down
Removed back of stove, removed screws from sensor inside oven, unplugged connector from back of stove, pulled sensor out through oven; installed new sensor, replaced back of stove. Set the oven to bake, waited for it to pre-heat; the oven thermometer showed that the same problem was occurring, the sensor replacement didn't work.
Parts Used:
-
Ellen from Schenectady, NY
-
Difficulty Level:Easy
-
Total Repair Time:15 - 30 mins
-
Tools:Screw drivers
7 of 8 people
found this instruction helpful.
Was this instruction helpful to you?
Thank you for voting!
Replace Oven Door Handles
Be prepaired to take the glass out. Unexpected, but not too hard. A right angle screw driver can be helpful for the bottom door. Takes some skill and patience. Good Luck! I am happy with the parts. Delivery time was quick.
Parts Used:

-
Michael from Levittown, NY
-
Difficulty Level:A Bit Difficult
-
Total Repair Time:30 - 60 mins
-
Tools:Screw drivers, Socket set
9 of 14 people
found this instruction helpful.
Was this instruction helpful to you?
Thank you for voting!
glass pane was cracked during the cleaning process
needed to completely dis assemble the oven door to get to the inner pane of glass...took some time...I was able to do it on my own...could possibly go a little quicker with two people for a few of the steps...but possible by one...then reinserted the glass pane...and then need to re assemble the door layer by layer...up and working again...would have cost several hundred dollars if need to call a repair person in...this way was the cost of the piece..less than $70 ... and my time...well worth it....thanks
Parts Used:
-
Ellen from Shelton, CT
-
Difficulty Level:Easy
-
Total Repair Time:More than 2 hours
-
Tools:Screw drivers
8 of 11 people
found this instruction helpful.
Was this instruction helpful to you?
Thank you for voting!
Cleaned old oven rack
I had the old oven rack in the oven when I cleaned it. The rack came out brown and would not slide easily. The new rack was exactly the right one and now all is back to perfect!
Parts Used:

-
Sandra from Sheboygan Falls, WI
-
Difficulty Level:Really Easy
-
Total Repair Time:Less than 15 mins
8 of 11 people
found this instruction helpful.
Was this instruction helpful to you?
Thank you for voting!
could not shut off upper oven on stove, the cancel button did not work.
Pulled stove from wall, removed sheetmetal back to electronic controls at the top of the stove. removed and replaced the electronic clock control modual, plugged in and tested clock and oven. moved stove back in place. thanks for the quick response on the part, I was surprised to get it in ONE DAY. We live in Maryland shipping point was Pennsylvania.
Parts Used:
-
George from California, MD
-
Difficulty Level:Really Easy
-
Total Repair Time:Less than 15 mins
-
Tools:Screw drivers
8 of 12 people
found this instruction helpful.
Was this instruction helpful to you?
Thank you for voting!