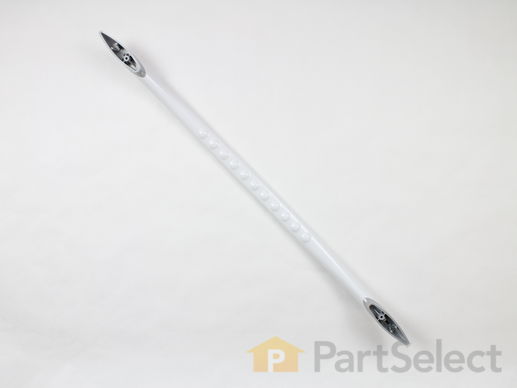
Door Handle WP74011768
Rated by 9 customers
Easy
30 - 60 mins
Ratings submitted by customers like you who bought this part.
Get this part fast! Average delivery time for in-stock parts via standard shipping: 1.8 days.
Door Handle Specifications

How Buying OEM Parts Can Save You Time and Money
Replacing your Maytag Range Door Handle

-
5 Stars 8
-
4 Stars 2
-
3 Stars 0
-
2 Stars 1
-
1 Star 2
- < Prev
- 1
- 2
- Next >
- < Prev
- 1
- 2
- Next >
- < Prev
- 1
- Next >
PULL UPWARD TO REMOVE, ( IT WILL LIFT RIGHT
OFF)
2. LAY OVEN DOOR ON A FLAT SURFACE ( HANDLE
DOWN AND HANGING OFF SURFACE) WITH A
TOWEL TO PROTECT THE GLASS.
3. REMOVE ALL SCREWS AROUND THE
PERIMETER OF THE ... Read more DOOR..
4. CAREFULLY SEPARATE THE DOOR FRONT AND
BOTTOM BRACKET BY SLIDING AWAY FROM
THE MAIN DOOR INNER-ASSEMBLY, ( THE
FRONT GLASS IS HELD BY THE TOP CHANNEL.
5. TURN THE MAIN DOOR INNER ASSEMBLY OVER
AND REMOVE THE HANDLE ASSEMBLY TWO
ATTACHING BRACKETS.
6. REMOVE THE ATTACHING BRACKETS FROM
THE HANDLE AND ATTACH TO THE NEW
HANDLE.
7. THE DOOR GLASSES CAN NOW BE CLEANED
8. ATTACH THE NEW HANDLE ASSEMBLY
9. REASSEMBLE IN REVERSE ORDER.
( BE CAREFUL WHEN SLIDING FRONT DOOR
GLASS INTO THE TOP DOOR CHANNEL}
-
Curt from ORANGE, CA
-
Difficulty Level:A Bit Difficult
-
Total Repair Time:30 - 60 mins
-
Tools:Screw drivers
-
Phillip from PHOENIX, AZ
-
Difficulty Level:Really Easy
-
Total Repair Time:30 - 60 mins
-
Tools:Screw drivers
-
Ann from Deer Park, WA
-
Difficulty Level:Easy
-
Total Repair Time:30 - 60 mins
-
Tools:Screw drivers
2. Took the bottom screws out out of the bottom plat on door.
3. Then took glass front and bottom plat off of door.
4. Then unscrewed hand brakets off of door and raplace handle.
5 Then put door back in reverse of takeing it off.
-
Charles from Chancellor, AL
-
Difficulty Level:Easy
-
Total Repair Time:30 - 60 mins
-
Tools:Screw drivers
-
Robert from Muskegon, MI
-
Difficulty Level:Easy
-
Total Repair Time:30 - 60 mins
-
Tools:Pliers, Screw drivers
-
Nathan from Oak Creek, WI
-
Difficulty Level:A Bit Difficult
-
Total Repair Time:30 - 60 mins
-
Tools:Pliers, Screw drivers
First remove the three screws that hold the metal piece at the bottom of the glass and remove that metal piece and the glass. Then remove the four screws that hold the handle bracket to the main oven do ... Read more or. Next remove the three screw at the top of the top trim . Remove the whole trim piece with the handle and brackets. Remove the old handle from the brackets. Install the new handle onto the brackets (through the new top trim. Reassemble.
-
Robert from Riverton, WY
-
Difficulty Level:Really Easy
-
Total Repair Time:30 - 60 mins
-
Tools:Screw drivers
-
William from Orlando, FL
-
Difficulty Level:A Bit Difficult
-
Total Repair Time:30 - 60 mins
-
Tools:Screw drivers
-
ROY LYNN from SEMINOLE, TX
-
Difficulty Level:Easy
-
Total Repair Time:30 - 60 mins
-
Tools:Screw drivers
- < Prev
- 1
- Next >
Ask our experts a question about this part and we'll get back to you as soon as possible!
- < Prev
- 1
- Next >

3 people found this helpful.

2 people found this helpful.

2 people found this helpful.

1 person found this helpful.
- < Prev
- 1
- Next >


Manufacturer Part Number: WP74011768

Item is in stock and will ship today if your order is placed before 4:00 PM Eastern Standard Time.
If your order is placed after 4:00 PM EST, the in stock items will ship on the next business day.
Item is not in stock and usually ships 3-5 business days from the time you place your order.
Item is not in stock and usually ships 10-15 business days from the time you place your order.
This item is no longer being made by the manufacturer, and cannot be added to your shopping cart.


