















HTDX100GM8WW Hotpoint Dryer - Instructions
Keep searches simple. Use keywords, e.g. "leaking", "pump", "broken" or "fit".
Timer was stripped

-
Mary Ann from Buzzards Bay, MA
-
Difficulty Level:Very Easy
-
Total Repair Time:Less than 15 mins
1 person
found this instruction helpful.
Was this instruction helpful to you?
Thank you for voting!
The door handle was comming off had broken hook
I pulled the old handle off and pushed the new one on.
No problem at all.
No problem at all.
Parts Used:
-
John C. from Cincinnati, OH
-
Difficulty Level:Really Easy
-
Total Repair Time:Less than 15 mins
1 person
found this instruction helpful.
Was this instruction helpful to you?
Thank you for voting!
Black marks showing up on garments.
Once I figured out how to remove the control panel. The rest was very easy. Upon pulling off the knob in the center of the control panel, there was a screw behind it. Once removed I used the palm of my hand and gave it a couple of upward hits in the center while the door was open. It slid up and I removed the electrical connections. Then carefully removed the top by pushing from the rear of the machine slightly and lifted off. Then removing the screws that hold the front on . After that it went pretty easily, reassembly went in reverse and. That was that!
Parts Used:


-
Garry from CONNELL, WA
-
Difficulty Level:A Bit Difficult
-
Total Repair Time:30 - 60 mins
-
Tools:Nutdriver, Screw drivers
1 person
found this instruction helpful.
Was this instruction helpful to you?
Thank you for voting!
Drum would not turn
Exactly how your perfect video instructions showed me. Thank you for a job well done!
Parts Used:
-
Jeff D from NEW MEADOWS, ID
-
Difficulty Level:Really Easy
-
Total Repair Time:30 - 60 mins
-
Tools:Screw drivers
1 person
found this instruction helpful.
Was this instruction helpful to you?
Thank you for voting!
The dial on the timer would no longer engage (knob would just spin)
I followed the Youtube video created by PartSelect and it was SUPER easy.
Removed dial from front panel
I unscrewed the back panel, which released the knob panel on the front and tipped that forward to access the timer device.
Released the locking tab and spun the entire timer counter clockwise until it released. Pulled each connecting wire off and immediately replaced it on the new timer so I didn't mix up the order.
Once wires were attached, I replaced timer turning clockwise until it locked in place.
Re-positioned front panel and replaced back panel installing screws.
Replaced dial and dryer was ready to go!
Removed dial from front panel
I unscrewed the back panel, which released the knob panel on the front and tipped that forward to access the timer device.
Released the locking tab and spun the entire timer counter clockwise until it released. Pulled each connecting wire off and immediately replaced it on the new timer so I didn't mix up the order.
Once wires were attached, I replaced timer turning clockwise until it locked in place.
Re-positioned front panel and replaced back panel installing screws.
Replaced dial and dryer was ready to go!
Parts Used:
-
Cindy from CHARLOTTE, MI
-
Difficulty Level:Really Easy
-
Total Repair Time:15 - 30 mins
-
Tools:Pliers, Screw drivers
1 person
found this instruction helpful.
Was this instruction helpful to you?
Thank you for voting!
Dryer timer wasn’t working with auto dry or time dry
When I ordered it in the email receipt were directions- just click installation instructions- I also looked at u tube video by just typing in GE Dryer timer repair. It took longer to clean the floor where the dryer sat for years since we never move it. Cleaning time is included in the 15 minutes— You will feel great since just saved a ton of money. So glad I found you for future issues with appliance repair. There are U Tube videos to fix everything. Robert Maheu Huntington Beach
Parts Used:
-
Robert from HUNTINGTN BCH, CA
-
Difficulty Level:Really Easy
-
Total Repair Time:15 - 30 mins
-
Tools:Nutdriver, Pliers, Screw drivers
1 person
found this instruction helpful.
Was this instruction helpful to you?
Thank you for voting!
Door handle broke
-
Cheryl from WILDER, KY
-
Difficulty Level:Really Easy
-
Total Repair Time:30 - 60 mins
1 person
found this instruction helpful.
Was this instruction helpful to you?
Thank you for voting!
BELT SQUEAKING
TOOK OFF TOP AND FRONT PANEL REACHED IN UNDER TUBE AND REMOVED FROM BELT TENSIONER HARDEST PART IS PUTTING BACK ON TENSIONER TAKES TWO HANDS LAYING ON YOUR BELLY
Parts Used:
-
Al from CORP CHRISTI, TX
-
Difficulty Level:A Bit Difficult
-
Total Repair Time:15 - 30 mins
-
Tools:Pliers, Screw drivers
1 person
found this instruction helpful.
Was this instruction helpful to you?
Thank you for voting!
no handle
just replaced the unit handle and how my wife can open the dryer without a screwdriver
Parts Used:
-
syd from wilmington, NC
-
Difficulty Level:Really Easy
-
Total Repair Time:Less than 15 mins
1 person
found this instruction helpful.
Was this instruction helpful to you?
Thank you for voting!
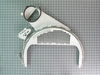
Cracked air duct
Two screws under the dryer door then the top comes off.Then two screws hold the front on come out. 4 screws top is off and front is off the rest is no problem.
Parts Used:
-
Forrest from Mays Landing, NJ
-
Difficulty Level:Easy
-
Total Repair Time:1- 2 hours
-
Tools:Screw drivers
2 of 4 people
found this instruction helpful.
Was this instruction helpful to you?
Thank you for voting!
drive belt is broken.
-
Phuc from WOODBRIDGE, VA
-
Difficulty Level:Easy
-
Total Repair Time:1- 2 hours
-
Tools:Screw drivers
1 person
found this instruction helpful.
Was this instruction helpful to you?
Thank you for voting!
dryer belt snapped
Replaced it as one would. I took off the front facing and replaced the belt. It took a bit of searching to find the proper way to route the belt around the pulley.
It took a while since it was my first time and I wasn't sure what to take apart and what to leave intact.
If I were to do it again, it would take 30 minutes or less.
It took a while since it was my first time and I wasn't sure what to take apart and what to leave intact.
If I were to do it again, it would take 30 minutes or less.
Parts Used:
-
Michael from Laurel Springs, NJ
-
Difficulty Level:A Bit Difficult
-
Total Repair Time:1- 2 hours
-
Tools:Screw drivers
3 of 7 people
found this instruction helpful.
Was this instruction helpful to you?
Thank you for voting!
Dryer needed a new dryer belt
-
Cindy from EPHRATA, PA
-
Difficulty Level:Easy
-
Total Repair Time:1- 2 hours
-
Tools:Pliers, Screw drivers, Wrench set
1 person
found this instruction helpful.
Was this instruction helpful to you?
Thank you for voting!
My last phase of repairs of minor items.
if your unit has over 6,000 hours of operations, one needs to remove the front panel and inspect the sliders that the drum rides on. The video were very helpful to replace the sliders. Unfortunately, my dryer had over 10,000 hours of operations over a 30 years period, hence a major repair costing over $200.00 dollars. The drum sliders were gone, hence the drum eat through the plastic guides. More so, the drum started to eat away the front panel. If the dryer is eating your closes and making a noise, one is looking at a $200.00 repair job. Hence check the sliders early will save one $$$$.
Parts Used:
-
Edward from EDGEWATER, FL
-
Difficulty Level:Really Easy
-
Total Repair Time:Less than 15 mins
1 person
found this instruction helpful.
Was this instruction helpful to you?
Thank you for voting!
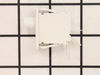
Switch not working.
Open the door and removed the part. Installed the new part and started the dryer.
Parts Used:
-
Alan from BELFORD, NJ
-
Difficulty Level:Very Easy
-
Total Repair Time:Less than 15 mins
1 person
found this instruction helpful.
Was this instruction helpful to you?
Thank you for voting!