















CFLE1011MW0 Frigidaire Washer Dryer Combo - Instructions
Keep searches simple. Use keywords, e.g. "leaking", "pump", "broken" or "fit".
Our door catch got lost inside the dryer after the door was slammed to hard
I took the new door catch out of the packaging and just snapped it in place it was easy peasy and took less time than opening the package
Parts Used:

-
Joyce from PORTAL, GA
-
Difficulty Level:Very Easy
-
Total Repair Time:Less than 15 mins
2 of 3 people
found this instruction helpful.
Was this instruction helpful to you?
Thank you for voting!
door catch wasn't working and screws in door were loose.

-
NICOLE from WEST JORDAN, UT
-
Difficulty Level:Really Easy
-
Total Repair Time:Less than 15 mins
-
Tools:Screw drivers
10 of 27 people
found this instruction helpful.
Was this instruction helpful to you?
Thank you for voting!
Latch on dryer no longer worked
So easy! I ordered the part on the website. Received it 24 hours later. And popped it in place. Good as new.
Parts Used:
-
chris from dallas, TX
-
Difficulty Level:Really Easy
-
Total Repair Time:Less than 15 mins
2 of 3 people
found this instruction helpful.
Was this instruction helpful to you?
Thank you for voting!
High pitched squeal from dryer during use...
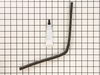
Followed directions of another website...had to replace ball and socket joint that attached the drum to the back frame of the dryer...removed top outside metal cover of dryer to facilitate attaching ball/socket kit to the drum...this allowed us to secure the ball/socket kit to the drum without cross threading the screws...with the top of dryer removed this allows you to lift the drum to fit into the plastic bracket...dryer had been in use for over ten years before repair...extreme amount of lint debris throughout internal area of dryer...lint was everywhere...spent a large amount of time vacuuming lint...duct connection from lint trap to lint fan/impeller was very loose and over the years lint seeped out from connection...suggest using duct tape or wood/composite shims to hold the lint duct to the fan/impeller...make sure you remove lint from the back of drum crevice and around the area of the heating element for electric dryers...for sanity's sake this should be a two person job...for this repair we replaced the upper and lower drum felt strip, installed a complete and new ball/socket kit, replaced drum belt, and vacuumed and damp wiped the entire interior of the dryer...
Parts Used:


-
Robert from OCEAN SPRINGS, MS
-
Difficulty Level:A Bit Difficult
-
Total Repair Time:More than 2 hours
-
Tools:Screw drivers, Socket set
2 of 3 people
found this instruction helpful.
Was this instruction helpful to you?
Thank you for voting!
Lint was going everywhere. The new one fits perfectly, but lint is still going alll over

-
Christine from DEER PARK, NY
-
Difficulty Level:Very Easy
-
Total Repair Time:Less than 15 mins
2 of 3 people
found this instruction helpful.
Was this instruction helpful to you?
Thank you for voting!
Very loud squeaking
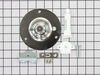
Opened top, removed front cover, removed belt, took out drum, replaced bearing on drum and bearing guide on back of dryer. Reinstalled drum and belt, then replaced drum glides and upper felt,let glue set with clamps over night.
Parts Used:

-
william from hackettstown, NJ
-
Difficulty Level:Easy
-
Total Repair Time:15 - 30 mins
-
Tools:Nutdriver, Screw drivers
2 of 3 people
found this instruction helpful.
Was this instruction helpful to you?
Thank you for voting!
loud squeeling noise
After changing the drum support bearing, and the front felt ring, the noise continued. It turned out to be the tensioner pully. The harmonic vibration travels throughout the dryer box like an instrument so you can't tell where the sound is comming from. Before you do anything, spray a little wd40 between the bushing and the shaft on the belt tenioner pully. If the squeel goes away, you have found your smoking gun.
Parts Used:
-
Lewis from Thornton, CO
-
Difficulty Level:Really Easy
-
Total Repair Time:Less than 15 mins
-
Tools:Nutdriver, Pliers, Screw drivers
2 of 3 people
found this instruction helpful.
Was this instruction helpful to you?
Thank you for voting!
the attached anchors and holes linled up about 80% of the time.
I cut off the four that didn't line up - I suppose since this was a gasket that fit several makes, I should expect this type of problem.
Parts Used:

-
Allan D from REDLANDS, CA
-
Difficulty Level:A Bit Difficult
-
Total Repair Time:15 - 30 mins
1 person
found this instruction helpful.
Was this instruction helpful to you?
Thank you for voting!
lint screen had holes
-
Carol from COLUMBUS, WI
-
Difficulty Level:Really Easy
-
Total Repair Time:Less than 15 mins
1 person
found this instruction helpful.
Was this instruction helpful to you?
Thank you for voting!
Top hinge on clothes dryer separated, leaving door difficult to open/close
Ordered part from partselect.com. Part was back ordered; however they were very proactive in communicating status updates! When it arrived it was simply a matter of removing door using a philips screwdriver, installing the new hinge and presto - job complete! Kudos to partselect.com ??
Parts Used:

-
Robert from CUMMING, GA
-
Difficulty Level:Really Easy
-
Total Repair Time:Less than 15 mins
-
Tools:Screw drivers
1 person
found this instruction helpful.
Was this instruction helpful to you?
Thank you for voting!
Dryer lint filter was all torn up after 12 years of use.
Simple: I ordered the part from you then took out the old old and inserted the new one. Took all of 1 minutes
Parts Used:
-
Michael from DUNN, NC
-
Difficulty Level:Very Easy
-
Total Repair Time:Less than 15 mins
1 person
found this instruction helpful.
Was this instruction helpful to you?
Thank you for voting!
LINT FILTER
-
ANGEL from MIAMI, FL
-
Difficulty Level:Very Easy
-
Total Repair Time:Less than 15 mins
1 person
found this instruction helpful.
Was this instruction helpful to you?
Thank you for voting!
Glide was broken
I watched the video on the repair and followed it. Super easy. Repair only took 30 mins. Please note there are 2 glides. Make sure to order 2.
Parts Used:
-
Eileen from SHERIDAN, CA
-
Difficulty Level:Really Easy
-
Total Repair Time:15 - 30 mins
-
Tools:Nutdriver, Screw drivers
1 person
found this instruction helpful.
Was this instruction helpful to you?
Thank you for voting!
dryer was squealing loadly
took off face of dryer, removed drum 4 screws removed two srews holding bearing and shaft ,replaced shaft bearing and shaft . Just for preventive maintenance i replaced idleling arm and dryer belt. I lined everything up replaced drum used shop vac to clean lint and dust from all parts replaced face of dryer and boom i got a btand new dryer
Parts Used:

-
MIKE from MASSAPEQUA PARK, NY
-
Difficulty Level:Really Easy
-
Total Repair Time:15 - 30 mins
-
Tools:Pliers, Screw drivers, Wrench set
1 person
found this instruction helpful.
Was this instruction helpful to you?
Thank you for voting!
The drive belt snapped due to age
Removed front and back panels as well as the dryer front, placed belt on drum and drive motor. I found that taking the door off the dryer front made the reassembly much easer.
Parts Used:
-
Thomas from MAYODAN, NC
-
Difficulty Level:A Bit Difficult
-
Total Repair Time:More than 2 hours
-
Tools:Pliers, Screw drivers, Socket set
1 person
found this instruction helpful.
Was this instruction helpful to you?
Thank you for voting!