















C202-C Jenn-Air Cooktop - Instructions
Keep searches simple. Use keywords, e.g. "leaking", "pump", "broken" or "fit".
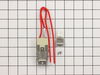
one of wire melted and broken off from receptacle
Cut broken wire and existed wire off and put splice on both new and old wires to connect them.
It's easy job.
It's easy job.
Parts Used:
-
Young from Cordova, TN
-
Difficulty Level:Easy
-
Total Repair Time:15 - 30 mins
-
Tools:Pliers, Screw drivers
0 of 1 people
found this instruction helpful.
Was this instruction helpful to you?
Thank you for voting!
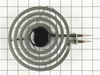
intermittent heat from burner
Pulled out electric heating element and replaced with new. I have had this frustrating problem for 2 years and after replacing the elements they now work like new! My only question, why did it take me so long to replace???
Parts Used:
-
Brian from Westport, CT
-
Difficulty Level:Really Easy
-
Total Repair Time:Less than 15 mins
0 of 1 people
found this instruction helpful.
Was this instruction helpful to you?
Thank you for voting!
Worn out stove top
We replaced the burner grates, knobs, air filter and burner pan. Looks as good as new!
Parts Used:

-
Redona from Roseville, CA
-
Difficulty Level:Really Easy
-
Total Repair Time:Less than 15 mins
0 of 1 people
found this instruction helpful.
Was this instruction helpful to you?
Thank you for voting!
Electrical receptacle for burner was defective.
After buying a 'universal' part at Lowe's and it not fitting correctly and shorting out the burner, I went online and found this source for an exact replacement part. Beside having to disassemble the drop in stove burner two or three times it went well when I had the correct part. I lost one screw somewhere and that delayed me a short time to find a replacement. Thus the 1 to 2 hours. It would have been about a 30 minute job if I had been smarter.
Parts Used:
-
gerald from Hillsboro, TN
-
Difficulty Level:Easy
-
Total Repair Time:1- 2 hours
-
Tools:Pliers, Screw drivers, Socket set
0 of 1 people
found this instruction helpful.
Was this instruction helpful to you?
Thank you for voting!
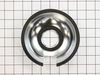
Screws holding recepticles in place had to be drilled out.
Removed screws by drilling one and using a pliers to remove 2nd one. At first did not have enough wire to pull recepticles out until I relized wires were clipped to back of range to hold in place. Unclipped wires, pulled recepticles out, cut wires and attached new recepticles by connecting wires with wire nuts (I think wire nuts were to small so I used my own a size larger). Another problem that I found was that the recepticles on my range were held in place only by the screws that attached the recepticles to the drip pan flang. I had to bend an L bracket to prop under each recepticle to hold the back of it up so the burner element would sit level over the drip pan.
Parts Used:

-
Dennis from Bacliff, TX
-
Difficulty Level:A Bit Difficult
-
Total Repair Time:1- 2 hours
-
Tools:Pliers, Screw drivers
0 of 1 people
found this instruction helpful.
Was this instruction helpful to you?
Thank you for voting!
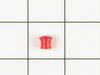
age & solivents melted the on pilot light lens
removed the wooden cutter block rt side top and the air exst.vent guard lf side then with a phileps driver 2 screws holding the control knob assm.in. both control knob assm.rt&lf come off the same way. just scraped out what that was left of the old lens stuck in new one and reatached light bulb holder. this bulb holder presses on and slides side ways to lock in place. then snaped control knob assm. back in and tighten the 2 screws. replaced vent guard & wooden cutter block. all was done.
Parts Used:
-
JAMES from McALESTER, OK
-
Difficulty Level:Really Easy
-
Total Repair Time:15 - 30 mins
-
Tools:Screw drivers
0 of 1 people
found this instruction helpful.
Was this instruction helpful to you?
Thank you for voting!
burner connecters lost contact
pulled he cooktop, replaced the recepticles, reassembled.
Parts Used:
-
tim from manchester, OH
-
Difficulty Level:Easy
-
Total Repair Time:1- 2 hours
-
Tools:Nutdriver, Screw drivers
0 of 2 people
found this instruction helpful.
Was this instruction helpful to you?
Thank you for voting!
Wife left burner on
-
Alan from Alpine, CA
-
Difficulty Level:Really Easy
-
Total Repair Time:15 - 30 mins
-
Tools:Screw drivers, Wrench (Adjustable)
0 of 2 people
found this instruction helpful.
Was this instruction helpful to you?
Thank you for voting!
old yucky filter
Thanks, have been looking for a replacement for this dinosaur filter forever. It is great!
Parts Used:
-
Diane from Flower Mound, TX
-
Difficulty Level:Really Easy
-
Total Repair Time:Less than 15 mins
0 of 2 people
found this instruction helpful.
Was this instruction helpful to you?
Thank you for voting!
Needed to replace the grease filter!
-
Colette from Annapolis, MD
-
Difficulty Level:Really Easy
-
Total Repair Time:Less than 15 mins
0 of 2 people
found this instruction helpful.
Was this instruction helpful to you?
Thank you for voting!
The paint begin popping of my original grill. My son had a friend that said that he could remove the old paint and repaint for me. Unfortunately in the shuffle of a motorcycle performance shop the grill was lost. I have been trying to get help from Jenn-Aire since March and they just kept saying th
Very simple for me!!! Open the box, uncover the new grill and lay it in its place.
Thank you so much!
Thank you so much!
Parts Used:
-
Norma from Salisbury, NC
-
Difficulty Level:Really Easy
-
Total Repair Time:Less than 15 mins
0 of 2 people
found this instruction helpful.
Was this instruction helpful to you?
Thank you for voting!
rotten filter for down draft vent
How I did the repair is no consequence. The service of easily finding the part on your site is GREAT! and the shipping time more than reasonable! Thanks!
Parts Used:
-
Craig from Ashburn, GA
-
Difficulty Level:Really Easy
-
Total Repair Time:Less than 15 mins
0 of 2 people
found this instruction helpful.
Was this instruction helpful to you?
Thank you for voting!
burner switch would only stay on hi
-
David from Willow Grove, PA
-
Difficulty Level:Really Easy
-
Total Repair Time:Less than 15 mins
-
Tools:Screw drivers, Wrench (Adjustable)
0 of 3 people
found this instruction helpful.
Was this instruction helpful to you?
Thank you for voting!
The paint had chipped and peeled on the inlet grill
I lifted off the old grill and replaced them with the new ones. My stove top looks great again. If I could find them, I would like to replace the knobs to turn on the gas!
Parts Used:
-
Ann from Irvington, NY
-
Difficulty Level:Really Easy
-
Total Repair Time:Less than 15 mins
0 of 4 people
found this instruction helpful.
Was this instruction helpful to you?
Thank you for voting!
Electric surface burner would only turn very hot
Well, I had to search a bit deeper in the internet to find out that the problem was not with the surface burner (which did look a bit burned out anyway) but rather with the surface burner switch (Part Number: PS336885) which must have ben damaged by the heat of the closest burner. If this problem would have been better documented (or if I would have searched more carefully) I would have saved over $40 with parts (Surface Burner Receptacle Kit) that I didn't quite need. Repairing the switch was very easy, thanks also to the available video , even though the stove used on this video (front panel) didn't quite match mine (top-back panel).
Parts Used:
-
Vittorio from Wakefield, MA
-
Difficulty Level:Easy
-
Total Repair Time:15 - 30 mins
-
Tools:Screw drivers
Was this instruction helpful to you?
Thank you for voting!