















BCS42ELE General Electric Refrigerator - Instructions
Keep searches simple. Use keywords, e.g. "leaking", "pump", "broken" or "fit".
ice maker stopped working
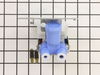
I unplugged the refrigerator and shut off the water. I removed the back of the frig where the inlet valve is located. I removed the old nuts and cut the plastic water line on the ends. I shoved them into the new fittings. I then turned on the water and plugged in the frig. I could hear the water pumping into the ice maker. I screwed the inlet and back of refrigerator in place.
Parts Used:
-
Karen from Gainesville, FL
-
Difficulty Level:Easy
-
Total Repair Time:30 - 60 mins
-
Tools:Wrench (Adjustable)
1 of 2 people
found this instruction helpful.
Was this instruction helpful to you?
Thank you for voting!
Leaky valve
Removed three screws, water input line, two water output lines. The new valve had push on fittings instead of screw on, so had to cut the old fittings off. Connecte input and output lines Replaced three screws holding valve in place. Turned water back on. Finished.
Parts Used:
-
George from Old Bethpage, NY
-
Difficulty Level:Easy
-
Total Repair Time:15 - 30 mins
-
Tools:Screw drivers, Wrench (Adjustable)
1 of 2 people
found this instruction helpful.
Was this instruction helpful to you?
Thank you for voting!
Ice maker overflowing. Valve stuck open
The valve I got was slightly bent up. I spent the first 10 minutes or so bending it back with my muscles. once that was done, I took off the backing of the fridge with the screwdriver, undid the single bolt holding the valve on, and unplugged it all (fridge was already unplugged). Just like everyone says, the tubing connecter is different, so I took off the old compression fittings, and pushed the tubes in. THen I hooked up the wiring... I realized that that the wiring adapter was needed but there wasn't enough room for it as is.. so I have to bend the tabs so the wiring would angle down. Everything has worked perfect since... I got Ice and no leaks! woo hoo!
Parts Used:
-
Johnathan from Gilbert, AZ
-
Difficulty Level:Easy
-
Total Repair Time:15 - 30 mins
-
Tools:Screw drivers, Wrench (Adjustable)
1 of 2 people
found this instruction helpful.
Was this instruction helpful to you?
Thank you for voting!
water over filling ice tray and leaking into ice tray and freezing
Followed the directions on the web site and did everything that was instructed to do and had no problems with installing the new dual water Valve. Has been in now for a week and no more over filling or freezing water in the storage box. Lots of clean ice, now!
Parts Used:
-
Gary from Groesbeck, TX
-
Difficulty Level:Easy
-
Total Repair Time:15 - 30 mins
-
Tools:Nutdriver, Wrench (Adjustable)
1 of 2 people
found this instruction helpful.
Was this instruction helpful to you?
Thank you for voting!
leaking water valve
I used a screwdriver to remove, then replace, the screw that holds in the valve. I used pliers to pull the refer water line out of the old valve. I just used my hands to reinstall the line. I used and open box wrench to remove and reattach the main water line. Nothing blocked access to the valve and it was very easy to remove the old one and install the new one.
Parts Used:
-
kathleen from red oak, TX
-
Difficulty Level:Really Easy
-
Total Repair Time:15 - 30 mins
-
Tools:Pliers, Screw drivers, Wrench set
1 of 2 people
found this instruction helpful.
Was this instruction helpful to you?
Thank you for voting!
no ice
Removed cardboard cover from back of refrigerator with nutdriver. Removed old pump and reconnected water lines and electrical. reinstalled pump.It did take about 5-10 minutes for the pump to refill ice tray.
Parts Used:
-
ROBERT from STOW, OH
-
Difficulty Level:Really Easy
-
Total Repair Time:15 - 30 mins
-
Tools:Nutdriver, Pliers, Wrench set
1 of 2 people
found this instruction helpful.
Was this instruction helpful to you?
Thank you for voting!
water wouldn't shut off
-
James from Somerset, KY
-
Difficulty Level:Really Easy
-
Total Repair Time:Less than 15 mins
-
Tools:Socket set, Wrench (Adjustable)
1 of 2 people
found this instruction helpful.
Was this instruction helpful to you?
Thank you for voting!
My icemaker was leaking down the back wall of the freezer (side-by-side unit) building a huge ice flow that grew into the path of the circulation fan.
After turning the water off, I removed the two screws holding the cover on the lower back of the freezer. I disconnected the copper water supply line from the valve. I then removed the screw holding the valve in place and removed it from the freezer. I removed the two wires from the valve and placed them on the new valve (after inserting the clip inserts to match the new size tabs).I pulled the two plastic water lines out of the valve and inserted them into the new valve. I put the new valve in place and replaced the screw. Total time less than 15 minutes. Much easier to fix, than to identify the problem. The collective wisdom of the internet strikes again! Thanks to all.
Parts Used:
-
Jerry from Poquoson, VA
-
Difficulty Level:Really Easy
-
Total Repair Time:Less than 15 mins
-
Tools:Screw drivers
1 of 2 people
found this instruction helpful.
Was this instruction helpful to you?
Thank you for voting!
Leaking valve
The valve was leaking from the core and not the in/out tubes. The valve is easy to get to and very easy to replace. When replacing the water in/outs you cut them off the old valve and then slip them on the new valve. 5 to 10 minute job.
Parts Used:
-
John from Chapel Hill, NC
-
Difficulty Level:Really Easy
-
Total Repair Time:Less than 15 mins
-
Tools:Pliers, Screw drivers
1 of 2 people
found this instruction helpful.
Was this instruction helpful to you?
Thank you for voting!
RH side of vegetable drawer broke
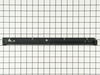
Husband removed the broken one and replaced it with the new one ordered from you - all he needed was a screwdriver. Works wonderfully.
Parts Used:
-
Ida from Orange Park, FL
-
Difficulty Level:Really Easy
-
Total Repair Time:Less than 15 mins
-
Tools:Screw drivers
1 of 2 people
found this instruction helpful.
Was this instruction helpful to you?
Thank you for voting!
Water flow was too low
Turn off water valve to the refigerator and disconnect line.
Remove the cardboard backing and insulation.
Remove old valve and cut lines close to the valve.
Trim plastic on new valve as needed to fit (generic valve).
Insert water lines into new valve.
Install new valve.
Connect water line and open valve.
Replace cardboard backing and insulation.
Remove the cardboard backing and insulation.
Remove old valve and cut lines close to the valve.
Trim plastic on new valve as needed to fit (generic valve).
Insert water lines into new valve.
Install new valve.
Connect water line and open valve.
Replace cardboard backing and insulation.
Parts Used:
-
Craig from Land O Lakes, FL
-
Difficulty Level:Easy
-
Total Repair Time:Less than 15 mins
-
Tools:Pliers, Screw drivers
1 of 2 people
found this instruction helpful.
Was this instruction helpful to you?
Thank you for voting!
Valve leaked water and needed to be replaced
First I removed the incoming water line from the valve. I then removed the screw that hold the valve in place. Then I pulled the element out about 3 inches and disconnected the two connector wires. Next I cut the plastic hoses from the old valve.
To install the new valve, I inserted the two plastic hoses into the new valve. (hoses are different diameters so it is next to impossible to insert them incorrectly.) I replaced the electrical connectors (This was the only glitch since the one connector on the refrigerator is larger then the pins on the new valve, A little electrical tape held the connector in place.) I then tightened the screw that holds the valve on the refirgerator and reconnected the household water to line to the valve.
The entire job took less time then it has taken me to type the procedure.
To install the new valve, I inserted the two plastic hoses into the new valve. (hoses are different diameters so it is next to impossible to insert them incorrectly.) I replaced the electrical connectors (This was the only glitch since the one connector on the refrigerator is larger then the pins on the new valve, A little electrical tape held the connector in place.) I then tightened the screw that holds the valve on the refirgerator and reconnected the household water to line to the valve.
The entire job took less time then it has taken me to type the procedure.
Parts Used:
-
Chester from Chambersburg, PA
-
Difficulty Level:Really Easy
-
Total Repair Time:Less than 15 mins
-
Tools:Nutdriver, Wrench (Adjustable)
1 of 2 people
found this instruction helpful.
Was this instruction helpful to you?
Thank you for voting!
No water going into ice maker
Pulled the fridge out from the wall, disconnected the power cord,turned off the water supply,removed the backing that covers the fan/motor and the two way water valve. Removed one screw that holds water valve to back of fridge,removed two water lines. Installed the new water valve , connected water lines and screw, installed back dust cover, plugged in the 110 cord, turned on the water valve. Within 30 minutes a new tray of ice cubes was ejected into the ice holding box. Mission completed.
Parts Used:
-
Bobby A from Del City, OK
-
Difficulty Level:Easy
-
Total Repair Time:15 - 30 mins
-
Tools:Nutdriver
1 of 3 people
found this instruction helpful.
Was this instruction helpful to you?
Thank you for voting!
Dual inlet water valve was leaking & ice formed in freezer
Rolled out the frigerator from the wall. Removed the electrical plug from the wall. Turned off the water valve; disconnected the inlet water line at the frigerator. Detached the dual valve assembly from the frigerator; identified and disconnected the outlet water lines and the four electrical lines from the old valve and installed them on to the new valve. Remounted the dual valve assembly on to the frigerator. Turned on the water and checked for leaks. Re-plugged the electric cord in the wall outlet; pushed the refgrigerator back into position. Total elapsed time was about 15 minutes, not counting the time I directed my wife to get me various tools from my work bench and the time it took me remove my 88 year old body from the kitchen floor, back to an upright position. Peeked into the freezer several times over several hours to be certain there were no leaks.
Parts Used:
-
Ray from Katy, TX
-
Difficulty Level:Easy
-
Total Repair Time:Less than 15 mins
-
Tools:Pliers, Screw drivers, Socket set, Wrench (Adjustable)
0 of 1 people
found this instruction helpful.
Was this instruction helpful to you?
Thank you for voting!
the original part had gotten a tiny pinhole in the plastic at the seam, probably due to age
After turning the water off and unplugging the refridgerator, I took the copper inlet tubing off using an adjustable wrench. I disconnected the two fuses that give power to the unit, and using a screwdriver, disconnected the water inlet/ outlet tubing from the old unit. I pushed the tubing into its proper place in the new unit, plugged in the two color coded fuses, used a wrench to reconnect the copper water tubing, and replaced the unit. EASY!!! So, easy, in fact that a non-handy girl could do it (and I can say that, being a non-handy girl!)
Parts Used:
-
Linda from Pittsfield, MA
-
Difficulty Level:Really Easy
-
Total Repair Time:Less than 15 mins
-
Tools:Wrench (Adjustable)
0 of 1 people
found this instruction helpful.
Was this instruction helpful to you?
Thank you for voting!