















ABR2227VES10 Amana Refrigerator - Instructions
Keep searches simple. Use keywords, e.g. "leaking", "pump", "broken" or "fit".
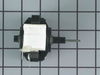
Thought motor was bad freezer cold fridge hot
Ordered new fan motor
Got part took fridge apart
Result was the motor was running
The fan blade had come off the motor
Replaced the motor anyway and reinstalled the fan, working well
Got part took fridge apart
Result was the motor was running
The fan blade had come off the motor
Replaced the motor anyway and reinstalled the fan, working well
Parts Used:
-
Wayne from PENNINGTON, NJ
-
Difficulty Level:Really Easy
-
Total Repair Time:30 - 60 mins
4 of 4 people
found this instruction helpful.
Was this instruction helpful to you?
Thank you for voting!
Water Fill Cup Broke
The Ice maker unit had to be removed and the shaft had to also be removed, which required dis-assembling the motor drive. The thickness of the shaft and the bearing fill cup prevents it from simply pushing it in place. Other than that I have Ice.
Parts Used:

-
Sam from Las Vegas, NV
-
Difficulty Level:A Bit Difficult
-
Total Repair Time:30 - 60 mins
-
Tools:Screw drivers
5 of 7 people
found this instruction helpful.
Was this instruction helpful to you?
Thank you for voting!
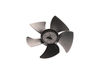
Wife used vacuum cleaner and busted blade off fan
Instructions were great five minutes to remove and replace fan....Thank You............ saved big money
Parts Used:
-
Robert from GOSHEN, IN
-
Difficulty Level:Really Easy
-
Total Repair Time:Less than 15 mins
-
Tools:Screw drivers
4 of 4 people
found this instruction helpful.
Was this instruction helpful to you?
Thank you for voting!
Noisy damper
Easy fix, it's right in the back of the fridge under a cover that just clips in, a piece of foam, and two screws. The hardest part is getting the clips free without breaking them. After replacement it's silent instead of making a grinding noise regularly.
Parts Used:

-
Keith from OLYMPIA, WA
-
Difficulty Level:Really Easy
-
Total Repair Time:Less than 15 mins
-
Tools:Screw drivers
4 of 4 people
found this instruction helpful.
Was this instruction helpful to you?
Thank you for voting!
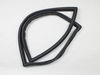
bad gasket
took about 15 min just took off gasket with flat screwdriver cleaned and put it on no glue it has magnets very easy
Parts Used:
-
Donna from Palestine, TX
-
Difficulty Level:Really Easy
-
Total Repair Time:Less than 15 mins
-
Tools:Screw drivers
4 of 4 people
found this instruction helpful.
Was this instruction helpful to you?
Thank you for voting!
Freezer box frosting up. Refrigerator not cold.
My son (who does HVAC, but not appliance repair) did some investigating by taking front and back panels off and determined that the evaporator coil was freezing over because the defrost wire was not heating up. He and his girlfriend did some real-time internet searching for diagnostic info because NO control diagram was included with the refrigerator. He determined the problem was most likely the electronic control board. Ordered and installed a new board and the refrigerator is back to working fine. Took about 2 hours to diagnose the problem and 1/4 hour to actually install the control board. Kind of disappointing that this control board failed when the refrigerator was less that 4 years old.
Parts Used:

-
Timothy from BELTSVILLE, MD
-
Difficulty Level:A Bit Difficult
-
Total Repair Time:30 - 60 mins
-
Tools:Nutdriver, Screw drivers
4 of 5 people
found this instruction helpful.
Was this instruction helpful to you?
Thank you for voting!
Center crisper rail breaking off.
After the original center crisper drawer slide rail broke and and second also looking in deep into your parts catalog I discovered that the refrigerator never came with a crisper frame brace from the store or factory.
Thanks to you , I no longer have the use of the center rail breaking off for now everything is made out of cheaply make plastic by whirlpool.
Thanks to you , I no longer have the use of the center rail breaking off for now everything is made out of cheaply make plastic by whirlpool.
Parts Used:


-
John from CRESCO, PA
-
Difficulty Level:Really Easy
-
Total Repair Time:Less than 15 mins
4 of 5 people
found this instruction helpful.
Was this instruction helpful to you?
Thank you for voting!
the rail to hold the crisper drawers broke
I first removed the bottom shelf. Then I popped the rail in. It was pretty easy although I did have to use some force to fit it in. Ordering the part and doing it myself was a lot cheaper than calling the repair man.
Parts Used:
-
Christina from Orange, CT
-
Difficulty Level:Really Easy
-
Total Repair Time:Less than 15 mins
4 of 5 people
found this instruction helpful.
Was this instruction helpful to you?
Thank you for voting!
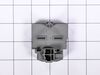
lots of clicking/ both fridg/freezer warm then recooling
went on this website to fine info ALWAYS GO TO TYE OF APP. FIRST THEN TYPE IN MODEL NUMBER...THAT WAY YOUR GOING TO GET THE INFO ONLY TO YOUR APP. then search under symptom .." DO LOTS OF READING HERE ",CLICK ON COSTUMER REPAIRS thats were i found additional info on my problem..now on to the fix.. it stands to reason that on my appy. anyways that if the to parts plug into each other then you should think smart and get both avoid the coming "i told you so, you should have ordered the other part to" didnt cost that much extra... word of advice here .. i have big hands so when " they say" to plug both together then plug into the compressor...DONT!!!! plug the start device in first then plug in capacitor... almost forgot!!!! make sure ALL ELECTRICAL PLUGS AND WIRES ARE CLEAN-NOT BURNT ECT... used a can of electric contact cleaner-NOT ON THE NEW PARTS JUST THE COMPRESSOR AND THE WIRE THAT PLUGS INTO THE CAPAC. .. its just that simple... you will have to let the app. run for at least 24-36 hrs. to get cool enough and stabilize. after that we had to readjust the temp settings a little bit no bigee enjoy!!!!!
Parts Used:

-
scott from GROVES, TX
-
Difficulty Level:Really Easy
-
Total Repair Time:Less than 15 mins
-
Tools:Nutdriver, Pliers
4 of 5 people
found this instruction helpful.
Was this instruction helpful to you?
Thank you for voting!
needed a Door Bin to replace the old one

-
Susan from BLOOMINGTON, IN
-
Difficulty Level:Easy
-
Total Repair Time:Less than 15 mins
6 of 11 people
found this instruction helpful.
Was this instruction helpful to you?
Thank you for voting!
FREEZER WOULD NOT DEFROST.
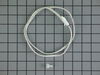
I initially tested the heating element and defrost thermostat using an ohm meter. the defrost thermostat was incased in ice, so I replaced it first. The refridgerator worked for about a week and then froze up again. I then replaced the thermistor and the unit is working as designed.
Parts Used:
-
JEFF from SEATTLE, WA
-
Difficulty Level:Really Easy
-
Total Repair Time:30 - 60 mins
-
Tools:Nutdriver, Screw drivers
4 of 5 people
found this instruction helpful.
Was this instruction helpful to you?
Thank you for voting!
Broken light switch
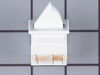
Watched video. Unplugged refrigerator and popped out switch. In plugged connector and pushed switch in place. Plugged in refrigerator and the light worked
Parts Used:
-
Terry from WARMINSTER, PA
-
Difficulty Level:Really Easy
-
Total Repair Time:15 - 30 mins
-
Tools:Screw drivers
4 of 5 people
found this instruction helpful.
Was this instruction helpful to you?
Thank you for voting!
Top section warm, but freezer okay.
Popped off the control panel at the top behind the door. Found the thermistor and replaced it, cutting the wires and splicing the new one in. Immediately the warm section of the refrigerator was getting below freezing temperature readings, so the cooling vent was not opening. I put the old one back on and the temperature readings went back to being accurate. So this was not the problem. I believe now that the fan somehow is not blowing enough cold air up. So now I'll probably buy a fan motor and maybe a blade and try that. Otherwise the computer module I priced at $500 so I hope it isn't that. I replace the fan motor a few years ago already.
Parts Used:
-
Christopher from HOMESTEAD, FL
-
Difficulty Level:Easy
-
Total Repair Time:15 - 30 mins
-
Tools:Screw drivers
3 of 3 people
found this instruction helpful.
Was this instruction helpful to you?
Thank you for voting!
Door Gasket had a tear in it.
To repair the problem,I ordered a new gasket. Once I received the gasket, I laid it flat on the floors and hot the blow dryer and blow out the creases in the gasket. I then took off the door by removing the four screws from the door and rest the door on the table. I then removed the old gasket and replaced it with the new one. It took about 15 minutes. My frig. Stop freezing up.
Parts Used:
-
Ida Mae from MEDLEY, FL
-
Difficulty Level:Very Easy
-
Total Repair Time:15 - 30 mins
-
Tools:Screw drivers
3 of 3 people
found this instruction helpful.
Was this instruction helpful to you?
Thank you for voting!
Parts ordered on Sun Arrived Tues (local stores closed)
Talking with the service tech and youtube video it was a snap... Saved a service repair and a 25% parts mark up..
Parts Used:
-
David from Blairsville, GA
-
Difficulty Level:Really Easy
-
Total Repair Time:15 - 30 mins
-
Tools:Screw drivers
3 of 3 people
found this instruction helpful.
Was this instruction helpful to you?
Thank you for voting!