















25354373300 Kenmore Refrigerator - Instructions
Keep searches simple. Use keywords, e.g. "leaking", "pump", "broken" or "fit".
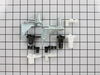
Bearing broke
Took off Door on Refr. and unscrewed Doorstop,
removed doorstop with broken Bearing and replaced with new Parts. Took about 20 Minutes
including reattaching Door. A 10 year old can do it.
removed doorstop with broken Bearing and replaced with new Parts. Took about 20 Minutes
including reattaching Door. A 10 year old can do it.
Parts Used:
-
Walter from Hamilton, OH
-
Difficulty Level:Really Easy
-
Total Repair Time:15 - 30 mins
-
Tools:Screw drivers, Socket set
7 of 8 people
found this instruction helpful.
Was this instruction helpful to you?
Thank you for voting!
There was a horrendous popping noise when I opened the refrigerator door.
First I cleaned out the side door then, removed the three screws on top of the door. Lifted the door off and set it carefully on a kitchen mat.
I had to use the pliers to remove the existing bearing hinge as it had disintegrated in the door. Once it was out the new hinge slid right into place and I reinstalled the door. I had help with the door. It’s much easier with two people to get proper alignment and to hold it in place while you reattach the screws.
I would have to say the hardest part of this repair was cleaning out the refrigerator.
I had to use the pliers to remove the existing bearing hinge as it had disintegrated in the door. Once it was out the new hinge slid right into place and I reinstalled the door. I had help with the door. It’s much easier with two people to get proper alignment and to hold it in place while you reattach the screws.
I would have to say the hardest part of this repair was cleaning out the refrigerator.
Parts Used:

-
Weston from Anchorage, AK
-
Difficulty Level:Really Easy
-
Total Repair Time:15 - 30 mins
-
Tools:Pliers, Screw drivers
7 of 8 people
found this instruction helpful.
Was this instruction helpful to you?
Thank you for voting!
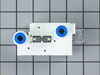
Water Was Dripping From Base And I Had No Ice Being Made Or Water In The Door.
Removed the plastic water tubes cover with a nut driver. Disconnected water hoses. Dropped control box assembly with nut driver. Removed old filter base with phillips screwdriver. Assembly opposite.
Parts Used:
-
john from mckees rocks, PA
-
Difficulty Level:Easy
-
Total Repair Time:30 - 60 mins
-
Tools:Nutdriver, Screw drivers
9 of 14 people
found this instruction helpful.
Was this instruction helpful to you?
Thank you for voting!
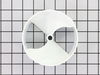
Icemaker not pushing out ice
Consult the exploded view of the Ice Container on this site. A likely cause the end plate (17) is worn. This plate connects the rotating corkscrew to the final plastic worm that pushes the ice into the crusher and thence to your waiting glass. The worm alone will not do the trick. To replace this plate, you need to take out all of the screws you can see, including the one that holds the spring for the crusher select bar.. First, the front cover, then the plate, and finally, locking ring from the worm and the black housing for the crusher. Now you can remove the whole worm assembly. Using a cloth or rubber insulator to protect it, unscrew the end screw and slide off the crusher teeth. Store on the table as a unit to facilitate re-assembly. Slide off the old bar and worm, put them back, and re-assemble. Takes a little dexterity to get the crusher select bar back, but not hard. Easy job.
Parts Used:
-
Andrew from SALEM, MA
-
Difficulty Level:Really Easy
-
Total Repair Time:30 - 60 mins
-
Tools:Nutdriver, Pliers, Screw drivers
7 of 8 people
found this instruction helpful.
Was this instruction helpful to you?
Thank you for voting!
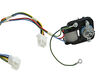
Lightning struct the house and fried the evap thermostat
Noticed the evap fan wasn't working, so trying to disconnect the wire broke the connection so had to order a new motor. Installed the motor but it still didn't work. Had a technician look at it and he said it was the control board. Ordered and installed control board and still didn't work. The only element left is the evap thermostat. Jumped the thermostat and it worked so ordered and installed a thermostat. It works now
Parts Used:
-
charles from parker, CO
-
Difficulty Level:A Bit Difficult
-
Total Repair Time:More than 2 hours
-
Tools:Nutdriver, Screw drivers, Socket set
8 of 11 people
found this instruction helpful.
Was this instruction helpful to you?
Thank you for voting!
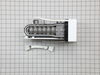
Original Ice Maker quit working.
Loosened the 2 screws a little so that it would slide up and off then unplugged the wire harness.
Installed the new one in reverse order and works like a champ.
Installed the new one in reverse order and works like a champ.
Parts Used:
-
Gary from Azle, TX
-
Difficulty Level:Really Easy
-
Total Repair Time:30 - 60 mins
-
Tools:Nutdriver
6 of 6 people
found this instruction helpful.
Was this instruction helpful to you?
Thank you for voting!
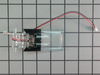
Broken Water dispenser
My son and I did it together. I was able to copy and paste the parts diagram on your website and we were able to go step by step following that diagram.We first shut the power to the refrigerator.We then removed the tray and the pad with buttons on the exterior of the fridge. We then unsnapped the electrical plug and were able to tilt the casing that holds the actuator. We removed the old one, and snapped the new one into place.We plugged it in and then proceeded to replace everything. Voila....we now have water again, all for the price of the part...Great!!!
Parts Used:
-
Ellen from Bloomsbury, NJ
-
Difficulty Level:Really Easy
-
Total Repair Time:15 - 30 mins
-
Tools:Screw drivers
6 of 6 people
found this instruction helpful.
Was this instruction helpful to you?
Thank you for voting!
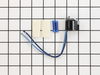
Frost build up on evaporator
Remove the bottom freezer drawer. Remove back metal evaporator panel. Wire in new defrost terminationT-stat. Reassemble evap panel. Good to go.
Parts Used:
-
B J from Dillingham, AK
-
Difficulty Level:Really Easy
-
Total Repair Time:15 - 30 mins
-
Tools:Nutdriver
12 of 24 people
found this instruction helpful.
Was this instruction helpful to you?
Thank you for voting!
Water actuator arm broke
Not too bad, remove the water and ice bezel (3 philips screws) then remove the dispenser unit another 3-4 philips screws. Remove water line from dispenser unit (remember this as the water tube re-insertion is the complicated part) I did not remove anything other then components listed above. Seals and inner door stay intact. Replaceing the actuator and arm was easy. two small philips will free the actuator and arm. Disconnect the two wire harness (black and red) NOTE- there are two sets of black and red wire harnesses that plug in next to each other. One is for the ice dispenser and the other for the water. putting it back together is as easy as taking it apart. However the water line has no play, no slack at all so when reinserting it, the space between the dispenser unit and the door itself is limited. Put the tip of the hose down into the hole you removed it from, hold the dispenser still and use a pair of long needle nose pliers to push (feed) the hose down into the hole. Make sure it comes out the other side by about 1/4 inch to insure it is in and stable. reinstall the unit and bezel. Most of my time was spent feeding the short water tube back in place. You will see just how much room there is between the dispenser and the door before you pull the water tube from the unit. In this case you can judge if it will be too complicated for you before you go any further.
Parts Used:
-
Christopher from Merrick, NY
-
Difficulty Level:A Bit Difficult
-
Total Repair Time:15 - 30 mins
-
Tools:Pliers, Screw drivers
7 of 9 people
found this instruction helpful.
Was this instruction helpful to you?
Thank you for voting!
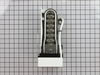
ice would not spill into bucket
The repair was very easy. I loosened the two screws holding the icemaker onto the side of the freezer, then unplugged the icemaker. Reversed the order, and it was done. You have to shut the water off first.
Parts Used:
-
Fredia from Benton, KY
-
Difficulty Level:Really Easy
-
Total Repair Time:15 - 30 mins
-
Tools:Screw drivers
9 of 15 people
found this instruction helpful.
Was this instruction helpful to you?
Thank you for voting!
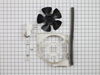
Freezer compartment warm / Ice cream soft
I worked for GM as a Frigidaire Tech, before starting my own business. I have retired now.
I took the three screws off the back of the bracket holding the motor. Disconected wire harness and pulled out the motor. Reverse to install. [email protected]
I took the three screws off the back of the bracket holding the motor. Disconected wire harness and pulled out the motor. Reverse to install. [email protected]
Parts Used:
-
George from McBee, SC
-
Difficulty Level:Really Easy
-
Total Repair Time:15 - 30 mins
-
Tools:Nutdriver, Socket set
9 of 15 people
found this instruction helpful.
Was this instruction helpful to you?
Thank you for voting!
my old ice maker leaked at the bottom
it was really easy changing the ice maker. the only trouble i had was the wiring. it was very stiff and hard to route. it did not work at first but that was my fault did not have the connector plugged in all the way.since then it works great.
Parts Used:
-
harry from terre haute, IN
-
Difficulty Level:Really Easy
-
Total Repair Time:Less than 15 mins
-
Tools:Nutdriver
7 of 9 people
found this instruction helpful.
Was this instruction helpful to you?
Thank you for voting!
Refrigerator Light bulb went out
I replaced the bulb using my hands to twist the bulb in the socket located at the top of the refrigerator.
Parts Used:

-
ANGELA from MEBANE, NC
-
Difficulty Level:Very Easy
-
Total Repair Time:Less than 15 mins
7 of 10 people
found this instruction helpful.
Was this instruction helpful to you?
Thank you for voting!
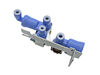
Water dripped from water outlet on door
-
Douglas from Denver, IN
-
Difficulty Level:Easy
-
Total Repair Time:15 - 30 mins
-
Tools:Nutdriver
6 of 7 people
found this instruction helpful.
Was this instruction helpful to you?
Thank you for voting!
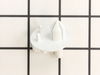
chrisper drawer jammed found supports were broken
Looked at video on how to remove and reinstall support and followed the instruct ions
Parts Used:
-
ROMAN from COLTON, CA
-
Difficulty Level:Really Easy
-
Total Repair Time:15 - 30 mins
-
Tools:Screw drivers
6 of 7 people
found this instruction helpful.
Was this instruction helpful to you?
Thank you for voting!