


Why Your Kenmore Dryer Isn’t Getting Hot
A Kenmore dryer that is running, but not heating up, won’t do much to dry your laundry. If your Kenmore dryer isn’t heating, or just isn’t getting hot enough, there is no need to panic. It could be an easy-to-fix airflow issue, a power supply or connection issue, or just a matter of how you’re loading your dryer and the cycle you’re selecting. Modern Kenmore dryers also use fault codes that could help to signal the fix for this issue, and we explain what they mean. Ultimately, if the quick fixes don’t lead to an obvious solution, it is likely a part has failed and requires maintenance or replacement. In this article, we’ll walk you through the troubleshooting process along with which parts may be causing problems and how to replace them.
Use & Care Tips for Your Kenmore Dryer
The following areas are where you should check first. A loose power cord, overloaded machine, or hitting the incorrect button may be a simple fix to get your Kenmore dryer running properly again.
Ensure Sufficient Power for the Electric Dryer
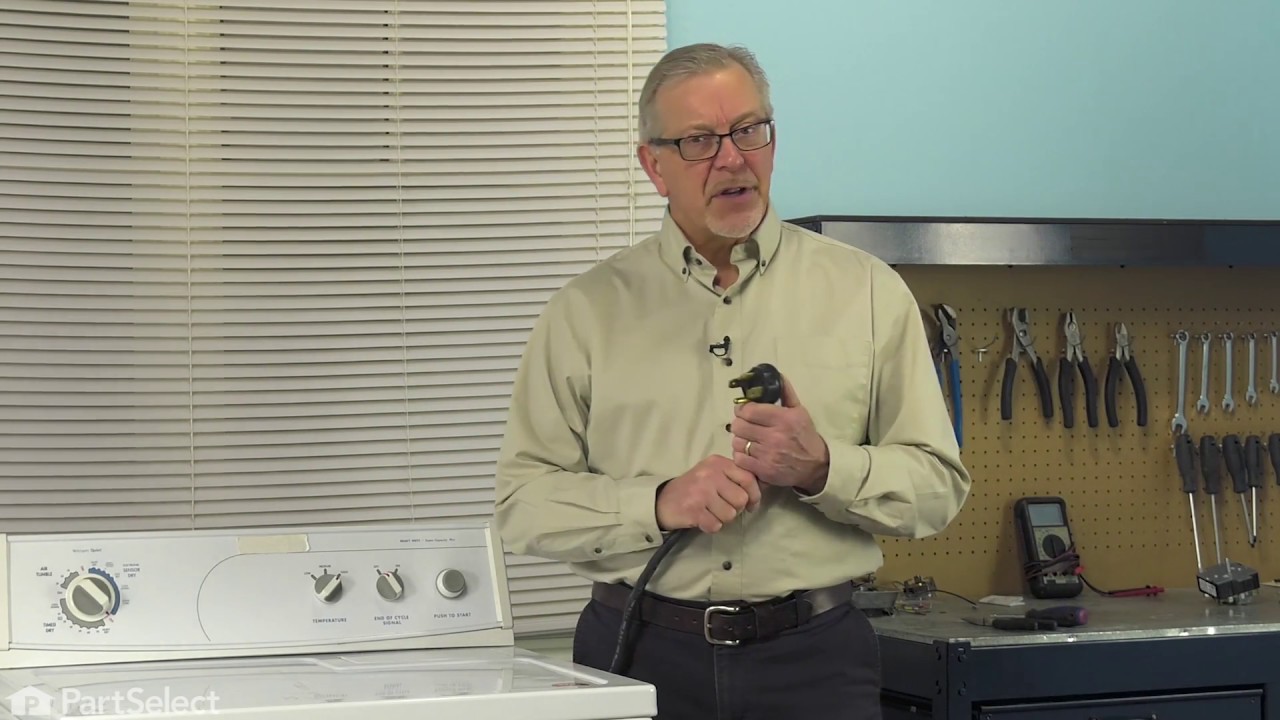
This will be obvious if your dryer isn’t turning on at all. First check that the power cord is fully plugged in and then check if a fuse has blown or the circuit breaker tripped. An important safety tip is making sure that your electric dryer isn’t plugged into an extension cord, it should be plugged directly into a 240V outlet. If you have a gas dryer, it also should not be used with an extension cord and should be plugged directly into a 120V outlet.
Ensure Connection for Your Gas Dryer
If you have a gas dryer, check to ensure that the gas is on and the line fully connected. You will want to check that the valve to the gas pipe is activated and receiving gas. If the valve is closed at all, the dryer won’t be able to receive gas and will not heat when running.
Select the Correct Cycle & Load Size
If you are overfilling your dryer or choosing an incorrect cycle, your laundry may not dry fully. Dryers are not meant to handle sopping wet laundry, so if your washing machine isn’t spinning properly you may have to repair that appliance instead. Overloading the machine is another mistake; you may think you’ll get more done with a larger load, but without room to tumble or proper airflow, you’ll be left with damp laundry at the end of the cycle. The final tip here is to ensure that you’re selecting the correct cycle. Modern Kenmore dryers have an “Air Dry” cycle which, if selected, will tumble your laundry, but hot air will not be blown out. Also ensure that “Low” or “No Heat” options aren’t being accidentally selected on your Kenmore Dryer’s interface, which could lead to very little heat being applied to your laundry during a cycle.
Cleaning Lint Filter and Vents
Your dryer may be heating up just fine, but without sufficient airflow, your laundry will take forever to dry. If the dryer lint trap or the vents are clogged with lint and other debris, it restricts the airflow, and you will be left with damp laundry. It is also possible that restricted airflow will trigger sensors or safety thermostats, which can then result in your dryer not running or heating to prevent fires. Keeping the lint traps clean and vents clear is an important routine step to ensure that the machine runs properly.
Related Fault Codes on a Kenmore Dryer
If your Kenmore dryer isn’t heating, it is possible you will see a fault code related to the issue. The fault codes most likely to be associated with a heating issue are F22, F23, F24, F25, F28, F29, and F30. Here’s a quick cheat sheet rundown of each fault code, and how it can shortcut you to the solution to your Kenmore dryer-not-heating issue.
F22 and F23 Kenmore Dryer Fault Codes
The F22 and F23 Kenmore fault codes mean that your open outlet temperature sensor, or thermistor, is experiencing a problem, which could affect its ability to measure and the heat output of the dryer. Refer to our “Thermistor” repair section in the parts replacement guide below for instructions on how to inspect and replace your Kenmore thermistor.
F24 and F25 Kenmore Dryer Fault Codes
If you’re seeing an F24 or F25 on your Kenmore Dryer, these fault codes are telling you that your thermistor, which part of the high-limit thermostat on many related Kenmore dryers, is shorted or open. After removing power to the dryer, check and test the thermistor/thermostat, using our complete guides to accessing and repairing these parts in the repair sections below.
F28 and F29 Kenmore Dryer Fault Codes
When your dryer shows an F28 or F29 fault code, it means that the moisture sensor isn’t functioning as it should. Remove power to the Kenmore dryer and check that it is wired correctly, and check for functionality using a multimeter.
F30 Kenmore Dryer Fault Code
The F30 Kenmore fault code is an indication of restricted airflow in your dryer. Start with the obvious locations like the lint trap and clear any build-up. If this doesn’t solve the issue, you will want to check the vents and any other connection points in your dryer hookup where lint may gather to ensure there isn’t a blockage, which can present safety issues as well as cause no heat during a cycle.
Parts to Inspect on Your Electric Kenmore Dryer
If you’ve gone through our common use and care tips and not resolved the issue, and fault codes either aren’t showing, or aren’t helping, we’ll help you walk through the common parts that cause Kenmore dryers not to heat. When diagnosing which part of your electric Kenmore dryer is causing the “no-heat” issue, we recommend going in order through the parts listed below.
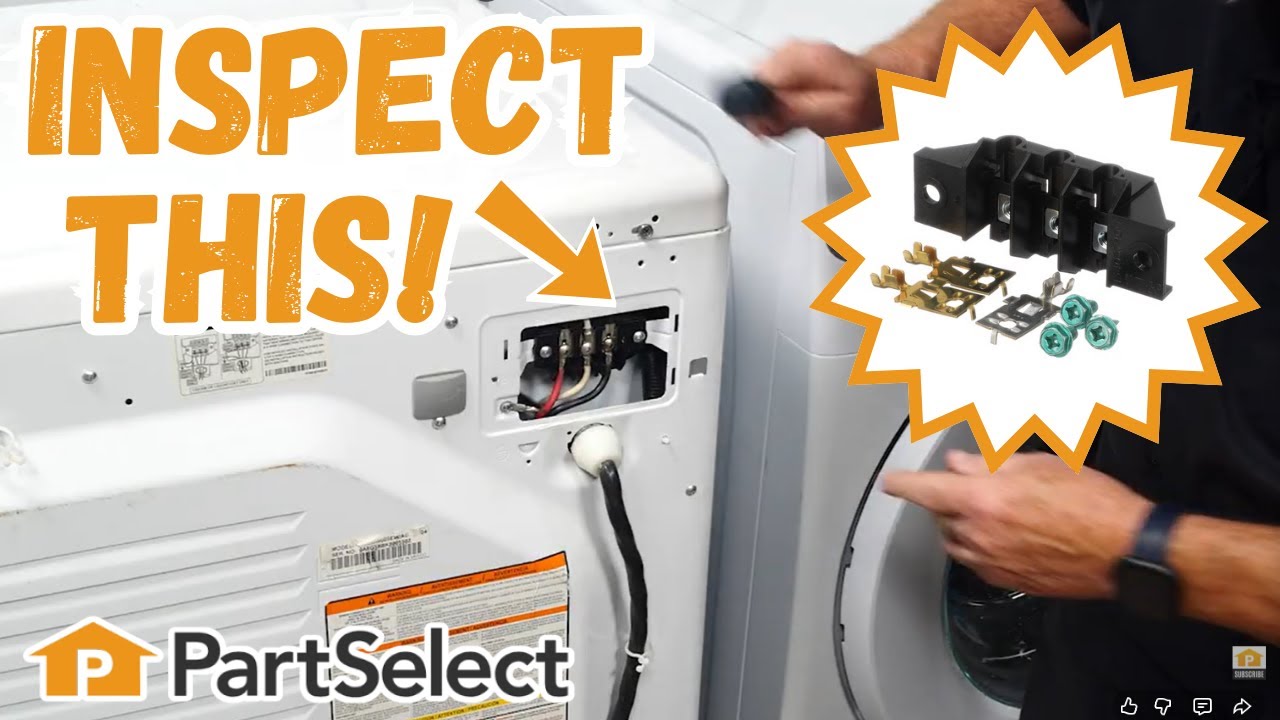
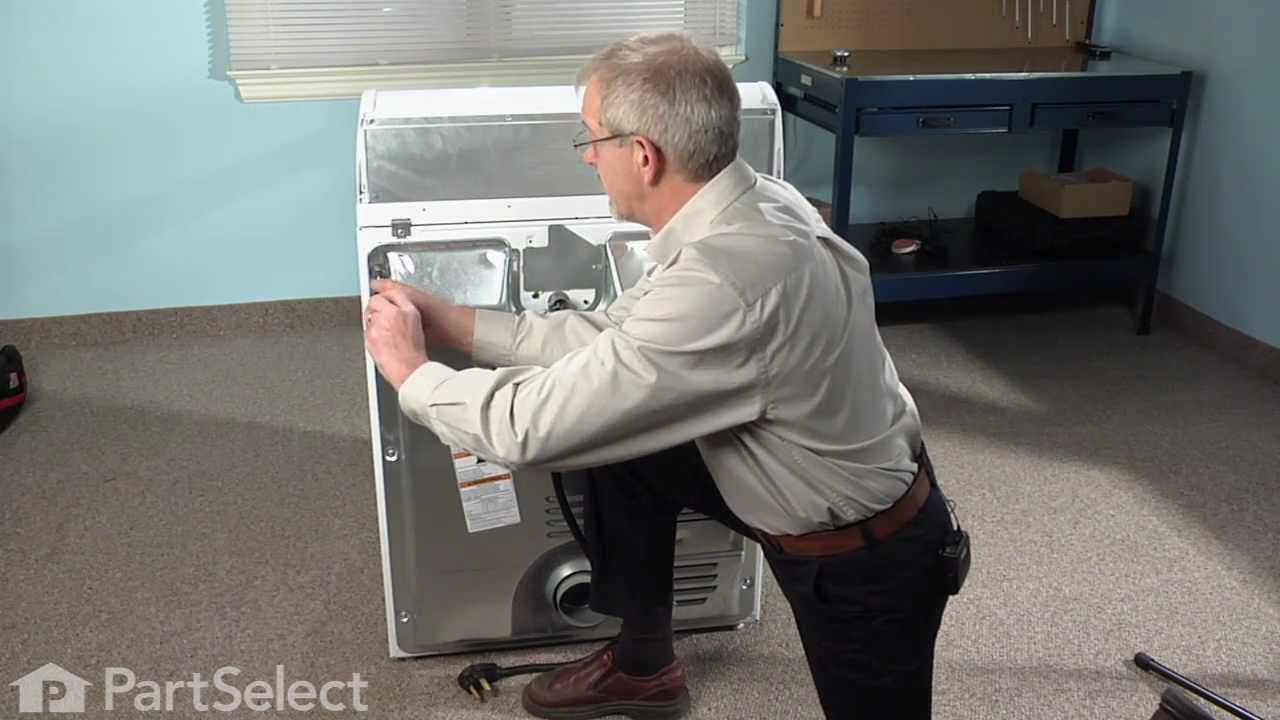
Terminal Block
The first part you should check is the terminal block. This part is responsible for managing all power coming from the wall outlet and delivering it to the proper components of your dryer. If this is not enough power going to the dryer’s heating element, it won’t be able to heat up enough or not heat up at all.
How to Inspect a Kenmore Dryer Terminal Block
- Unplug the dryer before you begin any work to eliminate the risk of electric shock.
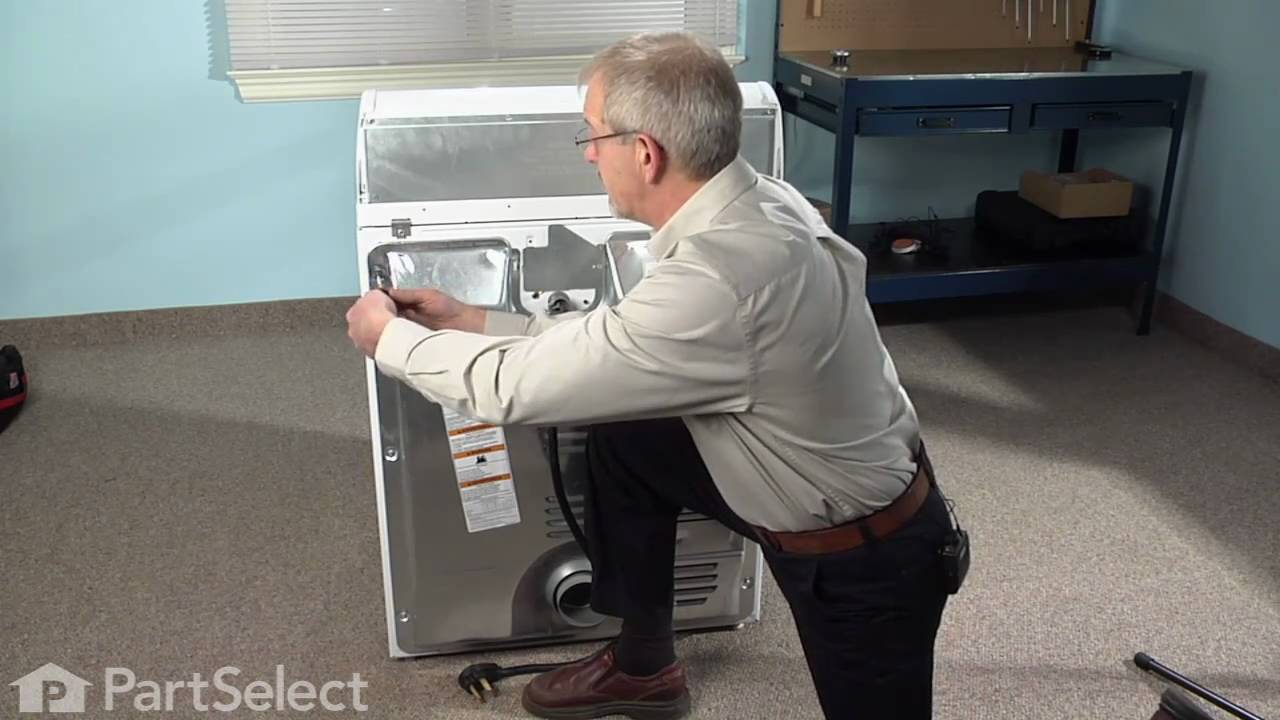
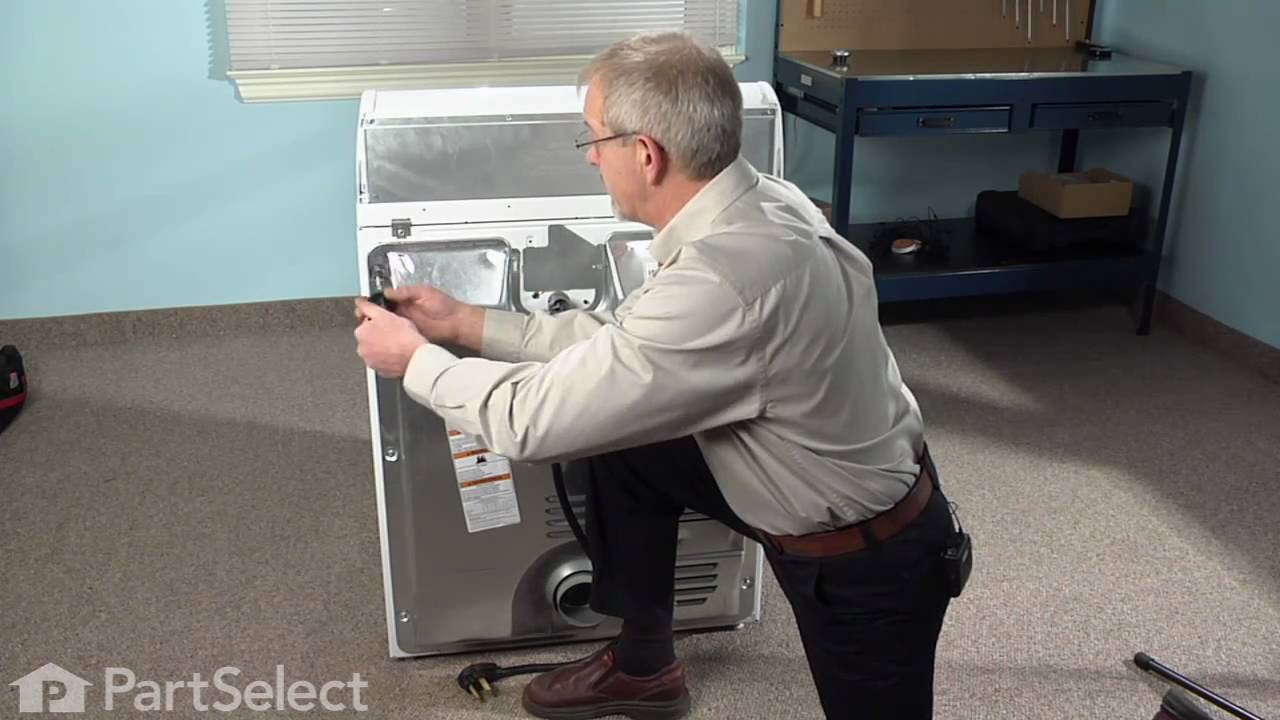
- Access the terminal block by pulling the dryer away from the wall and removing the rear access panel using a screwdriver or nut driver. The terminal block is located on the dryer's rear bulkhead where the power cord connects to the dryer’s internal wiring.
- Visually inspect the terminal block for signs of damage including burn marks, loose or corroded screws, and melted or frayed wires.
- If there is no visual damage, next ensure that all connection screws (including grounding screws if present) are snug. Be careful not to over tighten any connections, as this may strip threads or damage components.
- If there’s significant damage, burning, or electrical arcing, the terminal block should be replaced.
How to Replace a Kenmore Dryer Terminal Block
- Always unplug the dryer before starting any repairs.
- Unscrew and remove the rear access panel to expose the terminal block and its connections. Note the wiring configuration or take a photo for reference.
- Carefully remove the power cord and all internal wire connections from the terminal block. Unscrew the terminal block from the dryer’s bulkhead and remove it from the appliance.
- Install the new terminal block by placing it in position and secure it with screws.
- Reconnect all wires and the power cord exactly as they were, following your earlier documentation.
- Reinstall and secure the rear panel.Plug the dryer back in and test for proper operation. Confirm that there are no sparks, and that heating and motor functions work normally.
Thermal Fuse
The thermal fuse, also known as a thermal cut-off, is designed to prevent the dryer from overheating. They are a one-time use part, so once a dryer's fuse is blown, you will have to replace it.
How to Inspect a Kenmore Dryer Thermal Fuse
- Unplug the dryer or turn off the circuit breaker.
- On most Kenmore models, the thermal fuse is located on the blower housing, just behind the back panel. Some Kenmore gas models place it on the burner housing instead. Use a ¼-inch nut driver or screwdriver to remove the screws securing the rear panel. The thermal fuse is a small white plastic piece with two wires attached.
- Disconnect the wires by carefully pulling the two wire connectors off the fuse terminals. Use needle-nose pliers if needed, don’t pull on the wires themselves.
- Next is to test the thermal fuse with a multimeter. Set your multimeter to continuity or the lowest ohm setting. Touch each probe to the fuse terminals. If the reading is close to 0 ohms (or the multimeter makes a beep), the fuse is good. If there is no reading it means that there is an open circuit and the fuse is blown.
- If the fuse is blown, it will need to be replaced. If the fuse is good, move on to inspect other parts.
How to Replace a Kenmore Dryer Thermal Fuse
- Unplug the dryer or turn off the circuit breaker.
- On most Kenmore models, the thermal fuse is located on the blower housing, just behind the back panel. Some Kenmore gas models place it on the burner housing instead. Use a ¼-inch nut driver or screwdriver to remove the screws securing the rear panel. The thermal fuse is a small white plastic piece with two wires attached.
- Disconnect the wires by carefully pulling the two wire connectors off the fuse terminals. Use needle-nose pliers if needed, don’t pull on the wires themselves.
- Remove the mounting screw securing the fuse and pull it out.
- Install the new fuse by positioning it in the same spot. Secure it with the mounting screw and reconnect the wires to the same terminals as before.
- Reinstall the back panel and tighten all screws.
- Plug the dryer back in and start a cycle to confirm the dryer heats properly.

High Limit Thermostat
The high limit thermostat is a safety device mounted on the heating chamber and is designed to prevent the dryer from overheating when the exhaust vent is restricted. When tripped, the circuit to the heating element or gas valve will be interrupted. The high limit thermostat is not designed to activate repeatedly so it will eventually fail, causing a no heat symptom.
How to Inspect a Kenmore Dryer High Limit Thermostat
- Ensure the dryer is disconnected from power to avoid accidents.
- Remove the back panel using a screwdriver or nut driver. The high-limit thermostat is usually mounted on or near the blower or heating element housing.
- Carefully remove the wire connectors from the thermostat terminals. Take a photo or note their positions to help with reinstallation.
- Next, test the thermostat with a multimeter for continuity. Set your multimeter to the continuity or ohms setting. Touch one probe to each terminal. At room temperature, a good thermostat should show a reading close to zero (or your multimeter will make a sound if it has that option). No reading indicates an open circuit which means the thermostat has failed and will need to be replaced.
How to Replace a Kenmore Dryer High Limit Thermostat
- Unplug the dryer from the power source.
- Take off the back panel to gain access to the thermostat.
- Detach the old thermostat by removing the mounting screws.
- Disconnect the wire connectors from the thermostat. Use your reference photo from when you inspected the thermostat to note connections.
- Install the new high-limit thermostat and secure it in place. Then reconnect the wires to their matching terminals.
- Reassemble the dryer, plug it back in, and run a cycle to ensure the dryer is heating properly again.
- Unplug the dryer before you begin any inspection to eliminate electrical hazard.
- The cycling thermostat is located near the blower housing inside the dryer, where it monitors internal air temperature. To access it, you’ll likely need to remove parts of the top panel, and then the rear panel, depending on your model.
- Once accessible, disconnect the wires attached to the thermostat. It’s a good idea to photograph or label them before removal for reference when reinstalling the part. Then you can unscrew and remove the thermostat from its mounting.
- Set your multimeter to continuity mode and touch the probes to the thermostat’s terminals. If it beeps, the thermostat is still good. If there is no sound or reading, you will need to replace the thermostat.
- Unplug the dryer before beginning any repairs.
- To access the thermostat, remove the top and rear panels to reach the thermostat which is located near the blower housing.
- Before you disconnect the old thermostat, take a photo or label the wiring connections. Disconnect the wires and remove the old thermostat.
- Position the new cycling thermostat and secure it in place. Reconnect the wires exactly as they were, using your photo or labels as guidance.
- Reinstall all removed panels and secure them with screws. Then plug the dryer back in a run a cycle to confirm the heating element cycles on and off as expected.
- Unplug the dryer (and turn off gas if applicable) to eliminate any hazards.
- To access the thermistor, remove the lower front panel by releasing top clips with a putty knife and pulling it out. Remove the lint duct assembly to gain clear access to the blower housing, which the thermistor is mounted to the top of it.
- Carefully disconnect the two wire connectors, then use a ¼-inch wrench to remove the mounting screws, then remove the thermistor and remove the thermistor from the dryer.
- Set your multimeter to measure resistance (ohms). Place the probes on the thermistor’s terminals. At room temperature, a functioning thermistor should read around 10,000 ohms. If the reading significantly deviates, the thermistor is likely faulty and should be replaced.
- If the thermistor is functioning, you can reassemble the dryer or move on to inspect other heating components as needed. If defective, follow the replacement guide below.
- Unplug the dryer (and turn off gas if applicable) to eliminate any hazards.
- To access the thermistor, remove the lower front panel by releasing top clips with a putty knife and pulling it out. Remove the lint duct assembly to gain clear access to the blower housing, which the thermistor is mounted to the top of it.
- Carefully disconnect the two wire connectors, then use a ¼-inch wrench to remove the mounting screws, then remove the thermistor and remove the thermistor from the dryer.
- Place the new thermistor on the blower housing and secure it with the screws, then reconnect the wires to the new thermistor’s terminals.
- Reassemble your dryer by reversing the above steps, then plug it back on and run a test cycle to ensure this resolved the no-heat issue.
- Always unplug the dryer or turn off its circuit breaker before working on it.
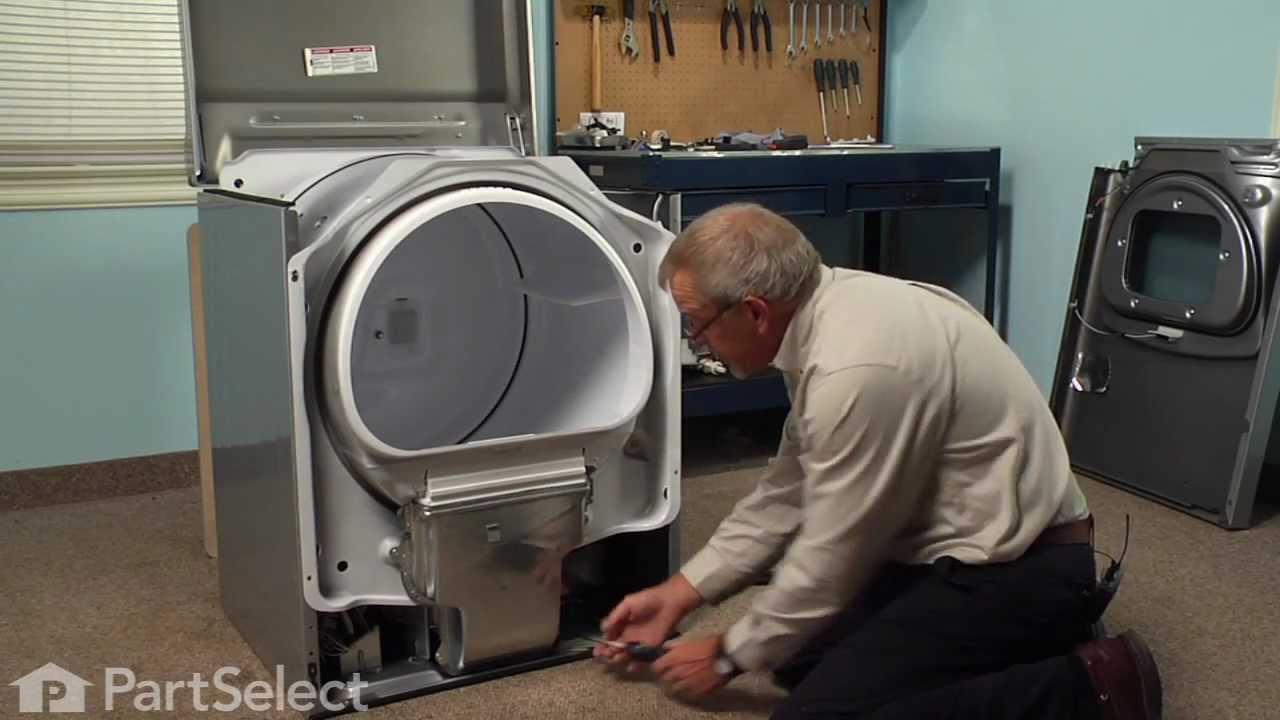
- To access the heating element, begin by moving the dryer away from the wall. Then use a screwdriver or nut driver to remove the rear panel.
- Locate the heating element: you'll find a coil of heating wire enclosed in a metal chamber near the bottom rear of the cabinet. Look closely at the coil and inspect it for breaks, deformities, or burn marks.
- Next, test for electrical continuity. Set your multimeter to the lowest resistance (Rx1) or the continuity setting. Touch each multimeter probe to one terminal of the heating element. A reading close to 0 ohms or a beep means the element is good. If the multimeter doesn’t beep or gives a reading indicating an open circuit, this means the element is bad and needs to be replaced.
- Confirm that the dryer is unplugged or the breaker is off before proceeding.
- To access the heating element, begin by moving the dryer away from the wall. Then use a screwdriver or nut driver to remove the rear panel.
- Before you disconnect and remove the old element, take a photograph of how the wires are connected. Then disconnect the wire connectors from the heating element terminals; pliers may be helpful for this step.
- Remove the mounting screws or clips securing the element and carefully pull the heating element out of the dryer.
- Please note that some Kenmore and Whirlpool elements include a separate safety device that must be transferred to the new element. Insert the new element into position and reattach the mounting screws or clips securely. Then you can reconnect the wire terminals in the same configuration as before.
- Reassemble your dryer by reversing the above steps, then plug it back on and run a test cycle to ensure this resolved the no-heat issue.
- Start by disconnecting the power supply to your dryer.
- To access the timer, remove the control knob from the front. Then open the control panel by removing the mounting screws. You’ll find the timer mounted inside the control console.
- Disconnect the wires from the timer (take a photo first for reference).
- Test the timer with a Multimeter by setting the device to Rx1 (ohms). Place the probes on the timer terminals according to the wiring diagram. A working timer should show 2,000–3,000 ohms. If the readings are far outside this range, the timer is defective and will need to be replaced.
- Start by disconnecting the power supply to your dryer.
- To access the timer, remove the control knob from the front. Then open the control panel by removing the mounting screws. You’ll find the timer mounted inside the control console.
- Disconnect the wires from the timer (take a photo first for reference) then unscrew the timer from its mounting bracket.
- Install the new timer by positioning it in place and secure it with the screws. Reconnect the wires to their matching terminals.
- Reassemble your dryer by reversing the above steps, then plug it back on and run a test cycle to ensure this resolved the no-heat issue.
- Disconnect the dryer from power before beginning any work to eliminate the risk of electric shock.
- The electronic control board is housed within the user interface panel, typically at the front or top of the dryer. Use a putty knife and screwdriver to carefully remove the top portion of the cabinet to access the board.
- Before disconnecting any wires, take a photo of the connections for reference later. Then carefully disconnect any wires attached to the control board housing and remove the screws holding the control board in place.
- The control board won’t typically show any physical signs of damage. If you have inspected or replaced all the above components of your dryer and it still won’t heat up, the control board may be the cause of the problem.
- Ensure the dryer is disconnected from the power source before proceeding.
- Remove the top cabinet panel using a putty knife and screwdriver to expose the control board area.
- Install the new control board by positioning the new board in place of the old one. Then reconnect all the wires exactly as documented earlier before securing the board in place with the mounting screws.
- Reassemble your dryer by reversing the above steps, then plug it back on and run a test cycle to ensure this resolved the no-heat issue.
- Before starting, unplug the dryer and shut off the gas supply.
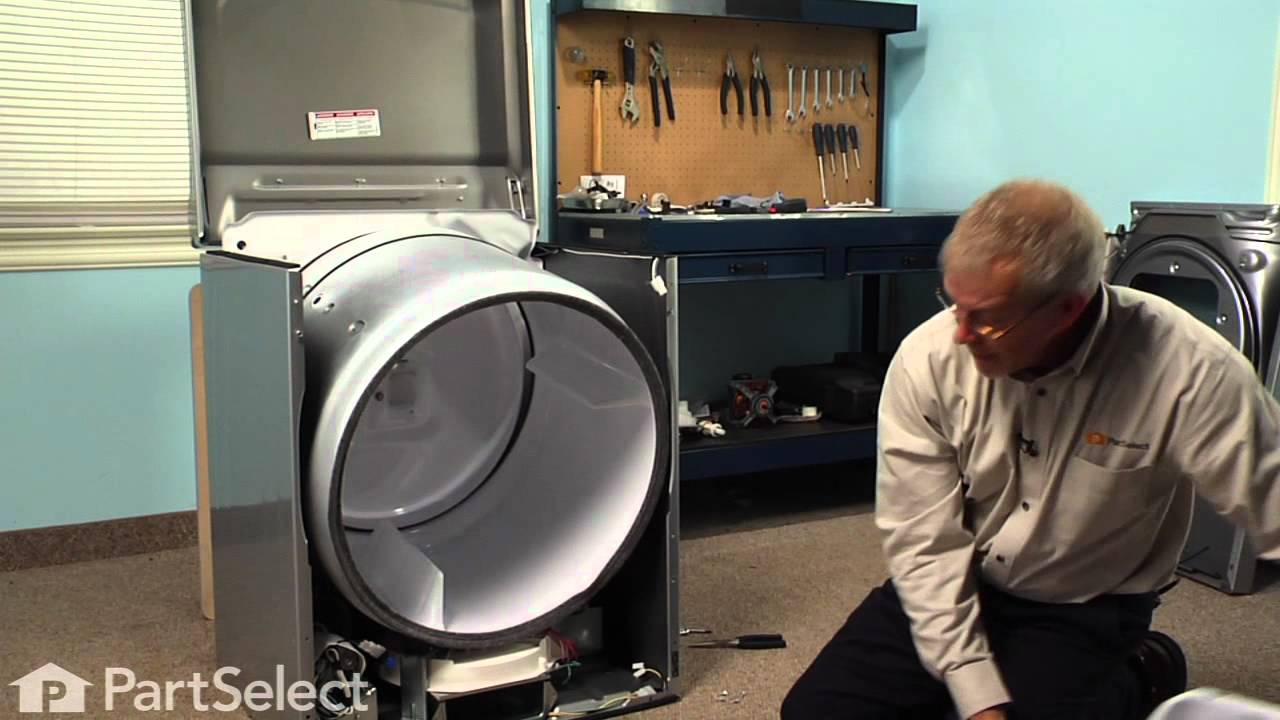
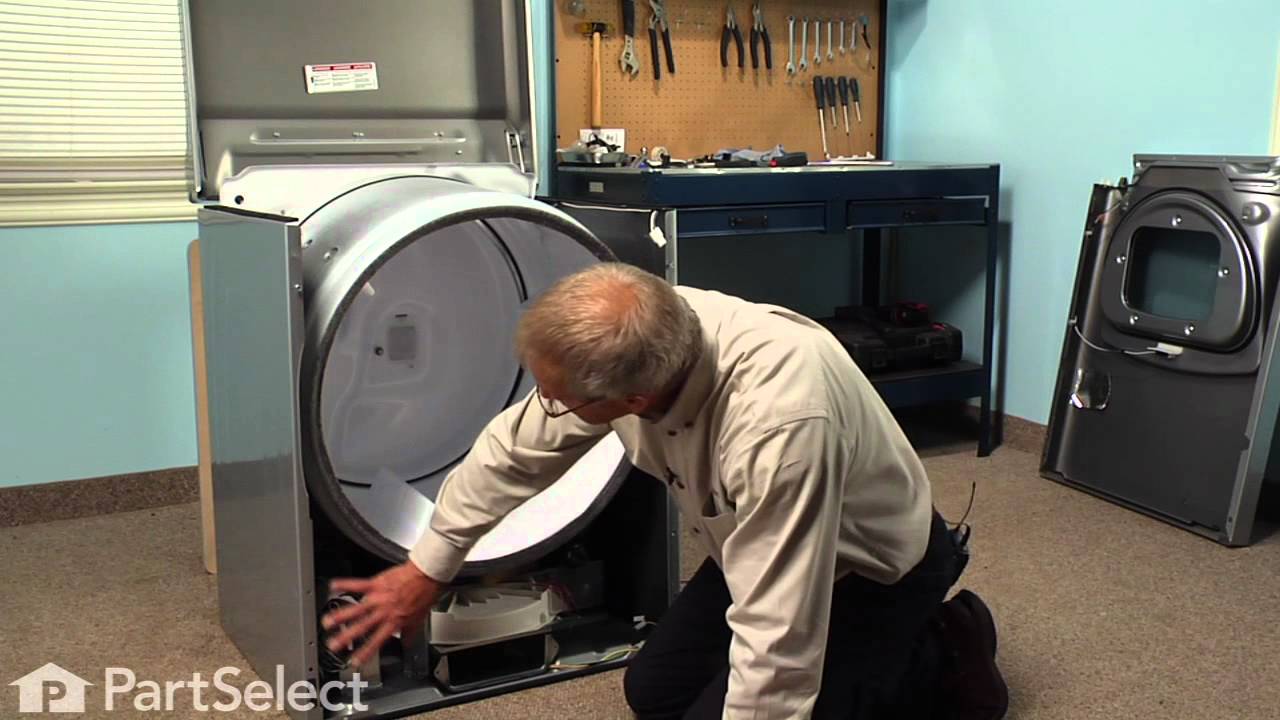
- To access the Igniter, the dryer will need to be disassembled. Pull out the lint screen, then remove the screws securing the lint housing. Then Release the clips holding down the top panel using a putty knife, lift, and prop it backward. Remove the front panel by disconnecting door switch wiring, then unscrew the mounting screws and lift the panel off.
- Next Push the idler pulley to relieve tension, slip the belt off the motor pulley, and use the belt to carefully lift the drum out of the dryer.
- You should now be able to see the igniter which is mounted to the burner assembly.
- Look for physical damage to the igniter such visible cracks, broken filaments, or discoloration. These signs typically indicate the igniter is faulty and needs to be replaced.
- Double-check that the dryer is unplugged and gas is shut off.
- Follow the disassembly steps from the inspection guide above if your dryer was put back together between inspecting the part and the repair.
- Locate the igniter on the burner tube and disconnect the wire connector. Note that there may be a locking tab released. Unscrew and gently pull out the old igniter.
- Handle the new igniter carefully—avoid touching the heating element with bare hands. Slide the new igniter into the mounting slot and secure with the screw. Reconnect the wire harness, ensuring it clicks into place.
- Reassemble your dryer by reversing the above steps, then plug it back on, connect the gas, and run a test cycle. The igniter should glow and ignite the gas if the repair was successful.
- Before beginning, unplug the dryer and shut off the gas supply.
- To access the sensor, remove the two screws beneath the lint filter housing to lift off the top of the dryer. Detach the door switch wiring, then remove the front panel and related fasteners. Remove the drive belt from the idler and use the belt to help pull the drum out of the dryer.
- The radiant flame sensor is located in the burner assembly, across from the gas igniter. Check for obvious damage such as cracks, discoloration or loose connections.
- To Test the Sensor, use a multimeter set to resistance mode. Measure between the sensor’s terminals. A functioning sensor should show a closed circuit (continuity) at room temperature. An open circuit indicates a bad sensor that will need to be replaced.
- Confirm the dryer is unplugged and the gas supply is turned off.
- To access the sensor, remove the two screws beneath the lint filter housing to lift off the top of the dryer. Detach the door switch wiring, then remove the front panel and related fasteners. Remove the drive belt from the idler and use the belt to help pull the drum out of the dryer.
- Locate the flame sensor across from the igniter. Unscrew it from the burner assembly and disconnect its wiring. Be gentle as this part is fragile.
- Install the replacement sensor in the same position and reconnect the wires securely. Ensure the sensor is secured in place.
- Reassemble your dryer by reversing the above steps, then plug it back on, connect the gas, and run a test cycle to ensure this resolves your heating issues.
Cycling or Operating Thermostat
Cycling thermostats, also known as an operating thermostat, control the temperature inside the dryer drum. They are designed to "cycle" the heating element on and off to maintain the correct amount of heat. The cycling thermostat is a regular wear part and over time can become defective and fail.
How to Inspect a Kenmore Dryer Thermostat
How to Replace a Kenmore Dryer Thermostat
Temperature Sensor or Thermistor
Temperature sensors, also known as thermistors, are devices that change resistance depending on the temperature. The internal temperature of gas and electric dryers is typically managed by cycling thermostats, but on electronic controlled dryers you will find temperature sensors. Depending on the dryer it may use multiple sensors to regulate the temperature.
How to Inspect a Kenmore Dryer Thermistor
How to Replace a Kenmore Dryer Thermistor
Heating Element
In electric dryers, heat is generated by the heating element. Electric current flows through the coils and creates heat. If the element is defective, then it will not heat.
How to Inspect a Kenmore Dryer Heating Element
How to Replace a Kenmore Dryer Heating Element
Timer
Mechanical control dryers will have physical dials, such as the timer to set the different cycles. The timer consists of a small motor connected to a series of gears that rotate cams, which turn electric contacts off and on inside the timer. The timer contacts control the dryer motor as well as the heat circuit. If the timer is defective, it may not communicate properly with the other dryer components, resulting in no heat.
How to Inspect a Kenmore Dryer Timer
How to Replace a Kenmore Dryer Timer
Electronic Control Board
Unlike mechanical dryers, those with electronic control boards use sensors and digital displays to select the different cycles. This board acts as the “brain” of the dryer and if it fails you may end up with a dryer not heating up.
How to Inspect a Kenmore Dryer Electronic Control Board
How to Replace a Kenmore Dryer Electronic Control Board

Parts to Inspect on Your Gas Kenmore Dryer
If your Kenmore dryer uses gas instead of electricity for heat, there are a few more parts you may need to inspect and replace. You will still want to start with power sources, fuses, and thermostats, but the parts below are specific to a gas dryer and may also cause a no-heat issue.
Igniter
As the name implies, the igniter in a gas dryer ignites the gas released by the gas valve to produce the heat to dry your laundry. When the dryer is calling for heat, the igniter will begin to glow as it heats up. When maximum temperature is reached, the gas valve will open, and the gas will be ignited. If the igniter is faulty, the gas won’t light, and you will not get any heat in your dryer.
How to Inspect a Kenmore Dryer Igniter
How to Replace a Kenmore Dryer Igniter
Flame Sensor
The flame sensor, also known as a radiant sensor, is designed to sense heat from either the igniter or the burner flame in gas dryers. If the sensor is defective, either the igniter won’t glow, or the gas valve won’t open, and the sensor will need to be replaced.
How to Inspect a Kenmore Dryer Flame Sensor
How to Replace a Kenmore Dryer Flame Sensor
If your Kenmore dryer isn’t getting hot enough or isn’t producing heat at all, there’s a strong likelihood it’s one of the quick fixes we’ve highlighted up front in this article. Hopefully, the Kenmore dryer itself will help guide you to the specific problem by displaying one of the related fault codes for this brand that we’ve highlighted, too. However, if it’s a part-related problem, we know that the list of likely culprits above will help you get to the root of the problem, whether your Kenmore dryer is a gas or electric model, and you will be back to having warm, dry laundry in no time.

Does your Samsung dryer have heating issues? Learn how to troubleshoot the ...

Learn the signs of a failing belt and how to swap it out like a pro. Get yo...

Get that old lint out, and get your clothes feeling fresher than ever with ...