















YIES366RS4 Whirlpool Range - Instructions
Keep searches simple. Use keywords, e.g. "leaking", "pump", "broken" or "fit".
Bottom element burnt into two pieces
Unplugged stove, opened door and removed two bolts with a phillips screwdriver. Pulled out old element and pulled off the two wire leads. Replaced with new element and reversed all steps...wallaaaaa.
Parts Used:

-
Maxwell from Springdale, AR
-
Difficulty Level:Easy
-
Total Repair Time:Less than 15 mins
-
Tools:Screw drivers
Was this instruction helpful to you?
Thank you for voting!
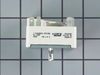
Not heating properly.
Removed rear panel and removed switch. I placed wires from old switch to the new one. re installed switch an back panel.
Parts Used:
-
Joseph R. from Candia, NH
-
Difficulty Level:Really Easy
-
Total Repair Time:Less than 15 mins
-
Tools:Screw drivers
Was this instruction helpful to you?
Thank you for voting!
Oven was not heating up to temp.
Pulled the oven away from the wall, unplugged the oven. Unscrewed the back panel(2 screws)that covers the pigtail connection. Pulled the two wires that attached to the heating element. Inside the oven i removed the two screws holding the element in place and removed old element. Put the new element in place and returned screws. The two wires clipped effortlessly on the back, returned cover and screws and plugged the oven back in. Tested the oven and returned it to its position, reset the clock and done.
Parts Used:
-
charlie from glenwood springs, CO
-
Difficulty Level:Really Easy
-
Total Repair Time:Less than 15 mins
-
Tools:Screw drivers
Was this instruction helpful to you?
Thank you for voting!
Oven Was Not Heating As It Should
Removed lower oven rack. Unplugged stove,removed 2 screws holding element in place,pulled element forward unplugged 2 wires. Reversed proc. To reinstall . Very simple. Parts were here in less than 24 hrs using standard shipping. Very good service
Parts Used:
-
larry from springville, AL
-
Difficulty Level:Really Easy
-
Total Repair Time:Less than 15 mins
-
Tools:Screw drivers
Was this instruction helpful to you?
Thank you for voting!
Broken drawer glide
Used a phillips head screwdriver to remove the single screw holding the part in place and put the new one on. Finding the part on this site was a breeze and it arrived quickly. A first rate experience all around.
Parts Used:

-
karen from Thornton, CO
-
Difficulty Level:Really Easy
-
Total Repair Time:Less than 15 mins
-
Tools:Screw drivers
Was this instruction helpful to you?
Thank you for voting!
elements (bake and broil) needed to be change out

-
Cynthia M from Houston, TX
-
Difficulty Level:Really Easy
-
Total Repair Time:Less than 15 mins
-
Tools:Screw drivers
Was this instruction helpful to you?
Thank you for voting!
broken burner switch
Easy as pie! Thank you for the illustration to help us pick out the correct part.
Parts Used:
-
Coral from Duluth, MN
-
Difficulty Level:Really Easy
-
Total Repair Time:Less than 15 mins
-
Tools:Screw drivers
Was this instruction helpful to you?
Thank you for voting!
The heating element had burned through from food spillage and sticking
I removed the broken heating element while waiting for the new part to arrive and cleaned the oven. SO much easier without anything in the way. Once the part arrived and it was wonderfully packaged...Easy to open but very well protected, it was a snap to connect the 2 power wires and then screw in the 2 screws to secure the heating element. I was back to baking in less than 10 minutes.
Parts Used:
-
Billy Scott from Tupelo, MS
-
Difficulty Level:Really Easy
-
Total Repair Time:Less than 15 mins
-
Tools:Screw drivers
Was this instruction helpful to you?
Thank you for voting!
Bake element not working
Turn power off at breaker box, remove back cover inserted wires into element, done and ready to be use
Parts Used:
-
Eloy from Andrews, TX
-
Difficulty Level:Really Easy
-
Total Repair Time:Less than 15 mins
-
Tools:Screw drivers
Was this instruction helpful to you?
Thank you for voting!
Damaged Socket When Removing Bulb Base
This is a built-in oven, so the biggest problem was figuring out how to remove it from the cabinet. The solution turned out to be removing the cooktop above it and unscrewing two screws that connected the oven to the inside of the cabinet. The other problem was removing BOTH metal backs from the oven. The first one was easy. The second one wasn't. The old socket was recessed behind the second back, making it virtually impossible to access the metal "wings" that hold it in place, so I ended up pulling out the socket assembly from inside the oven with pliers.
Parts Used:

-
Charles from Oceanside, CA
-
Difficulty Level:A Bit Difficult
-
Total Repair Time:30 - 60 mins
-
Tools:Pliers, Screw drivers
Was this instruction helpful to you?
Thank you for voting!
Broil heater exploded. The corner was burned/ corroded.
Unplug power. Remove panel on the back. Unplug heater.From front remove 3 screws and remove heater. Installed new heater. On the back restored connections - squized the lugs to have better connection. Put panel back. Plug the power and see if the coil get red. It looked good. Used oven few times it works fine. Difficoult part is to clean oven all around from accumulated grease. First repair for this stove, most of the time spend on figuring out what to open, no instructions.
Parts Used:
-
Amadeusz from Simi Valley, CA
-
Difficulty Level:Really Easy
-
Total Repair Time:30 - 60 mins
-
Tools:Pliers, Screw drivers
Was this instruction helpful to you?
Thank you for voting!
Bake element replacement
Keep in mind that I am a 65 year old woman who has replaced bake elements on a much older range that was hard wired. I viewed the video so I knew what to expect. The job would have taken no more than 15 minutes if the retaining screws had not been stuck. After several doses of WD40, I finally managed to get them loose but only then after I had tried every screw driver in the house. I clamped the leads with vise grips to keep them from slipping back in the stove. Unplugging the old broken element and plugging in the new one took maybe a couple of minutes. The retaining screws went back in without a problem.
Parts Used:
-
Mary from Odenville, AL
-
Difficulty Level:A Bit Difficult
-
Total Repair Time:30 - 60 mins
-
Tools:Pliers, Screw drivers
Was this instruction helpful to you?
Thank you for voting!
the bottom hinge pin fell out and door was loose
Ordered parts that I thought were correct. BUT I ordered from the door parts... which gave me the wrong screw and unnecessary shims. What I really needed was the cabinet parts! At the time of doing the order, I could not find the owner manual... but found it before the parts arrived. That is what saved me and also thanks to me, for being a pack rat and my grandson finding the spacer on floor after it came out. That made it possible to fix the door. The screw I tried to install, but soon realized it was wrong. I went thru the pack rat stash and found the screw that fell out late last year.....! I then noticed the screw holding the hinge bracket was loose, now that is almost impossible to tighten because everything or tools that I owned were tooooo long (it's only 1 1/2" off the floor)! I tightened that and put the spacer and bottom hinge pin in. The screw was only 3/4" off the floor and difficult to get into the hole without a mirror on the floor under the spot. I finally used a clamp wrench to hold the screw and thread the screw into the hole. From there, most sockets are too long, so I did find a short socket. Now that still took me to the mirror, so I used the clamp wrench to hold the socket to tighten the screw. Thank goodness I am mechanically inclined and can look at a schematic to to understand how something works or I would have had to call for a mechanic. Also I should say ... FIND you manual before ordering to start with the right parts! Manual showed the parts of the cabinet and the door as one long picture, which helped with the repair and would have for ordering.
Parts Used:
-
Peggy from Ogden, UT
-
Difficulty Level:A Bit Difficult
-
Total Repair Time:1- 2 hours
-
Tools:Pliers, Screw drivers, Socket set, Wrench (Adjustable), Wrench set
Was this instruction helpful to you?
Thank you for voting!
Bottom oven heating element burned out
Only difficult because one heating element connector broken off. Before receiving correct part, tried to install generic element, which had leads about 2 inches too long, so trying to force into place bent electrical connectors that go from oven to heating element. Tried to bend one back and it broke off, so did not bend 2nd one back. Received correct heating element, and slid unbroken connector on one element side, and soldered 2nd element on. Screwed heating element in and it works fine.
Parts Used:
-
Jan from Columbus, OH
-
Difficulty Level:A Bit Difficult
-
Total Repair Time:1- 2 hours
-
Tools:Pliers, Screw drivers
Was this instruction helpful to you?
Thank you for voting!
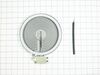
Burner Would,Nt Heat Up.
Removed top of stove replaced heating element ,piece of cake.
Parts Used:
-
david from cleveland, TX
-
Difficulty Level:Really Easy
-
Total Repair Time:15 - 30 mins
-
Tools:Screw drivers
Was this instruction helpful to you?
Thank you for voting!