















YIES366RS4 Whirlpool Range - Instructions
Keep searches simple. Use keywords, e.g. "leaking", "pump", "broken" or "fit".
oven light burnt out
1. Unscrewed glass cover on bulb
2. Removed old bulb
3. Screwed in new bulb
4. Replaced glass cover
5. Mixed drink & baked cupcakes
2. Removed old bulb
3. Screwed in new bulb
4. Replaced glass cover
5. Mixed drink & baked cupcakes
Parts Used:

-
William from Schwenksville, PA
-
Difficulty Level:Easy
-
Total Repair Time:Less than 15 mins
3 of 10 people
found this instruction helpful.
Was this instruction helpful to you?
Thank you for voting!
Light burned out in upper oven
-
Shirley from Las Vegas, NV
-
Difficulty Level:Really Easy
-
Total Repair Time:Less than 15 mins
0 of 1 people
found this instruction helpful.
Was this instruction helpful to you?
Thank you for voting!
Oven not heating properly
Unplug the oven, pull it out and empty the inside of the oven. The bottom heating element just unscrews from the back of the oven with two screws. Pull it out from the back of the oven and gently pull off the electrical connections. Reattach them to the new heating element, put it back into the oven and reattach the screws. Turn the oven on and check to make sure that the new heating element is working. Put everything back in the oven and you're done!
Parts Used:

-
Matthew from Greenville, OH
-
Difficulty Level:Really Easy
-
Total Repair Time:Less than 15 mins
-
Tools:Screw drivers
0 of 1 people
found this instruction helpful.
Was this instruction helpful to you?
Thank you for voting!
Oven gets too hot,if set at 350 it heats to 550. Changed the sensor and was not the problem.
Took off the screws on the back of the stove and took out the sensor, and put in the new one.
Parts Used:

-
Joanne from Negaunee, MI
-
Difficulty Level:Really Easy
-
Total Repair Time:Less than 15 mins
-
Tools:Screw drivers
0 of 2 people
found this instruction helpful.
Was this instruction helpful to you?
Thank you for voting!
Bulb Replacement
I pulled down the wire around the glass cover. . . Released on end of the wire from its holder being careful to not let the glass cover drop. Unscrewed the bulb and replaced with replacement. Easy, easy.
Parts Used:
-
Judith from Phoenix, AZ
-
Difficulty Level:Really Easy
-
Total Repair Time:Less than 15 mins
0 of 2 people
found this instruction helpful.
Was this instruction helpful to you?
Thank you for voting!
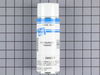
Both outside door handles turned very beige
Everything worked perfectly---thanks to the suggestion of your call center agent. She suggested that since the replacement door handles were no longer available, I should consider repainting them--it worked like a charm. Please tell her she was a life saver. We rent that house in Fl and my returning tenants had complained about the discoloring refer handles. Thank you
Parts Used:
-
Howard from Boynton Beach, FL
-
Difficulty Level:Easy
-
Total Repair Time:30 - 60 mins
-
Tools:Nutdriver
23 of 72 people
found this instruction helpful.
Was this instruction helpful to you?
Thank you for voting!
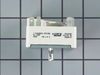
water pump went out
it was very easy i took the pump off only two clips and two hoses holding it type in the model number at parts select it came right up soi new it right one from the picture got with in 3 days put it back on less then 10 mins
Parts Used:
-
paul from windsor, VA
-
Difficulty Level:Really Easy
-
Total Repair Time:Less than 15 mins
-
Tools:Pliers
2 of 12 people
found this instruction helpful.
Was this instruction helpful to you?
Thank you for voting!
Light bulb failure
Received the part the day after ordering. Appreciated the quick service and repair took less than a minute.
Parts Used:
-
Grant from Alexandria, VA
-
Difficulty Level:Really Easy
-
Total Repair Time:Less than 15 mins
Was this instruction helpful to you?
Thank you for voting!
Baking element needed replacing.
It was as simple as using a screwdrivers and replacing in existing slot. Thank you. It works great!
Parts Used:
-
LINDA from BOLIVAR, TN
-
Difficulty Level:Really Easy
-
Total Repair Time:Less than 15 mins
-
Tools:Screw drivers
Was this instruction helpful to you?
Thank you for voting!
Broken drawer handle
My son broke the drawer handle of our stove a few years ago. It took me a while to get this repaired because the first company we ordered from shipped the wrong product to us and did not allow us to do a return! The team at PartSelect had the correct product delivered in just a few days! Once I had the product on hand the repair was super easy. Thanks PartSelect for great service!! Nick, ShirtsThatGo
Parts Used:

-
Nick from Chapel Hill, NC
-
Difficulty Level:Really Easy
-
Total Repair Time:Less than 15 mins
-
Tools:Screw drivers
Was this instruction helpful to you?
Thank you for voting!
broiler didn't work
Removed original broiler element, and found it was open. Replaced with new element.
Parts Used:

-
Rodney from Columbus, OH
-
Difficulty Level:Really Easy
-
Total Repair Time:Less than 15 mins
-
Tools:Pliers, Screw drivers
Was this instruction helpful to you?
Thank you for voting!
the heating element went out.
removed the two screws and unhooked the old heating element. I set the new element in place and attached the electrical leads and replaced the two screws and tested the oven.
Parts Used:
-
Eddie from Kaiser, MO
-
Difficulty Level:Really Easy
-
Total Repair Time:Less than 15 mins
-
Tools:Screw drivers
Was this instruction helpful to you?
Thank you for voting!
Stove kept turning off
Looked up on-line the error problem and what part I needed to fix it. Part arrived very quickly and everything was going fine until I realized the stove had two sensors. Replaced the top sensor now I am getting an error on the bottom sensor. Maybe I replaced the wrong one. I will replace the bottom sensor with the one I took out and see if that does the trick. Very very satisfied with PartsSelect. Good Price, Quick Shipping, Would do business with them again. They are now in my favorites so I can find them again if I need parts.
Parts Used:
-
Richard from Wooster, OH
-
Difficulty Level:Really Easy
-
Total Repair Time:Less than 15 mins
-
Tools:Screw drivers
Was this instruction helpful to you?
Thank you for voting!
Oven shutting off after temp reached 350
Remove the plug from outlet then shutoff gas. Remove the 10 screws hold the back panel of the oven. Unclip the connector of the temperature sensor from the main line. Pull the sensor straightout. Reverse the process install the new sensor. Couldn't be any easier. Oven working great. Calling in a reapairman would have cost $200 for parts and labor.
Parts Used:
-
Ken from Las Cruces, NM
-
Difficulty Level:Really Easy
-
Total Repair Time:Less than 15 mins
-
Tools:Screw drivers
Was this instruction helpful to you?
Thank you for voting!
top element was burnt out small burn hole in element
removed the screws that were on back side of oven securing panel that covered element terminals disconnected wiring to upper element then went in side oven area removing 4 upper mount screws that were holding upper element in place then removed old element and reinstalled new in same order was removed..
Parts Used:
-
Gregory from kissimmee, FL
-
Difficulty Level:Really Easy
-
Total Repair Time:15 - 30 mins
-
Tools:Screw drivers, Socket set
Was this instruction helpful to you?
Thank you for voting!