















WTW5025SW0 Whirlpool Washer - Instructions
Keep searches simple. Use keywords, e.g. "leaking", "pump", "broken" or "fit".
Washer would not agitate
When to PartSelect Web site, used their trouble shooting guide, Used their advice, which was to replace the actuator. bought and installed the actuator which took around 20 minutes or so. washer started working fine after replacing. Thanks to the website I save a lot of money. Thanks PartSelect
Parts Used:

-
Lee from FORT WORTH, TX
-
Difficulty Level:Really Easy
-
Total Repair Time:15 - 30 mins
-
Tools:Nutdriver, Screw drivers
6 of 6 people
found this instruction helpful.
Was this instruction helpful to you?
Thank you for voting!
Gear stripped on main spline
Followed detailed instructions which were supplied with the parts. It was easy and my machine is working great with no issues. Also I just didn’t get the main drive pulley, all new parts came for the bottom end, great service and excellent parts.
Parts Used:

-
Bernard from ARIZONA CITY, AZ
-
Difficulty Level:Really Easy
-
Total Repair Time:30 - 60 mins
-
Tools:Nutdriver, Screw drivers, Socket set
6 of 7 people
found this instruction helpful.
Was this instruction helpful to you?
Thank you for voting!
When the washer goes into a spin cycle, I would hear an intermittent loud clattering noise. I think the clutch teeth above (the cup part that is spring loaded) and the belted pulley's teeth below are not fully seating on each other during the spin cycle.
W10721967 Splutch Cam Kit
Assuming the pulley nut was properly tightened at the factory. I think this problem occurs because of ever-so-slight rounding of the splutch cam teeth from the actuator engaging and disengaging over whatever time frame there is before a clattering noise develops.
When I took off the 13mm nut using the adjustable strap tool, it felt tight to me...Was it put on as tight as it should have been at the factory? Who knows. I don't have the torque specification of this nut on that plastic pulley.
Watch the videos to remove and replace the belt cover and belt, actuator and splutch cam kit.
Pay particular attention to tightening up the nut. I put the pulley on and hand-tightened the nut. I used the adjustable strap tool and before I tightened everything, I pushed up on the pulley to press against the spring pressure in order to mesh the teeth together. After the nut was tight, I repositioned the strap tool and gave it another go, further tightening it. You see earlier that day, I only tightened it up once because I thought it was good and tight. I put everything back and within a half-hour it was clattering again and I could loosen the nut I thought was tight by hand! I fooled myself. That's why I did it twice, and don't be afraid to give it a good second tightening effort. Two weeks now and the wife is currently very happy.
Assuming the pulley nut was properly tightened at the factory. I think this problem occurs because of ever-so-slight rounding of the splutch cam teeth from the actuator engaging and disengaging over whatever time frame there is before a clattering noise develops.
When I took off the 13mm nut using the adjustable strap tool, it felt tight to me...Was it put on as tight as it should have been at the factory? Who knows. I don't have the torque specification of this nut on that plastic pulley.
Watch the videos to remove and replace the belt cover and belt, actuator and splutch cam kit.
Pay particular attention to tightening up the nut. I put the pulley on and hand-tightened the nut. I used the adjustable strap tool and before I tightened everything, I pushed up on the pulley to press against the spring pressure in order to mesh the teeth together. After the nut was tight, I repositioned the strap tool and gave it another go, further tightening it. You see earlier that day, I only tightened it up once because I thought it was good and tight. I put everything back and within a half-hour it was clattering again and I could loosen the nut I thought was tight by hand! I fooled myself. That's why I did it twice, and don't be afraid to give it a good second tightening effort. Two weeks now and the wife is currently very happy.
Parts Used:
-
TERRY from WAUKEE, IA
-
Difficulty Level:Easy
-
Total Repair Time:15 - 30 mins
-
Tools:Nutdriver, Socket set
8 of 14 people
found this instruction helpful.
Was this instruction helpful to you?
Thank you for voting!
Washer wasn't agitating.
First, this is the second time the transmission actuator went bad. The first-time washer was still under warrenty and I watched the tech replace it. This time warranty has expired and I'm mechanically inclined, so I ordered the part. Replacing was easy, unplug, tip washer up so you can get under it, remove plastic guard (two hex nuts) and remove actuator by removing two screws. Reverse procedure to install new actuator. The only caution I will say is when tipping washer if you have a wall to lean it against, perfect, just put something under it for saftey so it can't fall on you.
Parts Used:
-
Darryl from Danville, PA
-
Difficulty Level:Very Easy
-
Total Repair Time:15 - 30 mins
-
Tools:Screw drivers, Socket set
4 of 4 people
found this instruction helpful.
Was this instruction helpful to you?
Thank you for voting!
Off Balance, Shaking and noise during spin cycle
I followed the video instructions on the Part Select site. They were very good. I used the vise-grip to grab the rod and pull up to release the top hook. It is a little tight to get in there but doable.
A tip would be when installing the new rods, pre attach the vise grip. It makes it easier and you don't have to manipulate your hands as much. put them down far enough as the new rods are a bit harder to pull up.
The washer works great now and all symptoms are gone!
A tip would be when installing the new rods, pre attach the vise grip. It makes it easier and you don't have to manipulate your hands as much. put them down far enough as the new rods are a bit harder to pull up.
The washer works great now and all symptoms are gone!
Parts Used:

-
Patrick from Orlando, FL
-
Difficulty Level:Easy
-
Total Repair Time:30 - 60 mins
4 of 4 people
found this instruction helpful.
Was this instruction helpful to you?
Thank you for voting!
making noise when starting spin cycle
Watch video on the site and the insulation will be easy and take about 30 min.
Parts Used:
-
JERRY W. from CARROLLTON, GA
-
Difficulty Level:Really Easy
-
Total Repair Time:30 - 60 mins
-
Tools:Nutdriver, Screw drivers, Socket set
4 of 5 people
found this instruction helpful.
Was this instruction helpful to you?
Thank you for voting!
Washer went to bouncing in spin cycle.
Lifted top led. Removed top reem. One at a time and replace springs. Reverse steps recalibrate washing . Complete.
Parts Used:
-
Alex from Beeville, TX
-
Difficulty Level:Easy
-
Total Repair Time:30 - 60 mins
-
Tools:Nutdriver, Pliers
3 of 3 people
found this instruction helpful.
Was this instruction helpful to you?
Thank you for voting!
Washer was making an awful screeching noise when agitating
I turned off and disconnected the water lines (have a bucket ready) and tipped the washer on its back. I followed along with the provided video that was super helpful. Disconnecting, moving the washer, and reconnecting everything took longer than the repair. Very satisfied with this repair!
Parts Used:
-
Kristy from Lebanon, NJ
-
Difficulty Level:Really Easy
-
Total Repair Time:30 - 60 mins
-
Tools:Screw drivers, Socket set
3 of 3 people
found this instruction helpful.
Was this instruction helpful to you?
Thank you for voting!
Making a loud noise for a while then stopped spinning
Removed two screws to remove guard. Two screws to remove another part with wires. Pulley nut was already missing. Component was twist locking tabs.
Parts Used:
-
Lucas from ARKANSAS CITY, KS
-
Difficulty Level:Really Easy
-
Total Repair Time:15 - 30 mins
-
Tools:Screw drivers, Wrench set
3 of 3 people
found this instruction helpful.
Was this instruction helpful to you?
Thank you for voting!
Would not Agitate
Tip the washer on its back remove the agitator install new one under 15 minutes
Parts Used:
-
Scott from HILBERT, WI
-
Difficulty Level:Very Easy
-
Total Repair Time:Less than 15 mins
-
Tools:Screw drivers
2 of 2 people
found this instruction helpful.
Was this instruction helpful to you?
Thank you for voting!
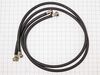
Washer hoses due for replacement
Replaced each hose. Did discover that either hose can be used for hot or cold water lines. No longer required to label hot and cold replacement hoses.
Parts Used:
-
James from PINE MOUNTAIN, GA
-
Difficulty Level:Easy
-
Total Repair Time:30 - 60 mins
3 of 5 people
found this instruction helpful.
Was this instruction helpful to you?
Thank you for voting!
Rinse cycle kept repeating, did not spin clothes
Spin indicator light was illuminated but machine was repeating rinse cycle rather than spinning water out of clothes. Replaced the pulley and drive coupler, thinking there was a mechanical problem. Video instructions were great but old pulley and drive coupler looked perfect so replacing them did nothing. Next I replaced the washer actuator (shifter), thinking that was the reason for no high speed spin. Easy job, as shown in the video, but it also did nothing. The problem turned out to be a failure in the control panel, probably resulting from years of vibration. Decided to stop chasing my tail and bought a new washer.
Parts Used:
-
Shane from CLINTON TWP, MI
-
Difficulty Level:Really Easy
-
Total Repair Time:30 - 60 mins
-
Tools:Nutdriver, Screw drivers, Socket set
2 of 3 people
found this instruction helpful.
Was this instruction helpful to you?
Thank you for voting!
Reolaced actuator
1. Unplugged the electrical cord
2. Unscrewed the plastic guard
3. Unscrewed the actuator screws
4 Unplugged the cord.
5. Replaced the olld one with the new one and reversed the order
6. Uprighted the machine
7 Performed trail run with vinegar
2. Unscrewed the plastic guard
3. Unscrewed the actuator screws
4 Unplugged the cord.
5. Replaced the olld one with the new one and reversed the order
6. Uprighted the machine
7 Performed trail run with vinegar
Parts Used:
-
Thomas from New Fairfield, CT
-
Difficulty Level:Really Easy
-
Total Repair Time:15 - 30 mins
-
Tools:Nutdriver, Screw drivers
2 of 3 people
found this instruction helpful.
Was this instruction helpful to you?
Thank you for voting!
The dryer nob wasn't working the dryer knob broke off inside the unit
It was very easy to install the new parts successfully thanku parts select I will always keep using your business the representative was so helpful and understanding my problem I wish I could remember his name he was outstanding and a 100 thumbs up to him
Parts Used:

-
WILLIAM from SEBASTIAN, FL
-
Difficulty Level:Very Easy
-
Total Repair Time:30 - 60 mins
-
Tools:Pliers, Screw drivers
2 of 3 people
found this instruction helpful.
Was this instruction helpful to you?
Thank you for voting!
The original part became clogged with softener glop and partially broke while attempting to clean.
Merely pulled the old part out and put the in new one. Fit perfectly and is working fine.
Parts Used:

-
Gifford from North Richland Hills, TX
-
Difficulty Level:Very Easy
-
Total Repair Time:Less than 15 mins
1 person
found this instruction helpful.
Was this instruction helpful to you?
Thank you for voting!