















WARE5260DCWW General Electric Washer - Instructions
Keep searches simple. Use keywords, e.g. "leaking", "pump", "broken" or "fit".
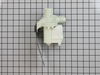
washer failed to drain water from machine
1) Disconnect power
2)remove front panel
3) remove screws and take hoses off
4) remove & replace water pump
:) YAY. all done
2)remove front panel
3) remove screws and take hoses off
4) remove & replace water pump
:) YAY. all done
Parts Used:
-
Kristy from Boca Raton, FL
-
Difficulty Level:Easy
-
Total Repair Time:15 - 30 mins
-
Tools:Pliers, Socket set
17 of 19 people
found this instruction helpful.
Was this instruction helpful to you?
Thank you for voting!
loud noise upon aggitation
-
Robert from Covington, PA
-
Difficulty Level:Really Easy
-
Total Repair Time:15 - 30 mins
-
Tools:Nutdriver
18 of 23 people
found this instruction helpful.
Was this instruction helpful to you?
Thank you for voting!
belt fits too tightly toget on easily

-
Travis from Hagaman, NY
-
Difficulty Level:Very Difficult
-
Total Repair Time:1- 2 hours
-
Tools:Screw drivers, Wrench (Adjustable)
19 of 26 people
found this instruction helpful.
Was this instruction helpful to you?
Thank you for voting!
Would not agitate or spin dry
After confirming what I thought was the problem and reading other posts it was fairly easy to replace the belt. After taking the bottom cover loose to gain access to the large and small pulley I found out that the belt was very tight to get on as a previous customer had mentioned. I also used visegrips to hold the belt in place on the large pulley while guideing the belt on the small motor pulley with one hand and turning the drum pulley with the other hand. It helped that I had read the other post first. Next time will be a snap.
Parts Used:
-
Ron from Mount Vernon, TX
-
Difficulty Level:Easy
-
Total Repair Time:15 - 30 mins
-
Tools:Nutdriver
15 of 17 people
found this instruction helpful.
Was this instruction helpful to you?
Thank you for voting!
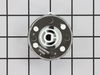
Knob broke
-
Dennis from Lindon, UT
-
Difficulty Level:Really Easy
-
Total Repair Time:Less than 15 mins
23 of 41 people
found this instruction helpful.
Was this instruction helpful to you?
Thank you for voting!
Broken Drive Belt
Removed bottom washer plate. Placed belt on small, grooved pulley. Started belt on larger pulley. Clamped lock pliers to larger pulley to prevent belt from slipping off. Turned belt onto larger pulley by turning and pressing the belt close to the smaller pulley. Adjusted belt and replaced bottom plate.
Parts Used:
-
Dirk from Anamosa, IA
-
Difficulty Level:Easy
-
Total Repair Time:15 - 30 mins
-
Tools:Nutdriver, Pliers
15 of 18 people
found this instruction helpful.
Was this instruction helpful to you?
Thank you for voting!
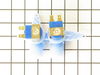
water not shutting off
Removed the screws for the control panel and replaced the load switch and valve body in about 20 minutes. Simple fix and it's working perfectly!
Parts Used:
-
Stephen from erie, PA
-
Difficulty Level:Really Easy
-
Total Repair Time:15 - 30 mins
-
Tools:Pliers, Screw drivers
15 of 18 people
found this instruction helpful.
Was this instruction helpful to you?
Thank you for voting!
There was no hot water coming out, I had already checked the screens
First I removed the old part (2 screws)
Pulled off 4 wires (maybe the wrong word, I'm not a professional!
Put the new part in-turned the water on and had a stream of HOT water-yay
I had been putting this off because no one in my family had noticed (except me) and with my husband out of work it seemed like a low priority, but when my daughters came home for Christmas, they said "There's no hot water in the washing machine" so I took the plunge--I cannot believe I waited that long!
It literally took me seven minutes!
Pulled off 4 wires (maybe the wrong word, I'm not a professional!
Put the new part in-turned the water on and had a stream of HOT water-yay
I had been putting this off because no one in my family had noticed (except me) and with my husband out of work it seemed like a low priority, but when my daughters came home for Christmas, they said "There's no hot water in the washing machine" so I took the plunge--I cannot believe I waited that long!
It literally took me seven minutes!
Parts Used:
-
Tricia from Glen Allen, VA
-
Difficulty Level:Really Easy
-
Total Repair Time:Less than 15 mins
-
Tools:Screw drivers, Wrench (Adjustable), Wrench set
12 of 12 people
found this instruction helpful.
Was this instruction helpful to you?
Thank you for voting!
Very Noisy In Spin
When disassembling I could not remove the 1 3/4" tub nut with in house tools and had to order the spanner wrench. Almost mandatory unless you have a socket wrench.
Parts Used:

-
Robert from HOLLAND, MI
-
Difficulty Level:Really Easy
-
Total Repair Time:30 - 60 mins
14 of 19 people
found this instruction helpful.
Was this instruction helpful to you?
Thank you for voting!
Washer machine didn't get water.
I remove three screws on top of the washer, moved the cover of the machine in order to get access to the water valve, and then desconnected the two solenoid of the valve,and removed two screws that hold the valve with the frame and installed the new valve in same order a took the old one.
Parts Used:
-
Eduardo from Borrego Springs, CA
-
Difficulty Level:Really Easy
-
Total Repair Time:Less than 15 mins
-
Tools:Screw drivers
11 of 11 people
found this instruction helpful.
Was this instruction helpful to you?
Thank you for voting!
Agitator not agitating
Left up agitator, use socket set to remove agitator coupling. Then replace old agitator coupling with the new one. Tighten nut with socket set, replace agitator. Yes it is that easy.
Parts Used:
-
Troy from Porter, TX
-
Difficulty Level:Really Easy
-
Total Repair Time:Less than 15 mins
-
Tools:Socket set
14 of 20 people
found this instruction helpful.
Was this instruction helpful to you?
Thank you for voting!
Noticed 3 straps were broken when we replaced the hose
I removed the front cover, then unscrewed the top to expose the top. There are two screws that hold each strap, which turns out are different sizes, so I had to use two different sockets. I also had to remove the hose & plastic tube for the bleach. Once that was done, the replacement was easy, I replaced all 4 straps, reconnected the tube for the bleach, screwed the top back on and snapped the front cover into place. This took maybe 30 minutes - and I am female!
Parts Used:
-
Christine from Tempe, AZ
-
Difficulty Level:Easy
-
Total Repair Time:15 - 30 mins
-
Tools:Pliers, Socket set
14 of 20 people
found this instruction helpful.
Was this instruction helpful to you?
Thank you for voting!
Intermittent overflow. You never knew when it was going to happen. Called GE Service, guy comes out and $110 dollars later he tells me there is nothing wrong with the wash machine. I must have overloaded it. Days later the machine overflowed 3 more times.
Got on line and hooked up with Parts Select and found thru similar stories that the overflow problem with this GE wash machine was a common problem and was explaned what parts were needed and described how to access the parts inside the control panel.
So I ordered water valve 1155105 and pressure switch 269820. I pulled the plug and turned the water supply off and disconnected the hoses. Pulled the knobs off the front panel and removed 4
screws. I identified the parts and how they were attached. Removed the wires and removed and replaced the parts. Put everything back together and the machine works great!
So I ordered water valve 1155105 and pressure switch 269820. I pulled the plug and turned the water supply off and disconnected the hoses. Pulled the knobs off the front panel and removed 4
screws. I identified the parts and how they were attached. Removed the wires and removed and replaced the parts. Put everything back together and the machine works great!
Parts Used:
-
Gerald from North Fort Myers, FL
-
Difficulty Level:Easy
-
Total Repair Time:15 - 30 mins
-
Tools:Pliers, Screw drivers
11 of 12 people
found this instruction helpful.
Was this instruction helpful to you?
Thank you for voting!
The Old Knob Broke.
-
RUSSELL from NORWALK, CT
-
Difficulty Level:Really Easy
-
Total Repair Time:Less than 15 mins
19 of 38 people
found this instruction helpful.
Was this instruction helpful to you?
Thank you for voting!
Purchased used washin machine w/o drain hose
After realizing I had purchased a used washing machine without a drain hose I thought I would never find one, but then I found partselect.com. After easily locating the part on the web site from the detailed diagrams and model number I then ordered it. Receiving the part quickly I used a socket to remove the plastic connector that prevents the hose from disconnecting once the washer is turned on. I fed the hose through the plastic connector and into the drain hole without any issues. I then used my one small socket to secruely fasten it back together. There was no additional tools or items needed to successfully attach the washer drain hose.
Parts Used:
-
Daniel from Oxford, GA
-
Difficulty Level:Really Easy
-
Total Repair Time:Less than 15 mins
-
Tools:Socket set
10 of 11 people
found this instruction helpful.
Was this instruction helpful to you?
Thank you for voting!