















VRD2204X03WB General Electric Dishwasher - Instructions
Keep searches simple. Use keywords, e.g. "leaking", "pump", "broken" or "fit".
Dishwasher wouldn’t start
Took the screws out of the back of the doorl located the switch and replaced it put screws back in and it was fixed
Parts Used:
-
Stephen from MARENGO, OH
-
Difficulty Level:Really Easy
-
Total Repair Time:30 - 60 mins
-
Tools:Screw drivers
7 of 10 people
found this instruction helpful.
Was this instruction helpful to you?
Thank you for voting!
Leaking at base of Dishwasher
Leaking at bottom of door edge - ordered new gaskets all around - no sense in replacing one at a time and paying extra shipping. Removed screws on the inside of the door panel and it lifted off easily. bottom corner of gasket was black and that is where some of the leaking was from. I replaced the door seal and ran the washer and it still leaked.... Pulled the washer out from the enclosure and it was quite wet back there - so I wanted to pull the washer to dry and clean things up - turned off power and water and remove screws at top edge that secure it to countertop. Insulation wrap was wet - Removed that and put it into the sun to dry - no sign of where water was leaking - reconnected water and power and ran a cycle with the washer pulled out - slowly leaking from top of washer where hose enters the top sprayer. Was easy to get to the sprayer - two little screws hold it in - removed the hose that feeds the sprayer and it was disintegrating - crumbly- I ordered the part and put it all back together and used a washer at the sprayer/hose junction to compress the fitting in hopes it would hold until the replacement came - it did. The replacement installed in 10 mins and did not need to disconect water or power. I would suggest replacing this hose at the same time you replace door seals based on condition of my hose.
Parts Used:


-
Christian from Youngsville, NC
-
Difficulty Level:Really Easy
-
Total Repair Time:15 - 30 mins
-
Tools:Nutdriver, Screw drivers, Wrench (Adjustable)
7 of 10 people
found this instruction helpful.
Was this instruction helpful to you?
Thank you for voting!
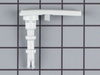
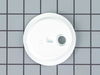
Soap dispenser door wouldn't close
Replaced all ordered parts.
Parts Used:

-
Clint from Quakertown, PA
-
Difficulty Level:A Bit Difficult
-
Total Repair Time:30 - 60 mins
-
Tools:Screw drivers
21 of 52 people
found this instruction helpful.
Was this instruction helpful to you?
Thank you for voting!
Dishwasher would not start
Removed panel to access the interlock switches. There were two. The button on one switch was fine and the button on the other would not depress. Ran a continuity test and it failed. The switch also had a burnt smell
Parts Used:
-
Dameon from SMYRNA, DE
-
Difficulty Level:Easy
-
Total Repair Time:1- 2 hours
-
Tools:Pliers, Screw drivers, Socket set
6 of 7 people
found this instruction helpful.
Was this instruction helpful to you?
Thank you for voting!
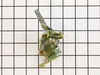
Door latch broke
Removed the old one from its slot and slid the new one into it.
No instructions needed.
No instructions needed.
Parts Used:
-
Barbara from TAMPA, FL
-
Difficulty Level:Really Easy
-
Total Repair Time:Less than 15 mins
-
Tools:Screw drivers
5 of 5 people
found this instruction helpful.
Was this instruction helpful to you?
Thank you for voting!
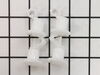
Broken Roller
I watched the video and did exactly what he did. I am a novice when it comes to repairs. I learn as I go. This repair went flawlessly. Ordering was quick and easy. The part arrived quickly. The repair took less time than expected. The part was what I needed and nothing else broke or went wrong when repairing the original problem. It was a 100% success.
Parts Used:
-
Michelle from Richardson, TX
-
Difficulty Level:Really Easy
-
Total Repair Time:Less than 15 mins
5 of 5 people
found this instruction helpful.
Was this instruction helpful to you?
Thank you for voting!
rusted/corroded lower dishwasher basket
removed old drawer-like basket, installed the new duplicate replacement part. Easiest "repair" I've ever done!
Parts Used:
-
Elaine from Oceanside, CA
-
Difficulty Level:Really Easy
-
Total Repair Time:Less than 15 mins
6 of 8 people
found this instruction helpful.
Was this instruction helpful to you?
Thank you for voting!
water leak due to bad rubber connector
Ordered rubber connector and it arrived the next day. Shut off main power and water. Disconnected water supply and pulled unit out from under counter. Flipped unit over on it's side. Disconnected wiring, drain hose, clamps and completely removed motor/pump. Rubber connector would not unscrew by hand so I found a drinking glass slightly smaller in diameter than the connector inner diameter. Inserted glass in connector and proceeded to unscrew connector by turning connector and glass together. After removing old connector I cleaned the mating part after removing it from inside the washer and removed all the build-up. Replaced everything back in same order.
Parts Used:
-
Timothy from Loves Park, IL
-
Difficulty Level:A Bit Difficult
-
Total Repair Time:1- 2 hours
5 of 5 people
found this instruction helpful.
Was this instruction helpful to you?
Thank you for voting!
Corner baffles were in a bad shape
Old baffles lift out and new ones installed - very easy
Parts Used:
-
Keith from Avon Lake, OH
-
Difficulty Level:Really Easy
-
Total Repair Time:Less than 15 mins
6 of 8 people
found this instruction helpful.
Was this instruction helpful to you?
Thank you for voting!
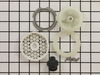
Leaking seal at solenoid shaft
I disconnected the electrical wires. Then disconnected the support strut and the two hose clamps. I was then able to remove the motor /pump assy where I completed the disassembly of the solenoid linkage and pump assy. I removed the solenoid shaft seal. I disassembled the impella parts & the motor shaft seal. I reassembled using new seals, impeller, and grader nut. The only tricky step was waking up to the fact of a left handed thread on the grader nut. I re-installed the motor/pump unit, tightened the hose clamps, connected the electrical wires, & support strut.
Parts Used:

-
Gerald from Pinehurst, NC
-
Difficulty Level:Really Easy
-
Total Repair Time:30 - 60 mins
-
Tools:Pliers, Screw drivers, Socket set
6 of 9 people
found this instruction helpful.
Was this instruction helpful to you?
Thank you for voting!
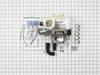
Not Draining, Leaking
Unplugged unit, unscrewed screws on top of dishwasher attached to countertop, undid water supply and drain hose that goes into tee with garbage disposal. Using crescent wrench turned front leveling screws up all the way and slid/rocked dishwasher out from under the counter - I had no problem leaving back leveling screws down. Turned dishwasher over on some towels (it WILL leak some water so spread out some towels!) so it was oriented like the directions that came with pump and motor. The directions were good, although color or a picture might have been more helpful. CHECK the new pump/ motor unit CAREFULLY for any loose debris from packing etc. I had a small piece of plastic that was in the top of the motor that goes in the dishwasher bottom that rattled around after I installed everything and put it back. I was able to get to it from the drain assembly in the tub but it made a heck of a racket at first. All in all, I had a great experience. I'm glad I ordered the pump and motor even though I only thought I needed the drain solenoid because when I took the old unit out, the prop on the old impeller was almost gone. Easy to order, good customer service (I called with a question and talked to a wonderful customer service representative!), good directions and easy to do. I'd say a 4 out of 10 in terms of difficulty. Thanks PartSelect!
Parts Used:
-
Brian M. from Hereford, AZ
-
Difficulty Level:Easy
-
Total Repair Time:1- 2 hours
-
Tools:Pliers, Screw drivers, Socket set, Wrench (Adjustable)
5 of 6 people
found this instruction helpful.
Was this instruction helpful to you?
Thank you for voting!
dishwasher did not start
Took out interlock switch (two leads) and replaced with new one. As simple as that.
Parts Used:
-
Lawrence from ROLESVILLE, NC
-
Difficulty Level:Very Easy
-
Total Repair Time:Less than 15 mins
7 of 13 people
found this instruction helpful.
Was this instruction helpful to you?
Thank you for voting!
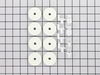
Three of the 8 wheels broke.
The newly purchased wheels have a little different design and could be installed in a matter of few seconds.
Parts Used:
-
Asok from HELOTES, TX
-
Difficulty Level:Very Easy
-
Total Repair Time:Less than 15 mins
5 of 7 people
found this instruction helpful.
Was this instruction helpful to you?
Thank you for voting!
the sump housing was worn out and leaked
first I used a shop vac to clean any excess water left behind, removed the sump housing from the motor, removed the sump housing from the body of dishwasher, replaced the old housing for the new one and reversed my steps to remove old one,
Parts Used:
-
sandra from colorado springs, CO
-
Difficulty Level:Easy
-
Total Repair Time:15 - 30 mins
-
Tools:Screw drivers
4 of 4 people
found this instruction helpful.
Was this instruction helpful to you?
Thank you for voting!
Wheel had melted and support cracked
Removed the lower rack and installed new wheels with clips
Parts Used:
-
Tom from UPPR CHICHSTR, PA
-
Difficulty Level:Very Easy
-
Total Repair Time:Less than 15 mins
5 of 7 people
found this instruction helpful.
Was this instruction helpful to you?
Thank you for voting!