















RB757WT4WW Hotpoint Range - Instructions
Keep searches simple. Use keywords, e.g. "leaking", "pump", "broken" or "fit".
element broke
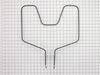
took 2 screws out that held element in, pulled old element out of oven wall, unhooked the wires. Hooked the wires to the new element, pushed it back into the oven wall, replaced the 2 screws.
Parts Used:
-
Richard from NEW BERLIN, NY
-
Difficulty Level:Really Easy
-
Total Repair Time:Less than 15 mins
-
Tools:Nutdriver
1 person
found this instruction helpful.
Was this instruction helpful to you?
Thank you for voting!
Replace bake heater element
Basically very easy. Be sure to follow suggested safe practices - DO shut off the circuit breaker to the unit BEFORE starting (I didn't to start with, shorted out the heater leads - dumb on my part). Just removed the burned out element by removing the 2 screws using a nutdriver, pulled the element out, and slipped off the crimp fittings. Reverse steps to install replacement. The crimp fittings were stubborn coming off the old one, so it took longer than expected. Otherwise, easy peasy.
Parts Used:
-
Douglas from Corvallis, OR
-
Difficulty Level:Easy
-
Total Repair Time:15 - 30 mins
-
Tools:Nutdriver, Pliers
1 person
found this instruction helpful.
Was this instruction helpful to you?
Thank you for voting!
Oven no longer heated except for Broil element
1)Unscrewed old baking element from wall of oven
2)Detached old baking element from wires
3)Attached new baking element to wires
4)Screwed new baking element to wall of oven
5)Turned on oven
2)Detached old baking element from wires
3)Attached new baking element to wires
4)Screwed new baking element to wall of oven
5)Turned on oven
Parts Used:
-
Derrick from Ypsilanti, MI
-
Difficulty Level:Easy
-
Total Repair Time:15 - 30 mins
-
Tools:Socket set
1 person
found this instruction helpful.
Was this instruction helpful to you?
Thank you for voting!
bake element was broken
i slid the oven out unplugged it !! , removed back cover with a nut driver, removed the two retaining nuts from the old bake element ,opened oven door removed two nuts that hold bake element to the back of the oven , installed new bake element then attached wires in the back of oven to the new element re installed retaining screws inside oven , check to make sure screws that hold power cord wires to the over are TIGHT !! i then installed rear cover then plugged in the oven it worked great !!
Parts Used:
-
allen from MT. AIRY, MD
-
Difficulty Level:Easy
-
Total Repair Time:15 - 30 mins
-
Tools:Nutdriver
1 person
found this instruction helpful.
Was this instruction helpful to you?
Thank you for voting!
Element burned out.
Flipped off the circuit breaker first. Unscrewed the two screws holding the element in place. Pulled out about 4-5 inches. Tried several times to pull apart the connections, finally got 'em - don't give up (I must have weak fingers). Then plugged in the new element, shoved the wires back in, screwed it back in place, flipped circuit breaker back on, turned the oven on.... made brownies (o:
Parts Used:
-
lynette from Bowling Green, KY
-
Difficulty Level:Easy
-
Total Repair Time:15 - 30 mins
-
Tools:Pliers
1 person
found this instruction helpful.
Was this instruction helpful to you?
Thank you for voting!
Heat element burned out
First unplugged it. Then removed everything in side for easy access. Took screws out 2 of them. Had to pull to removed elemnet . That took a while. Should have tried removing other screws or at less loosen them. It went in easy. And lift off we had red burner. hey..
Parts Used:
-
Donna from Thornville, OH
-
Difficulty Level:Easy
-
Total Repair Time:1- 2 hours
-
Tools:Nutdriver, Pliers, Screw drivers
1 person
found this instruction helpful.
Was this instruction helpful to you?
Thank you for voting!
Oven wouldn't heat - wire not exposed
Removed two screws and removed the oven elelent. One wire was not through the back of the stove. Ordered new element anyway. Slid stove out (slide-in model). Unplugged power. Removed two covers protecting wires on back of stove. Found wire for oven element. Had to cut and strip end of wire and use new blade clip. Crimped new clip to wire and inserted into oven through back of stove. Replaced covers. Plugged oven element to wires and tried out oven. WORKED ! Saved new oven element for next time. Difficulty encounted was lack of knowledge on where stove was screwed into counter-top and what size blade clip to buy. It always helps to have a dog 3" away just itching to lend a paw.
Parts Used:
-
Donald from Gulf Breeze, FL
-
Difficulty Level:A Bit Difficult
-
Total Repair Time:1- 2 hours
-
Tools:Nutdriver, Screw drivers
1 person
found this instruction helpful.
Was this instruction helpful to you?
Thank you for voting!
heating element shorting out-sparking
I turned off electric to the stove. In the oven, I removed the two screws that hold the element in place. I then pulled the element out about 3 inches and disconnected the two wires. After unpacking the new element, I placed it in the bottom of the oven, reconnected the two wires, and gently fed the wires back into the back of the oven. I then secured the new unit to the oven wall with the two screws.
Parts Used:
-
K from PERRYVILLE, MO
-
Difficulty Level:Really Easy
-
Total Repair Time:15 - 30 mins
-
Tools:Nutdriver
1 of 2 people
found this instruction helpful.
Was this instruction helpful to you?
Thank you for voting!
Just follow the enclosed instructions
-
HAROLD from Tucson, AZ
-
Difficulty Level:Really Easy
-
Total Repair Time:30 - 60 mins
-
Tools:Nutdriver
1 of 2 people
found this instruction helpful.
Was this instruction helpful to you?
Thank you for voting!
Lower bake element burned out.
1. Turned off power at the breaker box. Removed oven door from oven, and removed bake racks. Determined replacement element from PartSelect was correct. Inspected new element. Using meter, determined new element was OK via continuity test. Gathered all appropriate tools to do the job.
2. Using 1/4" nut driver, removed two retaining screws at back of oven that secure element
3. Pulled bad element out a few inches from oven back to reveal wires and spade connectors
4. Using screwdriver, pushed off electrical connectors from bad element and removed element
5. Inspected wires and connectors and determined them to be OK
6. Installed new element in reverse of above. Inspected oven controls and determined them to be OK. Turned on the breaker. Tested oven.
7. Baked a delicious chocolate cake
2. Using 1/4" nut driver, removed two retaining screws at back of oven that secure element
3. Pulled bad element out a few inches from oven back to reveal wires and spade connectors
4. Using screwdriver, pushed off electrical connectors from bad element and removed element
5. Inspected wires and connectors and determined them to be OK
6. Installed new element in reverse of above. Inspected oven controls and determined them to be OK. Turned on the breaker. Tested oven.
7. Baked a delicious chocolate cake
Parts Used:
-
Elaine from Hanover, PA
-
Difficulty Level:Easy
-
Total Repair Time:15 - 30 mins
-
Tools:Nutdriver, Pliers, Screw drivers
1 of 2 people
found this instruction helpful.
Was this instruction helpful to you?
Thank you for voting!
Bad sensor
-
John from CASPER, WY
-
Difficulty Level:Easy
-
Total Repair Time:30 - 60 mins
-
Tools:Screw drivers, Socket set
1 of 2 people
found this instruction helpful.
Was this instruction helpful to you?
Thank you for voting!
Baking element burned through.
First I removed the two screws that hold the element in place, I then pulled the element out about three inches, and it shorted out on the main panel of the back of the range. I then went to the breaker box and flipped the switch so I could tell my wife "Yes, I had turned the power off."
Disconnecting the two wires and reconnecting them was a simple operation after I cleaned my pants from the electrical short.
Re attaching the two-screw panes to hold the element in place finished the project.
Disconnecting the two wires and reconnecting them was a simple operation after I cleaned my pants from the electrical short.
Re attaching the two-screw panes to hold the element in place finished the project.
Parts Used:
-
James from Seattle, WA
-
Difficulty Level:Easy
-
Total Repair Time:Less than 15 mins
-
Tools:Nutdriver
1 of 2 people
found this instruction helpful.
Was this instruction helpful to you?
Thank you for voting!
Bake element broken
Before ordering, I took the element out to make sure I could do it. A flashlight was helpful.
I flipped off the circuit breakers to the stove, removed the racks and lifted off the oven door. Not having a nutdriver or socket set, I used a 6' crescent wrench to remove the two screws which hold the element to the back of the oven. I carefully pulled the element out until the spade connectors to the wires were exposed. I wiggled the connectors apart. I had pliers handy, but didn't need them.
I connected the new element to the wires and gently pushed the two connected prongs through their holes, trying not to disturb the insulation. I put a little WD-40 on the screws so they would go in easier. After tightening the screws with the crescent wrench, I replaced the racks and door. I flipped the circuit breaker back on and reset the clock. It works as good or better than new.
I flipped off the circuit breakers to the stove, removed the racks and lifted off the oven door. Not having a nutdriver or socket set, I used a 6' crescent wrench to remove the two screws which hold the element to the back of the oven. I carefully pulled the element out until the spade connectors to the wires were exposed. I wiggled the connectors apart. I had pliers handy, but didn't need them.
I connected the new element to the wires and gently pushed the two connected prongs through their holes, trying not to disturb the insulation. I put a little WD-40 on the screws so they would go in easier. After tightening the screws with the crescent wrench, I replaced the racks and door. I flipped the circuit breaker back on and reset the clock. It works as good or better than new.
Parts Used:
-
Charles from Damascus, MD
-
Difficulty Level:Easy
-
Total Repair Time:Less than 15 mins
-
Tools:Wrench (Adjustable)
1 of 2 people
found this instruction helpful.
Was this instruction helpful to you?
Thank you for voting!
Burner Would Not Heat
Did it By Hand
Your Shipment Time Excellant
Order it Mon. Received it Wed.
Thank You
Your Shipment Time Excellant
Order it Mon. Received it Wed.
Thank You
Parts Used:
-
Robert from La Crosse, WI
-
Difficulty Level:Really Easy
-
Total Repair Time:Less than 15 mins
1 of 2 people
found this instruction helpful.
Was this instruction helpful to you?
Thank you for voting!
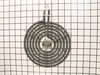
Large burner quit working
I pulled out the old burner - put the new one in and I was done. No tools required.
The first burner I received from PartSelect was warped. I called on Friday morning to see about returning it and ordering a new one. The CSR was very helpful and I was totally surprised to have the replacement arrive the very next day since I didn't ask for a Saturday delivery. I will definitely use PartSelect again.
The first burner I received from PartSelect was warped. I called on Friday morning to see about returning it and ordering a new one. The CSR was very helpful and I was totally surprised to have the replacement arrive the very next day since I didn't ask for a Saturday delivery. I will definitely use PartSelect again.
Parts Used:
-
JoAnn from Fort Worth, TX
-
Difficulty Level:Really Easy
-
Total Repair Time:Less than 15 mins
1 of 2 people
found this instruction helpful.
Was this instruction helpful to you?
Thank you for voting!