















RB754N6WH Hotpoint Range - Instructions
Keep searches simple. Use keywords, e.g. "leaking", "pump", "broken" or "fit".
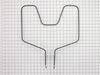
Bottom element broke in half
Pulled oven from wall, Unplugged oven from outlet, Took 5/16 nut driver pulled back cover off oven to expose the quick connect wires, Pulled wires off old element, Opened oven door took the 2 screws off bracket on back of oven, Removed old element, Put new element in place, Put the 2 wires back on, Buttoned back up check to see if worked it did ((:
Parts Used:
-
jason from newcastle, WY
-
Difficulty Level:Really Easy
-
Total Repair Time:15 - 30 mins
-
Tools:Nutdriver
0 of 1 people
found this instruction helpful.
Was this instruction helpful to you?
Thank you for voting!
Bottom element would not heat
Remove two screws holding element. Pull element forward exposing connections. Pull connections apart. Replace with new element. replace screws. Done
Parts Used:
-
GARY from OREM, UT
-
Difficulty Level:Really Easy
-
Total Repair Time:15 - 30 mins
-
Tools:Nutdriver
0 of 1 people
found this instruction helpful.
Was this instruction helpful to you?
Thank you for voting!
Lower oven element burned out.
First I removed the two screws holding the element to the back of the oven. When I pulled the element out I disconnected the two wires and removed the element. I found the serial / part number on the existing part and order from PartSelect. The element arrived two days sooner than expected!! Replacing the element was a bit more difficult in that I had to pull the stove away from the wall and remove the rear cover in order to pull the wires and element through the insulation in the back of the oven. Four screws held the rear cover, but once those were removed the element easily went into place and the repair was finished. Cleaning behind and under the stove took a few extra minutes but the entire repair only took about 30 minutes, plus the wait time for the part. Two tips, pliers were used to disconnect and reconnect the slip-on connectors. The connectors were pretty tight and reaching to the rear of the oven was difficult to get leverage to pull apart and reconnect. Also, the oven light caused considerable glare on my glasses so I taped the door button controlling the oven light and used a flashlight to see inside. Otherwise, a simple repair. PartSelect had the best price on the element and service and delivery were excellent!
Parts Used:
-
Gary from Powder Springs, GA
-
Difficulty Level:Really Easy
-
Total Repair Time:15 - 30 mins
-
Tools:Nutdriver, Pliers
0 of 1 people
found this instruction helpful.
Was this instruction helpful to you?
Thank you for voting!
Element turned into a welder
pulled out oven, unplugged power. Removed back cover for element, disconnect old element. Moved to front of oven and removed the two screws that held the old element,removed old element. Installed new element, connect element, installed cover, reconnect power.
Parts Used:
-
Greg from Hamburg, IA
-
Difficulty Level:Really Easy
-
Total Repair Time:15 - 30 mins
-
Tools:Nutdriver, Screw drivers
0 of 1 people
found this instruction helpful.
Was this instruction helpful to you?
Thank you for voting!
The bottom bake unit burned out
Very simple. Two small hex shaped screws hold the unit to the back of the stove. Remove those with a small socket wrench. Rachet type makes the job easier. Gently pull the element from the back of the stove. Remove the two push-on wires from the element. They simple pull off. The elements have supporting feet toward the front. Those must be down to rest the element on the bottom of the stove. Replace the push-on wires, push the element back into the holes in the rear of the stove and screw the small hex shaped screws back into the oven wall. The job is done.
Parts Used:
-
Larry from Fredericksburg, VA
-
Difficulty Level:Really Easy
-
Total Repair Time:15 - 30 mins
-
Tools:Socket set
0 of 1 people
found this instruction helpful.
Was this instruction helpful to you?
Thank you for voting!
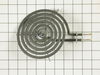
Surface element didn't heat. Cracked.
I simply pulled out the old element. Plugged in
the replacement, which arrived very quickly, and
that was it. I couldn't believe that was all there
was to it. I really loved being able to order the
replacement part online. Intend to order more
replacement parts just to have my stovetop
looking like new again.
the replacement, which arrived very quickly, and
that was it. I couldn't believe that was all there
was to it. I really loved being able to order the
replacement part online. Intend to order more
replacement parts just to have my stovetop
looking like new again.
Parts Used:
-
Darlene from New Berlin, WI
-
Difficulty Level:Really Easy
-
Total Repair Time:Less than 15 mins
0 of 1 people
found this instruction helpful.
Was this instruction helpful to you?
Thank you for voting!
Existing Element Broke
removed two bolts on the inside of the oven, disconnected the two electrical connections in back which were a little set so I had to use pliers and removed old element. Reversed procedure to install new element.
The >15 minutes includes vacuuming out the oven.
partselect.com deliver was extremely fast and the part was packed securely. We would order from them again without a problem.
The >15 minutes includes vacuuming out the oven.
partselect.com deliver was extremely fast and the part was packed securely. We would order from them again without a problem.
Parts Used:
-
Joseph from Trenton, TX
-
Difficulty Level:Really Easy
-
Total Repair Time:Less than 15 mins
-
Tools:Nutdriver, Pliers
0 of 1 people
found this instruction helpful.
Was this instruction helpful to you?
Thank you for voting!
baking element burned out
pulled stove out from wall about a foot ans disconnected the electricity cord. removed the 2 screws holding the element in place and pulled it out a bout 3 inches and disconnected the two wires. attached the new element & pushed it in place and tighrened the 2 screws. hooked up the electric power, moved stove back in place & it was done!
Parts Used:
-
Ladd from Danville, IL
-
Difficulty Level:Really Easy
-
Total Repair Time:30 - 60 mins
-
Tools:Socket set
0 of 1 people
found this instruction helpful.
Was this instruction helpful to you?
Thank you for voting!
Old Element Was Rusted.
Very well, I made a mistake with the model #. So I had to return and reorder .
Parts Used:
-
Joan from Mascotte, FL
-
Difficulty Level:Easy
-
Total Repair Time:15 - 30 mins
-
Tools:Screw drivers
0 of 1 people
found this instruction helpful.
Was this instruction helpful to you?
Thank you for voting!
Bake element burned out
With less than 24 hrs from ordering to delivery, I was making cookies. Installation was quick and painless.
Parts Used:
-
eric from Melbourne, FL
-
Difficulty Level:Really Easy
-
Total Repair Time:15 - 30 mins
-
Tools:Nutdriver
0 of 1 people
found this instruction helpful.
Was this instruction helpful to you?
Thank you for voting!
burned out baking element
Unplugged the stove. Unscrewed the element. opened the rear cover to reach wires. Passed wires through the slot and connected the element. Screwed the element in place. Reinstalled the rear cover. Plugged the stove and pushed it back to place. Tested the oven, it worked.
Parts Used:
-
Ramsey from Niceville, FL
-
Difficulty Level:Easy
-
Total Repair Time:15 - 30 mins
-
Tools:Pliers
0 of 1 people
found this instruction helpful.
Was this instruction helpful to you?
Thank you for voting!
My bake element broke in half
First i turned off the main electricity for the oven. Then I removed the two screws with my socket wrench. Then i pulled the element out about 3 inches then disconnected the 2 wires that heated the element. I simply reversed the process to put in the new bake element and i was done.
Parts Used:
-
John from Medford, NY
-
Difficulty Level:Really Easy
-
Total Repair Time:Less than 15 mins
-
Tools:Socket set
0 of 1 people
found this instruction helpful.
Was this instruction helpful to you?
Thank you for voting!
Oven would not heat. Top element would come on, but the lower element would not.
First I unplugged the stove. I then removed the two screws that held the element in place. I then pulled the element out about four inches to expose the connection. I disconnected the two wires, removed the element and replaced it with the new one. I then reassembled the oven in reverse order. It was very simple.
Parts Used:
-
Reuben from Halfway, MO
-
Difficulty Level:Easy
-
Total Repair Time:Less than 15 mins
-
Tools:Socket set
0 of 1 people
found this instruction helpful.
Was this instruction helpful to you?
Thank you for voting!
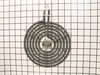
Burner not working.
I pulled the old burner out and slid the new one in it's place. Turned on the eye to make sure it worked. Felt heat in a few seconds and turned off.
Parts Used:
-
Scott from Dallas, GA
-
Difficulty Level:Really Easy
-
Total Repair Time:Less than 15 mins
0 of 1 people
found this instruction helpful.
Was this instruction helpful to you?
Thank you for voting!
Element burned out
AMAZING SHIPPING.Ordered on Friday,received saturday WITHOUT NEXT DAY COST.Amazing,worked perfect.
Parts Used:
-
Bryan from Overland Park, KS
-
Difficulty Level:Really Easy
-
Total Repair Time:Less than 15 mins
-
Tools:Screw drivers
0 of 1 people
found this instruction helpful.
Was this instruction helpful to you?
Thank you for voting!