















RB754N6WH Hotpoint Range - Instructions
Keep searches simple. Use keywords, e.g. "leaking", "pump", "broken" or "fit".
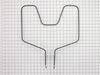
Bake element burnt apart
I removed the 2 screwws inside the oven cavity and pulled the element towards me. I unplugged the wires from the element and plugged in the new one and secured it in place with the 2 screws.
Parts Used:
-
Roger from Barnesville, OH
-
Difficulty Level:Really Easy
-
Total Repair Time:Less than 15 mins
-
Tools:Nutdriver, Pliers
0 of 1 people
found this instruction helpful.
Was this instruction helpful to you?
Thank you for voting!
Broken bake element
Shut off electrical supply to stove.Remove 2 screws.
Slide element out enough to remove connectors from element.
Position new element.Slide connectors onto new element.
Slide element back into position.Replace 2 screws.Turn on electrical supply.
Slide element out enough to remove connectors from element.
Position new element.Slide connectors onto new element.
Slide element back into position.Replace 2 screws.Turn on electrical supply.
Parts Used:
-
Harvard Folding Box Co from Lynn, MA
-
Difficulty Level:Really Easy
-
Total Repair Time:Less than 15 mins
-
Tools:Nutdriver
0 of 1 people
found this instruction helpful.
Was this instruction helpful to you?
Thank you for voting!
Heating element worn-out
Turned off the breaker to the stove, removed oven racks, used small pair of plyers to remove bolts (2) holding defective element in place. Pulled (2) wires that had a snap connection apart. Old element was not removed. Connected (2) snap wires, pushed them back into the oven wall, used plyers to re-connect the element to oven. Installation DONE!
Turned on breaker and then the oven; we are now baking again.
Turned on breaker and then the oven; we are now baking again.
Parts Used:
-
Mary from Bivalve, MD
-
Difficulty Level:Really Easy
-
Total Repair Time:Less than 15 mins
-
Tools:Pliers
0 of 1 people
found this instruction helpful.
Was this instruction helpful to you?
Thank you for voting!
10-yr old Baking Element gave out
This repair was idiot-proof. Removed 2 screws, unplugged the old part, plugged in the new one, and replaced the 2 screws.
Literally a 2 minute repair!!
Literally a 2 minute repair!!
Parts Used:
-
Timothy from Boise, ID
-
Difficulty Level:Really Easy
-
Total Repair Time:Less than 15 mins
-
Tools:Nutdriver
0 of 1 people
found this instruction helpful.
Was this instruction helpful to you?
Thank you for voting!
Oven was burning food
Two screws hold the element to the oven wall. two wires attached to the back of the element. very simple removal and replacement.
Parts Used:
-
Dane from Baton Rouge, LA
-
Difficulty Level:Really Easy
-
Total Repair Time:Less than 15 mins
-
Tools:Screw drivers
0 of 1 people
found this instruction helpful.
Was this instruction helpful to you?
Thank you for voting!
element broke
shut power off to range, took 2 screws out, took 2 snap on clips off old element. put snap on clips on new element, put 2 screws back in, and turned breaker on.
Parts Used:
-
joseph from conover, NC
-
Difficulty Level:Really Easy
-
Total Repair Time:Less than 15 mins
-
Tools:Nutdriver
0 of 1 people
found this instruction helpful.
Was this instruction helpful to you?
Thank you for voting!
Stove element broke
I removed the 2 nuts and pulled the element out until I reached the disconnect and unhooked the elements from the wire. Replaced the new one in reverse order. It was great finding the part here after Sears said they no longer made the part.
Parts Used:
-
Harold from Harrison, AR
-
Difficulty Level:Really Easy
-
Total Repair Time:Less than 15 mins
-
Tools:Nutdriver, Screw drivers
0 of 1 people
found this instruction helpful.
Was this instruction helpful to you?
Thank you for voting!
Element broke
First I switched the fuse to the oven had no power and then I removed the old element and wiped down the inside with a damp towel.
I then attached the new element and then used the screws to attach the element firmly into place.
I then restored power by switching the fuse back and then burned the element to remove and chemicals and then done
I then attached the new element and then used the screws to attach the element firmly into place.
I then restored power by switching the fuse back and then burned the element to remove and chemicals and then done
Parts Used:
-
Kim from Vancouver, WA
-
Difficulty Level:Really Easy
-
Total Repair Time:Less than 15 mins
-
Tools:Nutdriver, Pliers
0 of 1 people
found this instruction helpful.
Was this instruction helpful to you?
Thank you for voting!
Bake Element Defective
Cut power to oven from breaker box. Remove two retaining screws using a nutdriver at rear of oven. Slowly pull Bake Element from rear of range exposing connector clips. Disconnect at clips from oven wiring. Connect new Baking Element to wiring connectors. Push new baking element into rear of oven. Reconnect baking element using original screws with nutdriver at rear of oven. Turn on power to oven from breaker box. Job complete in 10-15 mins.
Parts Used:
-
Glenn from Newnan, GA
-
Difficulty Level:Really Easy
-
Total Repair Time:Less than 15 mins
-
Tools:Nutdriver
0 of 1 people
found this instruction helpful.
Was this instruction helpful to you?
Thank you for voting!
I ruined old unit
Removed old, and replaced with new, heating element! Maybe 10 seconds.
Parts Used:
-
Arthur E. from St. Louis, MO
-
Difficulty Level:Really Easy
-
Total Repair Time:Less than 15 mins
0 of 1 people
found this instruction helpful.
Was this instruction helpful to you?
Thank you for voting!
Bottom element cracked/split - open circuit
Removed oven shelves (30 seconds). Removed 2 screws holding broken element to oven (2 minutes). Pulled broken element assembly out & removed 2 wires attached to element (1 minute). Connected wires to new element (just push them into place) and mounted new element with the 2 screws (1 1/2 minutes). Turned on oven element to test & since I was so tired from all of this 5-minute activity, I rested.
Al S.
Al S.
Parts Used:
-
Al from Charlotte, NC
-
Difficulty Level:Really Easy
-
Total Repair Time:Less than 15 mins
-
Tools:Nutdriver
0 of 1 people
found this instruction helpful.
Was this instruction helpful to you?
Thank you for voting!
Cracked Baking element in Stove
Removed two scres that hold element in Place. Pulled out element about 3" and removed wire disconnect. Re-connected new element and re-installed mounting screws. Very easy. Parts were delivered promptly. Great service!!!! Thank you Parts select!!!!! Saved me a trip to Sears to purchas a new element or Stove.
Parts Used:
-
Lionel from Luling, LA
-
Difficulty Level:Really Easy
-
Total Repair Time:15 - 30 mins
-
Tools:Nutdriver, Pliers
0 of 1 people
found this instruction helpful.
Was this instruction helpful to you?
Thank you for voting!
oven would not heat on bake
The hardest part of repair was moving the oven from the cabnets to unplug and gain access to rear of oven. Remove rear cover panel unplug two spade connectors attached to the heating element. Open oven door and remove the two screws holding the heating element to back of oven. Pull heating element out. Then slide the new element in and assemble in reverse order.
Parts Used:
-
Larry from Burnsville, NC
-
Difficulty Level:Easy
-
Total Repair Time:15 - 30 mins
-
Tools:Nutdriver, Screw drivers
0 of 1 people
found this instruction helpful.
Was this instruction helpful to you?
Thank you for voting!
oven elements sparked and would not turn off
removed two screws, pulled element out (which broke at the sparking site) Took screw driver to push off where the element was connected. Put new one in, re-did screws. Turned on and off oven. This company was great to work with, smooth sailing. It was funny when we noticed the problem-Husband said $125.00 repair, I got on net and said no about $40. He is taking me out to dinner tonight.
Parts Used:
-
ophelia from paducah, KY
-
Difficulty Level:Really Easy
-
Total Repair Time:15 - 30 mins
-
Tools:Nutdriver, Screw drivers
0 of 1 people
found this instruction helpful.
Was this instruction helpful to you?
Thank you for voting!
The baking element was not heating up
I followed the directions in the video on the website. The repair was so easy!! I simply unscrewed the screws holding the element in place at the back of the oven, pulled the wires out. This did take a little bit of time, as I didn't want to pull the wire off of the element and lose it in the back of the oven, but I was able to eventually work it free from the insulation and make the connectors visible. I slid off the old element, slid the wires back on to the new one and pushed them back into the wall of the oven and replaced the screws. Works like a charm!! I will definitely use your website for other appliance repairs!!
Parts Used:
-
Karen from Leland, NC
-
Difficulty Level:Really Easy
-
Total Repair Time:15 - 30 mins
-
Tools:Pliers, Screw drivers
0 of 1 people
found this instruction helpful.
Was this instruction helpful to you?
Thank you for voting!